Tuesday, December 25, 2012

Coffee and almond liqueur fruit cake for Christmas

Having studied in Catholic school and being in Bangalore most of my life, Christmas has been a very special festival for me. When I was younger, it wasn't the food that mattered so much, it was the spirit of Christmas and sharing and caring that went with it, that was celebrated. We had carol singers come to a neighbour's place and and we always invited ourselves over. I also had friends who invited us over during Christmas and it was always that warmth which exuded from the families that made me feel so good about Christmas
I miss all that here in Ahmedabad, where Christmas is at best a reason to party or to have another sale in stores across the city.

almond liqueur fruit cake

Last year, I baked my first ever Christmas cake and had friends over. The kids were super excited about Santa dropping off the gifts in their stockings and we played some Christmas carols at home and had a nice dinner together

This year, we moms are having a party for our kids, helping them decorate the trees and have some fun time together. I plan to bake some cupcakes for the kids now.
These two cakes are for family, at home here and one for my relatives that I am visiting in Bombay tomorrow - yaay !

I absolutely loved the cake I made from Swapna's blog last year, but wanted to try a different recipe this time. I zeroed in on this one from Saffron trail. I kept postponing soaking the fruits and finally got down to it last week. Soaking it longer does make a difference, a huge difference. I upped the coffee in it and added almond liqueur, that my cousin brought from Goa many months back. So maybe this isn't like your traditional Christmas fruit cake, its a rum infused fruit cake with coffee and loads of almonds.

cake slice

Merry Christmas to all of you. I am off for a week. See you in the New Year.

Coffee and almond liqueur fruit cake
Adapted from here with some tweaking

What you need

For soaking -
2 cups mixed dry fruits
1/2 cup rum

For the caramel -
1/2 cup sugar
3/4 cup hot water

3 cups flour
2 tsp baking powder
1/2 tsp baking soda
2.5 tsp instant coffee powder
1 cup oil
1 cup powdered sugar
1 tsp ginger powder
1 tsp clove powder
1 tsp mixed fruit essence
3 eggs
1/4 cup mixed nuts (cashew nuts, walnuts and almonds)
2 tbsp almond liqueur (I had a lovely bottle of this from Goa, gifted by my cousin)
2 cups of soaked fruit

Directions

1 week to 3-6 months ahead
Soak the fruits
2 cups of dried fruits (raisins, dates, cranberries, currants, candied orange peels soaked in 1/2 cup rum)

A little ahead
Heat the sugar in a thick bottom pan. Once it starts to caramelize, slowly pour water over it and stir well to form a smooth caramel liquid

Grease the tins with parchment paper. I used an 8" round tin and a 5" round tin.
Preheat oven at 175 C.
In a large bowl, beat together oil, sugar, cinnamon and ginger powder, vanilla essence and 3 eggs.
Add the cooled caramel and whisk well.
In a large dish, sieve the flour, soda, baking powder and instant coffee powder.
Add the dry ingredients to the wet ingredients, in batches and fold in well
Once its done, add 2 cups of the soaked fruit, nuts and the liquor. Mix well and pour equally into the two greased tins.
Bake for 30 minutes at 175 C and another 15-25 minutes at 150 C covered by foil
Test the centre of the cake if it is done. Cool for 15 minutes in pan. Remove along with paper onto a cooling rack
Poke holes with a skewer or toothpick and pour two tablespoons of rum or any other liquor. Once cooled, cover with parchment paper and keep in a tin. Repeat the rum-soak every other day for a week or so (optional)

Friday, December 21, 2012

Rice kheer / Chawal ka kheer

In my son's class last year, they were learning about the different festivals in India and each child was given one festival. The kids had to learn about it, wear clothes appropriate to that festival and give a presentation on it. They also had to carry something which is cooked specifically for that festival.

My little one had to give a presentation on Buddha Purnima. Thanks to Google, we did a whole lot of reading and even his dress turned out looking much nicer than I imagined. I dressed him up as a little Buddhist monk. For the food which he needed to take, after a lot of searching, I finally figured that on Buddha Purnima, they make an offering of rice kheer, since Buddha was offered rice and milk when he completed many days of fasting in the forest.

rice kheer

This was my first time with rice kheer. I usually make the simple seviya kheer, or payasam, the South Indian way. Got this recipe from my friend. She asked me to use only milk, but I was really running short on time, so made it with condensed milk.

His presentation went off fantastically and the kheer was a big hit. Some kids requested for it again, so its been made many times now.

Rice kheer / Chawal ka kheer

What you need -

3-4 tbsp Basmati long grained rice
1 litre milk
1/2 can condensed milk
1/2 tsp saffron
1 tbsp warm milk to soak the saffron
5-6 almonds
7-8 raisins
3-4 cardamoms

What you do with it -

Wash the rice and soak it in water for about 10 mins
Soak the saffron threads in the one tbsp of warm milk and keep aside
Crush the cardamom seeds to a fine powder
Blanch the almonds in hot water for 15 mins. Peel the skin off the almonds and cut into slivers
In a non-stick pan, add the milk and bring it to boil
Add the rice and lower the flame. Stir well at regular intervals
You need to do this till the rice is cooked, but not breaking apart
Once the rice is cooked, add the condensed milk. There is no need to add sugar,unless you really want it sweeter
Add the saffron and raisins to this and stir well for another 3-4 mins
Take it off the heat and garnish with slivered almonds and powdered cardamom
Serve hot or allow to chill completely.
The kheer thickens up quite a bit once its chilled. Add a few tbsps of milk and mix well if it gets too thick. Since my son doesn't like it too thick, I add about quarter cup of milk into this. Stir well so the the consistency is not affected

Tuesday, December 18, 2012

Low fat Gajar ka halwa / Carrot halwa

Winter has officially arrived in Gujarat. Its still warm in the afternoons, but the evenings are pleasant. This is also time for the migratory birds to visit Gujarat and I am looking forward to go see those beautiful flamingoes and pelicans soon.

I really enjoy this season, for the lovely weather of course, the really fresh and colourful vegetables available and the wonderful food cooked specifically during this season.
The local winter specials Undhiyu, til chikki and khichu (steamed rice flour) top the list for me.

gajar ka halwa1

This is the season for the sweet reddish carrots, better know as the 'Delhi carrots' down South, which make an awesome gajar ka halwa. Traditionally, this is made really rich with khoa / mawa (thickened whole milk), lots of ghee and sugar.
I am not too fond of sweet dishes and definitely not when they are so laden with ghee. I have started making this low fat version after I saw the recipe on Tarla Dalal's site. Here the taste of the carrots is not overpowered and the ghee is minimal. I like the idea of using milk powder to thicken it instead of the mawa

gajar ka halwa

Low fat Gajar ka halwa / Carrot halwa

Adapted from Tarla Dalal's recipe

What you need -

7-8 carrots (about 2 cups when grated)
2 cups low fat milk
4-5 tbsp skimmed milk powder / dairy whitener (I used Nestle Everyday dairy whitener)
2-3 tbsp sugar
1-2 tsp ghee / clarified butter

What you do with it -

Add the grated carrots along with the milk in a pan (preferably non-stick) and stir two - three times
Cover and allow to cook on a low flame. You could use the pressure cooker too, works well both ways, though I prefer this method when I have the time
Once the carrots have softened, add the sugar and milk powder and stir continuously, till it begins to thicken
Add the ghee at this point and stir some more till it turns a slightly deeper colour. If you'd rather do with it, skip this ghee
Serve hot. If you want to up the taste and calories, have it with a scoop of vanilla ice-cream

Monday, December 10, 2012

Vegetable biryani in a rice cooker

I really like biryani, for the flavour and the fact that its a one pot meal, or in this case, made easier by layering it in the rice cooker.
I bought my rice cooker right after I got married and its been serving me well for a long long time now.

There is this whole discussion about biryani vs a pulao / pilaf. Pilaf is where the rice and vegetables are cooked together and biryanis where they are cooked separately and then layered and cooked minimally together.

vegetable biryani rice cooker

I very rarely get into these details and make whatever saves more time for me. The rice cooker has been a blessing, a real big help from the days when I couldn't even cook rice the right way.

My version here is with uncooked rice and vegetables layered in the rice cooker. You can call it biryani or pulao. Its tastes great either ways !

I don't believe in buying too many ready masalas, especially when the usage is very limited. My biryanis are usually not as flavourful as I'd like them to be. A friend told me she uses Everest Shahi Biryani masala, which has the actually whole spices. Her biryani tastes really good, so I picked up this masala

It worked very well in this biryani and a raita was enough accompaniment.

Vegetable Biryani

What you need -

2 cups basmati or any long grained rice
3.5 cups water
3 onions
1/2 cup mint leaves
1/4 cup coriander leaves
3-4 cloves
1 stick cinnamon
3-4 cloves garlic
1" piece ginger
2-3 green chillies
2 tomatoes
1.5 cups assorted vegetables (carrots, peas, cauliflower, capsicum)
1-2 tsp biryani masala (If using the Shahi Biryani one, powder it before you use it)
1/2 cup plain yoghurt / curd
3 tsp milk

What you do with it -

Chop the onions lengthwise. Clean and chop the coriander and mint leaves
Chop all the vegetables in bite size pieces.
Finely chop the tomatoes. Clean and soak the rice in water
Grind the ginger, garlic and green chillies to a paste
In a pan, add 2 tbsp oil and put in the cloves and cinnamon. Add the ginger-garlic-green chilli paste. Saute for 2 mins and then add the onions, mint leaves and coriander leaves
Fry this on a low flame till the onions are slightly browned
If using capsicum, add now and fry with the onions for a minute or two
Add the tomatoes and fry on high heat for 3-4 mins Add the yoghurt and then the biryani masala powder
Add the vegetables, 1 cup water and salt and cook 3-4 mins
Drain the rice
In the rice cooker, add a layer of the rice and then a layer of the vegetables in the masala
Repeat until all the rice and vegetables are in the rice cooker. Have the rice layer right on top
Add the remaining 2.5 cups water
Sprinkle 2-3 tsps of milk on top of the rice and then close the lid
Allow it to cook
Once its done, mix once and garnish with browned onions or cashew nuts
Serve hot with a cucumber raita

Thursday, December 6, 2012

Chocolate walnut pudding (No eggs)

TH and my son are more than happy to have something sweet after every meal. And my son asks me what we have for dessert, almost everyday after dinner. A couple of days back, I said I really don't know what to make everyday and he was like "But you watch Masterchef and you see so many recipes on Google" ! For him Google has the solution to every problem in my life ! Now I really had no more excuses, so I rustled up this for dessert on Sunday.
A simple and delicious dessert idea. This has no eggs and is more like a cake.

eggless chocolate pudding

This recipe is not from 'Google' though, its from Ma's friend. If Ma likes something that she's eaten some place, she either asks for the recipe or tries making it from what she thinks has gone into it and then promptly mails me the recipe. I have a folder full of recipes from her. She also tries recipes from my blog, though she will not read the recipe here and will call up to ask. I definitely get my love for cooking from her.

chocolate pudding slice

Chocolate Walnut Pudding

What you need -

For the base -

1 cup maida / APF
2 tsp baking powder
1/4 tsp salt
1 tsp vanilla extract
2/3 cup sugar
2 tbsp cocoa powder
1/2 cup chopped walnuts
1/2 cup milk
2 tbsp unsalted butter

For the topping

3 tbsp sugar (add more if you like it sweet)
1/4 cup cocoa
1.5 cups boiling hot water

What you do with it -

Pre-heat the oven to 180 C
Sieve together the maida, baking powder, salt and cocoa powder 3 times
In a bowl, add melted butter. Mix in the sugar, milk, vanilla and chopped walnuts
Add the sifted dry ingredients and mix well
Pour the batter into a greased baking dish
Over this spread sugar and cocoa from the 'topping'
Add the boiling water carefully so as not to disturb the base. Do Not Mix
Bake for 30 mins. The base will have a chocolatey sauce like texture that tastes absolutely delicious
I sprinkled some icing sugar and drizzled some caramel sauce over it
Serve hot or cold with ice cream or cream

Monday, December 3, 2012

Checkered cake with fondant angry birds

Last week, I had a party for my son's birthday and invited some of his friends over. After the craziness of handling a bunch of hyper active 7 year olds (especially the boys), I think the next birthday party will be when he is 18 and old enough to handle it all himself.

After the lovely holiday we had, it was back to the routine - getting loads of laundry done and getting the house back in action. Cooking and baking was not something I was very kicked about. I decided to order out the cake, but then this sudden inspiration struck a day before the party I decided to make some angry birds with fondant. He is currently in this 'angry birds' phase and seems to love that game. We also get so much merchandise that it just makes it even more popular, especially with kids. Water bottles, pencils, erasers, bags, shoes, t-shirts...the works ! I have never made or worked with fondant before and I figured I could take a chance. If it didn't turn out well, I could still just go ahead and order out that cake.

fondant angry birds
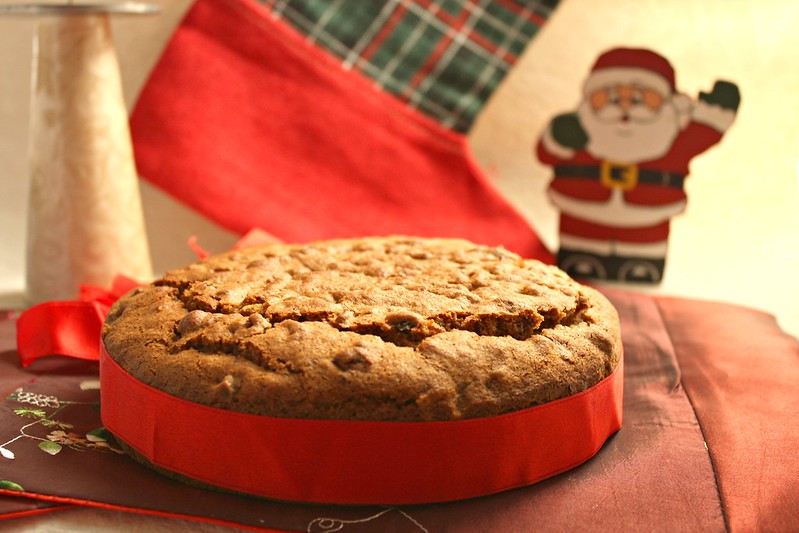
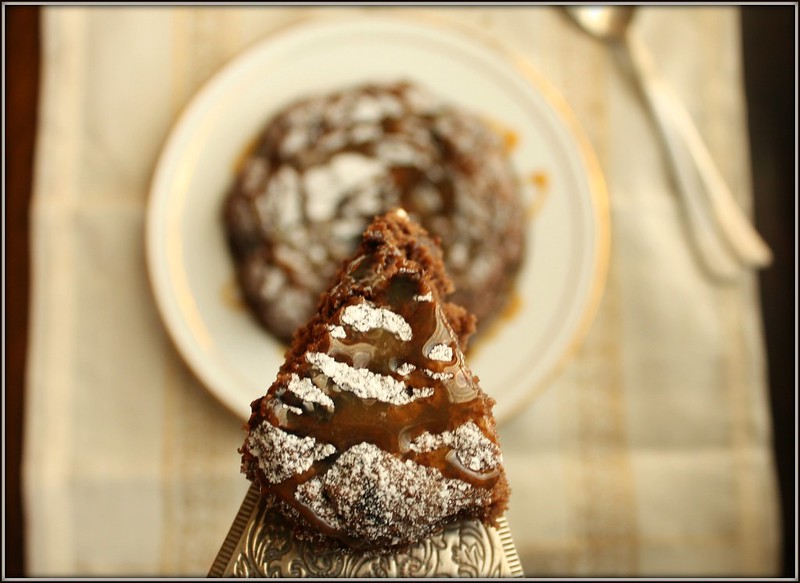
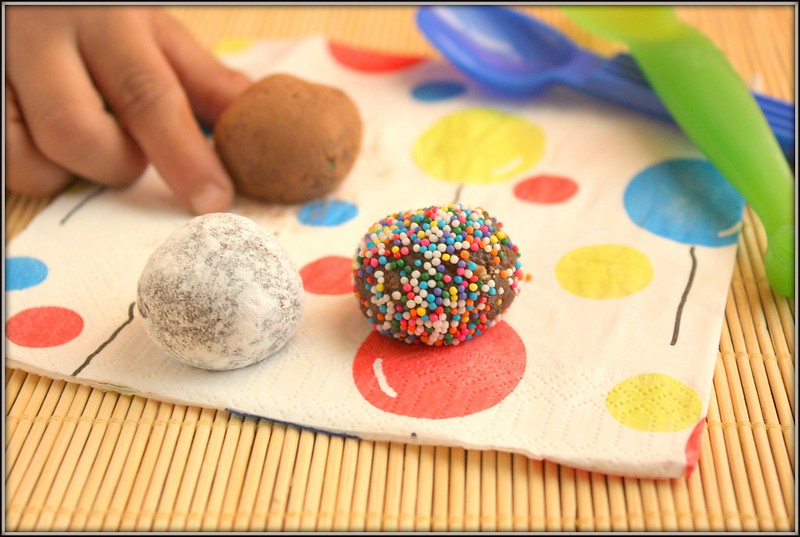
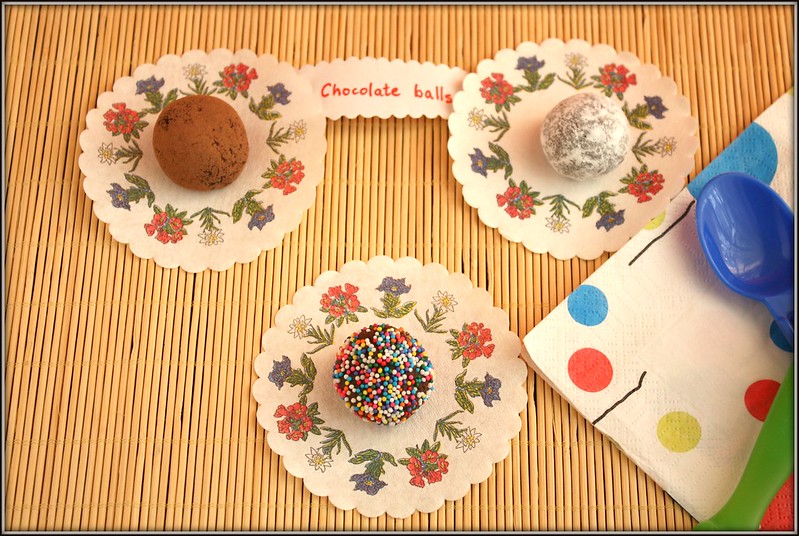
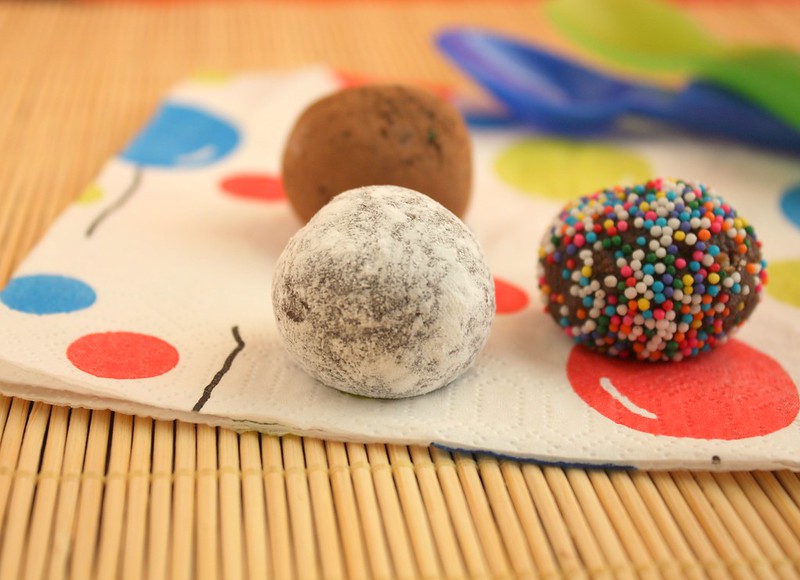
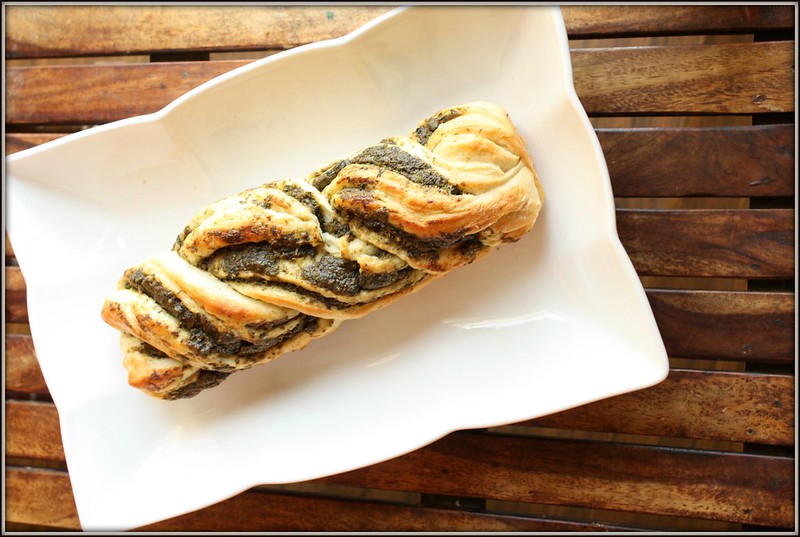
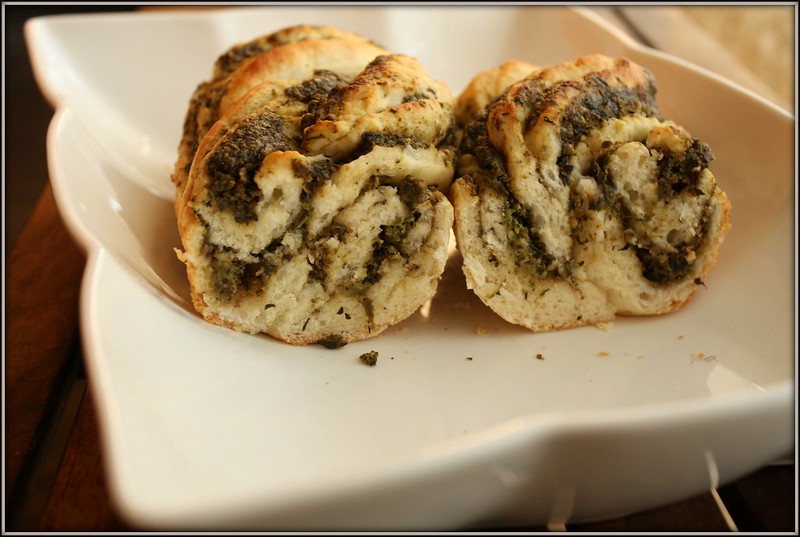
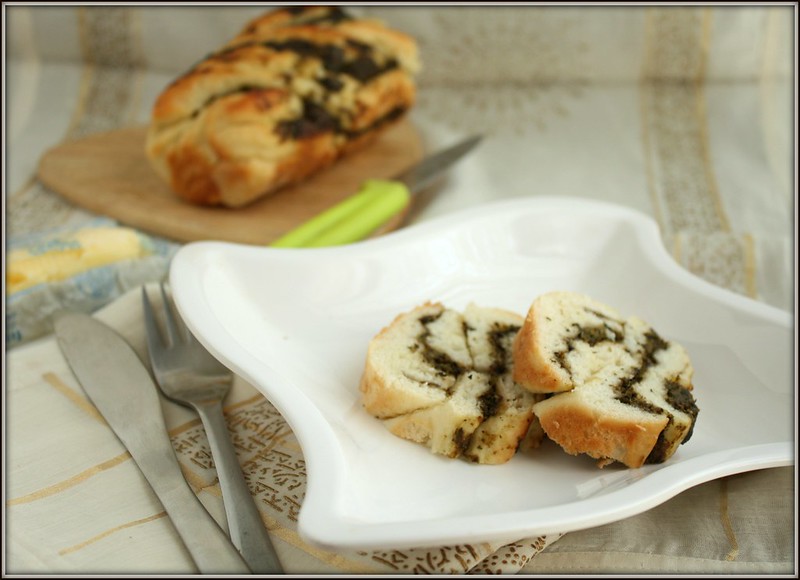
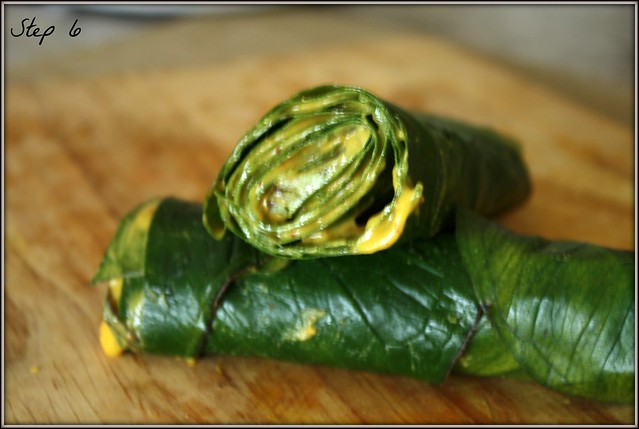
Pics taken after the party, so its all a bit messy

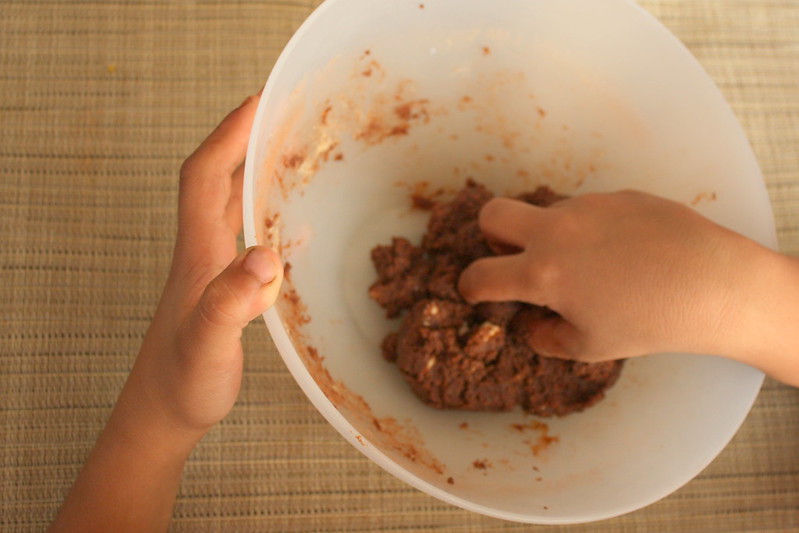
I was very unsure about how the fondant would turn out. First I needed to figure where I'd get the marshmallows, colours and how I would really go about something like this. A friend offered me her set of liquid food colours. Getting gel based ones was not even an option, so I jumped at this offer. She came over and we made the marshmallow fondant from Sayantani's lovely blog, which was way simpler than I imagined.
Sat up later that evening making the birds and pigs with the fondant. Mixing the colours into it really made it a little too difficult to mould. I then used more sugar and tried to get them pliable.
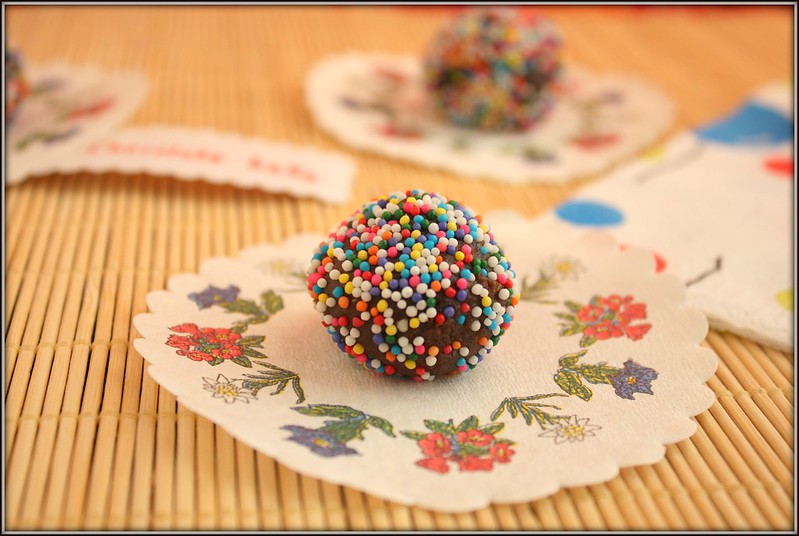
The birds are a bit shapeless, the eyebrows too bushy, the beaks crooked, but this was my very first attempt and my little fella was thrilled. He gave me the best compliment ever. He saw the birds and pigs and said "You made this Mamma, you really are a Wow mother". Nothing could make me happier.

I had made this egg less vanilla sponge cake from Sharmi's blog, for a friend, who served it with chocolate sauce for her son's birthday. It was a hit with the kids. So I decided on keeping the cake simple and give it a chocolate butter frosting.
But 'simple' wasn't working, not after my son honoured me with the 'Wow mother' title. I remembered seeing this lovely chequered cake on Sunita's blog and have been wanting to try it out for the longest time. So I decided on making a chocolate sponge too and making a chequered cake.

chequered cake with pig

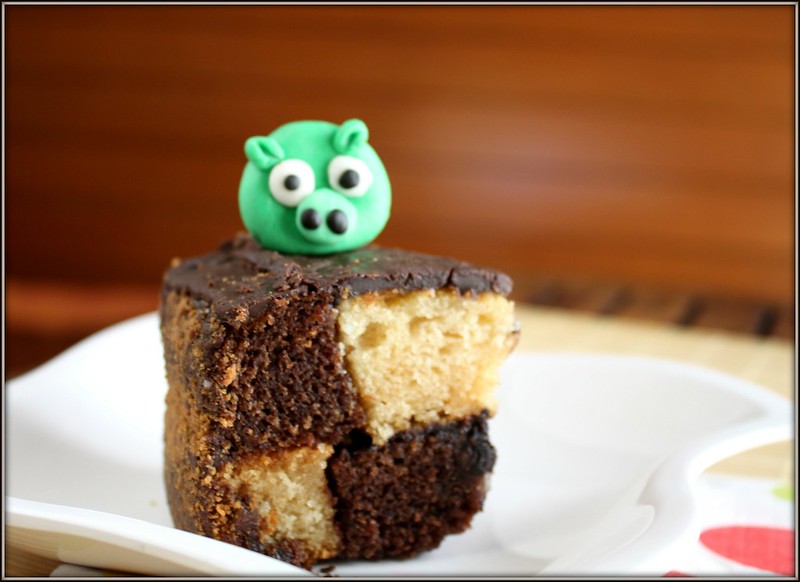
The kids were delighted with the angry birds. I even managed to get candles in the shape of angry birds, so we had 7 candles in a circle in the centre of the cake and the fondant ones around them. I was rushing with the cake and frosting till it was almost time for the party. There was barely any time after I finished frosting the cake, so I couldn't take any pictures. And taking any pictures with the kids all set to pull the angry birds off the cake was impossible.
I had a small piece of cake remaining from the party and of course I brought all my fondant pieces back, and then clicked them, so that explains the messy birds and pigs !

This post is also my tribute to the food blogging world and the wonderful bloggers from whom I have learnt so much and dared to experiment with things that I never ever thought I would make.

Thank you Sharmi, Sunita and special thanks to Sayantani for all the inspiration behind this cake and the fondant.

What you need -

Cakes -
Recipe Source for the sponge cakes - Sharmi
For the chequered pattern - Sunita
1 round vanilla sponge cake
1 round chocolate sponge cake (add 2 tbsp cocoa powder along with the flour to the same recipe as above)

Chocolate sauce for binding
100 gms dark chocolate
3 tbsp cream
3 tbsp icing sugar

Chocolate butter frosting
50 gm baking chocolate
5 tbsp unsalted butter

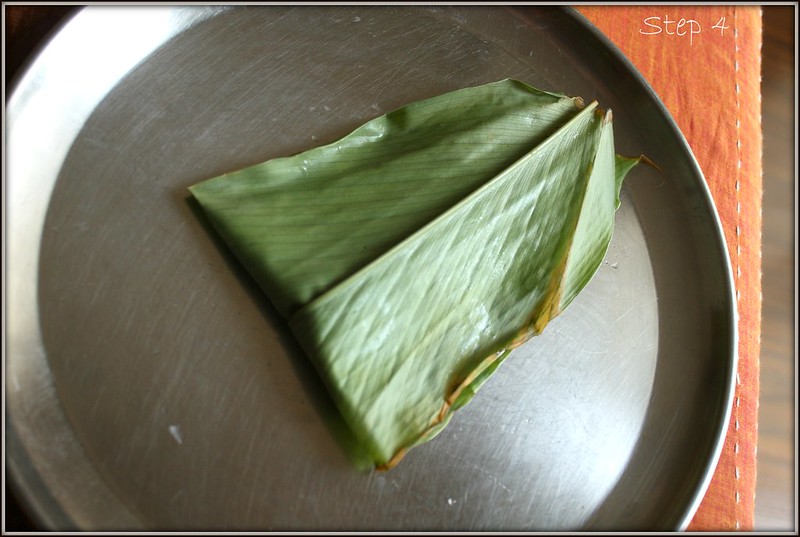
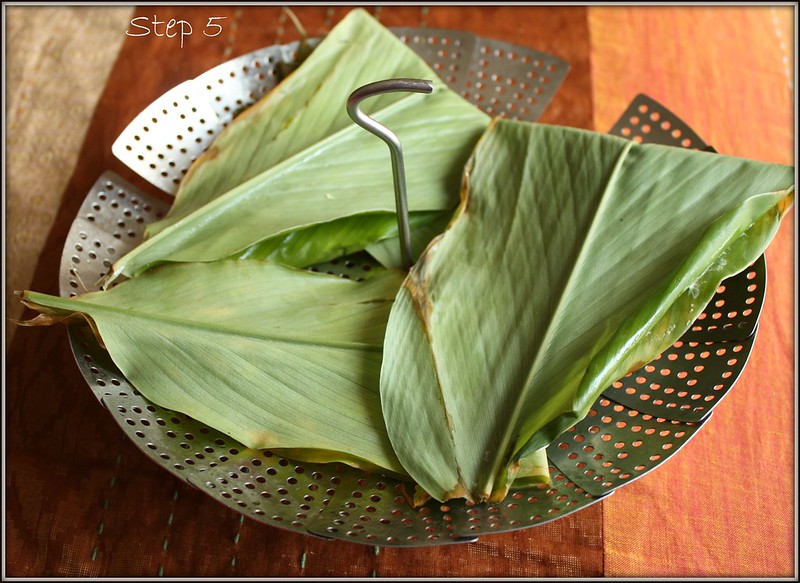
Fondant (Made and shaped one day earlier)
Recipe source - Sayantani

100 gms white marshmallows
300 gms icing sugar
1/4 cup vegetable oil
1/2 tsp vanilla extract
1 tbsp water
food colours (I used liquid food colours, but gel based would work best)

Crumb for the sides -
8-10 biscuits, preferably chocolate flavoured

What you do with it -

Fondant (Make one day ahead)
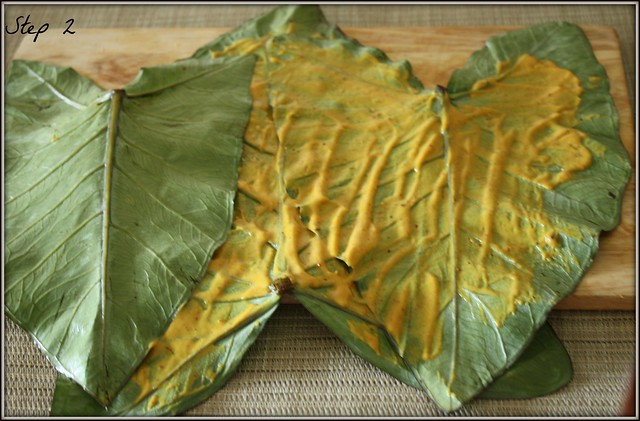
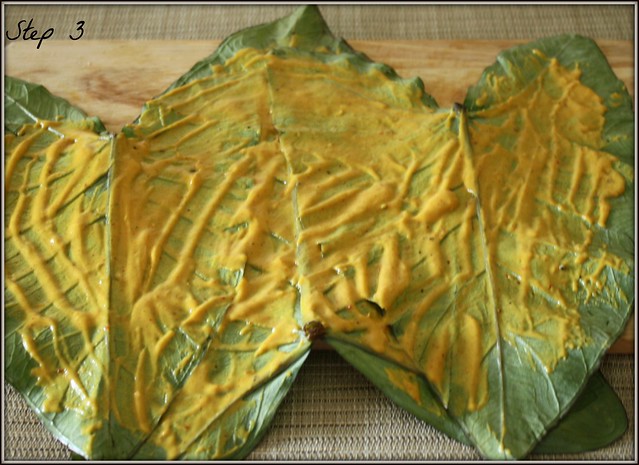
In a large glass bowl, take the marshmallows, salt, vanilla extract and water. Microwave for 60 seconds. If not melted fully Micro for another 10 seconds and stir with a well greased spoon. Start adding the sugar, add half of it first and stir continuously. Keep adding till it becomes thick and you can't stir further
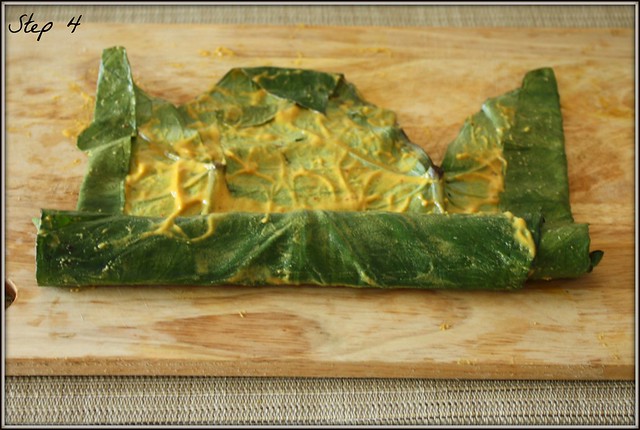
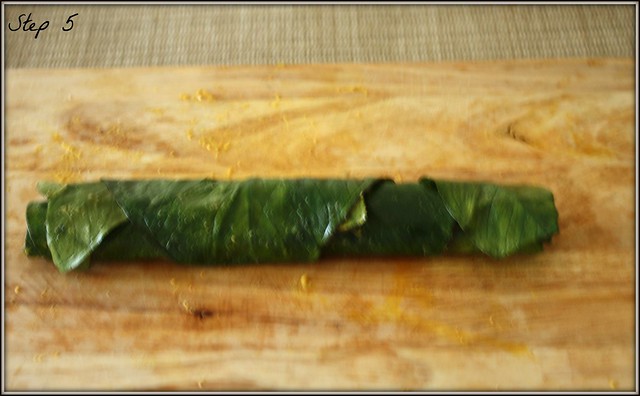
Grease you hands really well with the oil and transfer the mixture onto a icing sugar dusted surface. Knead well, adding more icing sugar if it is still sticky. Knead for about 8-10 mins till the dough is soft but dry. Grease the fondant with the oil and wrap it in a cling warp and store it in the fridge
When you are ready to shape it, take the required amount of the food colour and mix it into the dough till you get the desired colour. I needed to add icing sugar when the dough got sticky with the colours. Make the shapes as required. I tried my best to make the fondant look like birds and pigs !

Cakes (Make at least 4 hours ahead)
Recipe Source - Sharmi
Ensure that you bake the cake in the same size pans and allow them to cool completely, for about 3-4 hours. If the top has raised too much, cut to form an even layer.
Use a cookie cutter or place any round plate that is about 1.5"-2" smaller than the cake. Slice the cake carefully, around this shape so you get an inner ring. Place another small plate or bowl to make another circle about 1.5"-2" smaller than the outer one. Cut along the rim. Do this for both the cakes
You will now have 3 rings of each cake. Gently remove the centre rings of both the cakes

Crumb (Make ahead, to save time)
Pulse the biscuits till it form a smooth powder

Chocolate sauce for sandwiching the cakes and layers -
Make the chocolate sauce by heating the chocolate pieces over a double boiler till they melt completely. Take it off the heat and mix in the cream. Stir well till smooth

Chocolate butter frosting (Make this just before you use it)
Melt the chocolate in a small bowl, above a pan of steaming water. Once it melts, place it over a bowl of ice cubes and then add the butter. Beat well over the ice till you get a smooth spreading consistency

Assemble -

Keep the cake rings ready and then use the chocolate sauce like a glue and spread between the rings and then carefully place the rings back together to form alternate rings in both cakes. This way you have one cake with vanilla-chocolate-vanilla and the other with chocolate-vanilla-chocolate
Spread the chocolate sauce above the first cake and then place the second cake above it. Spread the chocolate sauce over the top of the cake and even it out to remove any crumbs. With a large knife spread the sauce over the edges, sealing whatever little gaps that may be there.
Take a large spoonful of the chocolate butter frosting and spread it over the top of the cake. Quickly spread it with the flat side of the knife and make it even.
Take handfuls of the bourbon biscuit powder and cover the sides of the cake all around. You could use any other border design or just leave the chocolate sauce around the sides.
Place the fondant pieces over the cake.

Wednesday, November 28, 2012

Momos and more...

We are back from a wonderful week of holidaying in Darjeeling, Gangtok and Kalimpong. I had visited these places many many years back, and couldn't recollect too much. It was a relaxing week, though we were on the road most of the time.

We could see the mighty Kanchenjunga from all these places, and at all times - sunrise, sunset and all the while in between.

Kanchenjunga at sunrise

We woke up at 3 one morning to drive up to Tiger hill from Darjeeling, to watch the sunrise. I though it was a bit over-hyped, standing in the freezing cold there, fingers numb without the gloves, so I could hold on to the camera. We waited, very very patiently for almost an hour in the darkness of the night till finally the Kanchenjunja began to shape up. The sun rose on one side and the Kanchenjunga reflected the light, standing tall and magnificent, making the cold numbing hour worth the wait. The valley below came to life and we could see the layers of mountain ranges between us and the Kanchenjunga. Never has the sunrise meant this much. Here's a bit of that sunrise.

sunrise at tiget hill

Momos were something I had eaten at fancy restaurants, I'd never imagined eating them off a roadside stall at 7 in the morning. There were these women standing with a table stacked with steamers, filled with momos and another pan of boiled and spiced black chana.

momos in steamer

The momos were shaped so beautifully and had a spicy filling. There were the vegetarian and chicken options

momos

The momos were steaming hot and delicious. We were famished and these momos with a green chilli chutney were just what we need to beat the cold.
Can't wait to make these at home soon.

steaming hot momos

We also had a lot of chowmein and a whole lot of thukpa, a Tibetian soup with noodles. I tried the thenthuk, which is handmade pasta dunked in a flavourful soup, tasted pretty similar to the thukpa.
I picked a pack of homemade noodles from a tiny store up a hill. Its used in the thukpa, thats another one on my to-do list.

With the recommendation from friends on fb, and Gauri, I tried the humongous breakfast at Keventers and the awesome fruit cakes and jam doughnuts from Glenarys in Darjeeling. Thank you Kaajal and Gauri. That was the best breakfast ever !

This is my 200th post. A landmark of sorts for me, with my ever fluctuating interests in the various things I take up.

Blogging, frequently or otherwise, is something I really enjoy.It has helped me get into this wonderful community of food bloggers. You get to learn so much and make such wonderful friends.

Thank you my dear readers. It really means a lot to have you read my posts. Thank you.

Friday, November 9, 2012

Chocolate balls made by my little chef !

My son will turn 7 in a week and he had made this butterless chocolate cake almost two years back. Back then, I had to read out the recipe and take the ingredients out for him and put it in the oven. This time he's made this himself, in fact its a recipe he learnt at school !

sidhandchocballs

In his school, they have a parent interaction session once a fortnight, where a parent goes and teaches the kids something creative or shares a story with them.
Last week, he learnt about making chocolate balls and he was super excited when he came home. This is totally his recipe from what he remembers. I had to translate the actual measurements from what he showed me with the height of his fingers.

He never liked playing with clay or playdoh when he was little. He always found it too 'yucky' and hated to get his fingers dirty. Today, when he had to make this dough, he started with a bang, but then wasn't very sure since his fingers had dough all over. But he got the hang of it and managed just fine.

siddough

He adores the kids in Junior Masterchef Australia, and the movie Ratatouille is one of his favourites. Thankfully, he loves his food and isn't fussy about eating. He is open to trying new stuff and its a real blessing. I have seen mothers fuss over their kids and the kids always run away from food.
He has a big sweet tooth and always wants something sweet at the end of his meal.

He dressed up as a chef for a fancy dress at school sometime back and now nurses a dream of opening his restaurant one day !

chocolate balls with sprinkles

He made these and was very happy with the way it turned out. He said 'Mamma, can you put this on the Yum Factor'. There was no way I'd let a chance like that skip by, so here it is, from my little chef. Yes, I am one proud Mamma !!

chocolate balls1

Its super simple, takes less than 10 mins, and is great fun for kids to make. If you like involving kids in your kitchen, this is a great way to start. We coated some with sprinkles, some with icing sugar and some with cocoa powder. They turned out a bit too sweet for me, but kids will love it !

chocolate balls

We are off on a little vacation for Diwali and will be back in ten days.
Wish you all a wonderful Diwali. May this Diwali bring a lot of love, peace and happiness in your life. Enjoy your Diwali and stay safe.

Chocolate balls
(This recipe makes about 15 chocolate balls)

What you need -

20 Marie / digestive biscuits (about 3/4 cup when powdered)
3-4 tbsp milk
1/4 cup granulated sugar
2 tbsp cocoa powder
sprinkles, cocoa powder, icing sugar to decorate

What you do with it -

Pulse the biscuits to a powder and set aside in a bowl
Grind the sugar to a fine powder
Add the cocoa powder and stir well
Add the milk and stir once or twice. Add more milk if it is too dry.
Knead with your hand to form a smooth dough
Roll in the sprinkles, icing sugar or cocoa powder or even have it plain

Tuesday, November 6, 2012

Vegan banana bread

Vegan baking is something I discovered only after I started this blog. I knew what being vegan was all about and I knew that with Indian food, especially South Indian cooking, its easy to be vegan - we really don't use so much dairy in everyday cooking, but I really felt that people who turned vegan missed out a whole lot on baked goodies. Can't believe how wrong I was ! Vaishali's Holy cow has a whole lot for those of you interested in vegan baking.
I am not vegan and this bread happens to be vegan only because I ran out of butter.

vegan banana bread 2

In India, where you don't really get egg replacers or the various other options for dairy replacements, I really didn't imagine baking without it. Its just that if we open our minds a bit, and make a few conscious decisions, we can actually allow change. Not that I see myself turning vegan, but I am happy that I actually have baked cakes, brownies and cookies without eggs, which again is something I had never imagined. This happened after I moved here and found that most people I know do not eat eggs because of their religious beliefs and that opened out a whole new world of egg free baking, using various substitutes
This is also my first time using flax seeds as an egg substitute

The bread was a bit dense with the wheat and oatmeal, but it felt so healthy and made for a great breakfast. I didn't want it too sweet either, I like the natural sweetness from the bananas. My son enjoyed it with milk after his swimming classes.

What you need -

1/2 cup wheat flour
1/2 cup powdered oats
1 cup APF / maida
1/4 cup oil
1/2 cup sugar
a pinch of salt
1/2 tsp cinnamon powder
1 tablespoon flax seed powder + 3 tablespoons water
3 ripe / over ripe bananas
1/2 cup raisins
1 tbsp flax seeds
1 tbsp sunflower seeds
1 tsp baking powder
1/2 tsp baking soda

What you do with it -

Mix the wheat flour, powdered oats, maida, cinnamon and salt in a large bowl. Add the baking soda and baking powder and stir well
Grind the bananas and sugar to form a banana puree
Blend the flaxseed powder along with water till it feels creamy. Add the mashed bananas and oil to this
Add the flour to this, stirring to incorporate all the flour. The batter will be thick, but if it is too dry, add 2-3 tbsp of warm water
Add the raisins and flax seeds
Pre-heat an oven to 170 C
Grease a loaf pan and pour in the batter. Sprinkle sunflower seeds over the batter
Bake for about 50 mins and check by inserting a toothpick in the centre of the loaf. If it comes out clean, your loaf is done
Cool on a rack for about 10 minutes and then unmould carefully from the loaf pan. Cut into thick slices. Tastes wonderful when its warm

Monday, November 5, 2012

Oat crackers with garlic chives

Its a week before Diwali and the festive spirit is on here in Ahmedabad. People get their house completely spruced up with all the cleaning, painting and re-upholstering ! The Diwali shopping, party planning, buying gifts, buying new clothes, new jewellery and then there's the making of mithai(sweet) and namkeen(savoury) for Diwali. The shops here have every imaginable savoury snack for Diwali, but people here, especially the big joint families always make it at home. They either have a 'maharaj'(cook) come in or the women in the family get together and make a whole lot of it.

oat crackers

Sweets, especially the Indian mithai is really not my forte. I don't like eating it too much and I don't make it too well either, though for my son's sake, I plan to make sitaphal basundi soon.

Here is my slightly hatke savoury snack for Diwali. Healthy, crunchy and not sweet - that's really my kinda stuff. I had tried the garlic chive scones last time around and really liked the mild flavour of garlic.
This time I tried oat crackers with chilli flakes and garlic chives. It turned out crisp and spicy, goes perfect with tea on a cold wintry evening.

oat crackers with garlic chives

Oat crackers with garlic chives

What you need -

1 cup oats (I used quick cooking oats)
3 tbsp wheat flour
3 tbsp APF / maida
3 tbsp cold unsalted butter
6 garlic chives (use garlic powder if you don't find chives)
1/4 cup milk
1 tsp salt
1/2 tsp baking powder
1/2 coarsely ground pepper powder
1/2 tsp chilli flakes

What you do with it -

Grind the oats to a really fine powder
Add the wheat flour, APF / maida, baking powder, salt, pepper and stir well
Ensure that the butter is cold. Cut into little pieces and mix with the flour
Mix with your hands, till it is like a coarse crumbly powder
Add the chives and chilli flakes, along with the milk and form the dough
Roll it out to about 1/4" thickness or thinner and use a cookie cutter to cut into rounds
Pre-heat the oven to 170 C. Grease a butter paper and place these crackers on the sheet
Bake for 8 mins and then turn over and bake for another 6-7 mins till slightly browned. This is with my oven setting, may vary in other ovens.
This dough should make about 25-30 crackers

Friday, November 2, 2012

Apple and Raisin muffins

The last couple of weeks have been terribly boring when it came to cooking. When it was time to cook, I would just blank out and never know what to make. There are days when I am not stocked with too many vegetables, but this was not one of those times. I had a fridge full of vegetables, but I just couldn't think of what I want to do with it.

apple muffin

TH was down with a viral fever and then my son had some gastric problem, and I was making the basic khichdi and raita for many days. Knowing me, I would have been waiting to make something more interesting now that they are doing fine, but it just wasn't working out. Even my new oven was waiting patiently for me to get out of the rut and do something.

For me, my kitchen is where I can constructively get rid of whatever is bothering me and it helps clear up my head. When I am low, upset or even mad at someone, I need to go make something that takes up my time and energy and the result is a calmer me and usually, a very tasty, elaborate meal ! So, it scares me when I don't feel like cooking, because that is a sign of something seriously wrong.

apple and raisin muffin

I hope to get my mojo back soon. Will leave you with these deliciously soft eggless apple and raisin muffins that I made from Madhuram's blog. My son and his friend loved it and I'm hoping this gets me back in the groove.

Apple and raisin muffins

Adapted from Madhuram's eggless cooking

What you need -

1/2 - 3/4 cup milk
1/2 sugar
1/2 cup raisins
1 cup grated apples (I used 2 apples)
1/4 cup butter
a pinch of ground cinnamon
2 cups maida / APF
1 tsp baking soda
3/4 cup chopped walnuts

What you do with it -

Take 1/2 cup milk in a pan, add the sugar, grated apples, raisins, butter and the ground cinnamon
Keep it on a flame and stir till it starts thickening. Should take about 8-10 mins
Take it off the heat and allow it to cool
In a bowl, sieve the flour and the baking soda and add it to the cooled apple mixture
If the batter is too thick, add the remaining milk and mix well to get it to the right consistency
Pre-heat the oven to about 180 C and line a muffin pan with the paper cupcake moulds
Pour in the batter upto 3/4th level and sprinkle come chopped walnut pieces over it
Bake at 180 for 12-15 mins
These muffins are extremely soft and best when hot

Monday, October 22, 2012

Thotakoora Koora / Amaranth leaves with roasted gram

I miss all the greens I get in the markets in Bangalore. Here's its pretty restricted to spinach / palak, fenugreek / methi and some seasonal ones like bathua and sarson in winter.
Amaranth or dantin soppu as its called in Kannada is one of my favourites. It was available all year round and I used it in dals or paired it with some simple vegetables. I finally saw it in hypercity here last week, bought a big bunch and then turned to my trusted book for simple, tasty recipes - Cooking with Pedatha

amaranth leaves

I love this book and everything that I have tried from it so far, has been simple and delicious. Everyday vegetables like pumpkins, cucumbers, brinjals and carrots turn out to be such heart-warming dishes with the perfect balance of spice, sweet and sour tastes.
This recipe with amaranth leaves / thotakoora was another such earthy dish with so much green goodness. Paired it with hot rice and rasam, and had a happy content meal.

thotakoora koora

Thotakoora Koora

Adapted from 'Cooking at home with Pedatha' - Vegetarian recipes from a Trditional Andhra kitchen by Jigyasa Giri and Pratibha Jain

What you need -

1 large bunch amaranth leaves
2 tbsp Roasted gram / pottu kadalai, powdered
1" piece ginger
2 cloves garlic
handful of coriader leaves
2 green chillies
1 tbsp oil
salt to taste

Tempering
1tsp urad dal
2 tsp mustard seeds
1/4 tsp turmeric powder
1/2 tsp asafoetida
6-7 curry leaves

What you do with it

Clean and chop the greens, along with the tender stems. Mine came up to about 4 cups
Grind the ginger, garlic, coriander and green chillies to a paste
In a deep pan, heat oil for tempering. Add the urad dal and the pop the mustard. Lower the flame and add turmeric, asafoetida and curry leaves
Add the greens and stir. Cover and cook till done
Add the ground paste and salt and continue cooking for 2-3 mins
Take it off the heat and stir in the powdered roasted gram
Serve hot with steamed rice or as a side dish

Tuesday, October 16, 2012

Braided Pesto Bread for World Bread Day

Last time around, when most blogs had beautiful breads served up for World bread day, I really drooled over them and wished I could bake like that. Its not that I hadn't baked bread, but it never looked good enough. I hate that it didn't brown enough in the convection mode of my microwave oven.
I have been contemplating buying an OTG for a really long time now, but kept telling myself I didn't need it. My microwave worked just fine and I don't really bake that much. I am a member in two very active foodie groups on fb and read a lot about the ovens everyone recommended there. I am not really impulsive with my buying, but one day, under the pretext of retail therapy or such, I went and picked up the Morphy Richards 40L OTG. And with a lot of inputs from SJ, I finally made my first nicely browned bread in my new oven.

braided pesto bread

This braiding of bread is simple and fun and it makes the bread look so pretty. I followed the recipe from here and it started out as a wreath, but I didn't have enough pesto to fill up all the dough, so used half the dough and left it as a braided bread

braided pesto bread dough

The aroma with that pesto in the bread filled up the kitchen and that's when all those wonderful descriptions of how baking can be so addictive and so therapeutic start making so much sense. When it turns out right, baking is truly something that can lift your spirits and make you feel good about everything around you.

pesto bread in half
The swirls of pesto when I cut the bread in half

Instant yeast has been like a wonder find for me. It hasn't failed me once in the last few baking attempts. Thank you Suma and Sayantani for helping me discover this really user-friendly yeast. The bread was really soft and aromatic and the crust had browned really well. The slices looked nice with the swirls of pesto and tasted awesome with some hot soup.

braided pesto bread slices

I didn't get to take step-by-step pics of how you get this braid, since my hungry family was waiting for lunch, and pulling out a camera at this stage was not a great idea. Check this beautiful blog for the detailed steps

Sending this to Susan's Yeastspotting

Braided pesto bread
Adapted from 'Confessions of a Foodie Bride'

What you need -

For the bread -

2.5 cups flour (I used maida / APF)
1 cup warm water
1.5 tsp instant yeast (I used gloripan) / 2 tsp active dried yeast
1 tbsp olive oil
1 tsp salt
1.5 tsp sugar

For the pesto -

1 cup cleaned basil leaves
3 cloves garlic
3 tbsp grated cheese (I used regular Amul processed cheese)
1/4 cup walnut kernels (Use pine nuts or almonds if you like)
1 tbsp olive oil
a pinch of salt
3 peppercorns

What you do with it -

For the pesto - Grind all the ingredients along with the olive oil to a coarse paste and store. I made this a week in advance. It keeps well when refrigerated

For the bread -
If using active dried yeast, sprinkle the yeast with the sugar into the lukewarm water and keep in a warm place for about 10 mins. If it gets all frothy, proceed with adding the flour, oil and salt. If not, please don't use this yeast, it will not work
If using instant yeast, just sprinkle the yeast over the flour, add the oil, water, sugar and salt and knead well for about 5-6 mins to form an elastic dough, that's not too sticky. Roll into a ball and place it in a greased bowl. Cover with a moist cloth or cling wrap and allow it to rise, till it doubles. Mine took about 45 mins
Preheat the oven to 200 C
Punch down the dough and roll it out on a floured surface to a rectangle of about 8" x 12"
Spread the pesto over this, leaving about 1/2" along the sides
Start rolling the longer side, towards you, folding the edges in
Use a little water and seal the ends
Cut it lengthwise into 2 and then braid it with the filling showing upwards. Transfer to a loaf pan
Pinch the ends together and allow it to rise for another 20-25 mins
Bake for 20-25 mins (This depends on the oven you have)
Allow to cool slightly before you cut it
Enjoy with some hot soup

Friday, October 12, 2012

Pomegranate and lime juice

I can't seem to stop complaining about the weather here. Its so hot here again and many kids are falling sick with this crazy heat. TH is down with viral fever and there's the simple khichdi on the menu for every meal.
TH has been advised rest, something he does only on the doctor's prescription, and to drink a lot of fluids. I am very lazy when it comes to making juices for some reason, but being the good wife that I am, I decided to make fresh juice everyday for him.

pomegranate and lime juice

I had had this at a friend's place. It was a lovely combination using pomegranate and lemon and such a pretty colour too !
Its really refreshing in the heat here, my son loved it and TH found it very replenishing.

pom and lime juice

There's no real recipe here. I used what I had at home, you could use more or less of the lemons and pomegranates

What you need

1/2 cup pomegranate seeds
4 lemons
2 tbsps powdered sugar
1/2 tsp black salt
ice cubes (optional)

What you do with it -

Squeeze the lemons and remove the seeds
Mix the powdered sugar into the lemon juice
Remove the seeds of the pomegranate and use a mixer/ blender to get a thick pulp
Strain using a muslin cloth or a sieve
Add this to the lemon juice
Mix in with the black salt
Add approx 3 glasses of water and stir well
Serve as is or with ice cubes
You could even spike it with some vodka !

Wednesday, October 10, 2012

Patra / Pathrode - Repost

This is one more of those dishes making its way into my kitchen and blog again, thanks to the pictures I lost in blogger. One of my favourite Konkani dishes, this one is made specially made during Ganesh Chaturthi and of course, every time I just have to eat one !

patra

Patra in Gujarati, Pathrode in Konkani and Aluvadi in Marathi is basically Arbi / Colocasia leaves bundled with some flour and spices, steamed and seasoned. In Gujarat, its made only with chickpea flour. In the Konkani version, its with soaked and ground chana dal and rice. Ma uses the easy way out and so do I. No soaking and grinding, we use chickpea flour and rice flour, with the spices.

I love dishes that are steamed on cooked in leaves. Gives it all the flavour and feels so healthy. The patolis that I made for Gauri puja just wouldn't taste the same if it wasn't steamed in those turmeric leaves.
I always thought this was a complicated and messy job, but realised how simple it is once I started making it at home

Here's a step-by-step on how to make patra / pathrode

Use leaves that have a blackish / dark stem. The ones with dark stems are not itchy, so always safer to use that. These were not dark and thankfully not itchy either.
Wash, wipe and place the vein side up. If the vein is too thick, roll it out with a rolling pin / belan

patra step 1

Spread the batter as evenly as possible, with your fingers, all over the leaf, leaving about an inch on all sides. Place the second leaf with the vein on top, but facing the other way, this makes it way easier when you need to roll it up. Overlap the first leaf with the second one and spread the batter over it.

patra step 2

Repeat with each leaf overlapping the other and spread the batter, leaving space at the edges. Using about 6 leaves in one set gives you nice layered big pieces when it done. You can use just three and make smaller ones too

patra step 3

Fold in the sides and start rolling it to form a log, gently enough, without tearing the leaves anywhere

patra step 4

Once you get a log like this, cut it in half

patra step 5

Steam these in a cooker or idli / dhokla steamer for about 10 mins. Allow it to cool and then cut into thick slices

patra step 6

Pan fry these pieces with the seasoning and garnish with grated fresh coconut. Enjoy as a snack or as a side dish with rice and a plain ghashi

patra 1

What you need

9 colocasia leaves
2.5 cups besan / chickpea flour
1/2 cup rice flour
1 tsp red chilli powder
1/2 tsp asafoetida
1 tsp tamarind paste
2-3 tbsp grated jaggery
salt to taste
1 cup water

Seasoning -
2 tsp sesame seeds
1 tsp mustard seeds
1/4 tsp asafoetida powder
1 tbsp oil

Garnish -
1-2 tbsp grated coconut
coriander leaves

What you do with it -

Make a thick batter with the besan, rice flour, jaggery, tamarind paste, chilli powder, asafoetida and salt using one cup water. Add more water if it is too thick, but don't dilute it too much
Wash the leaves and wipe them dry. Place the leaf vein side up, spread the batter with your fingers, leaving about an inch on all sides of the leaf. Overlap with another leaf, with the vein facing upwards, but on the other side of the first leaf, as shown above. Repeat the process with about 3 or 6 leaves, depending of the size of pieces you want.
Fold in all sides of the leaf and roll to form a log. Cut into 2-3 big pieces
Grease a steamer plate with a little oil and places the pieces in the steamer. allow to steam for 10-12 mins
Remove and allow to cool
Cut into thick slices
In a large pan, heat 2 tbsp oil, add the mustard seeds and sesame seeds. Add the asafoetida and then place the pieces in the pan
Allow it brown slightly on both sides and take it off the heat
Garnish with coconut and coriander leaves
Serve as a snack or as an accompaniment with rice and ghashi

Friday, October 5, 2012

Fruit chaat

The weather in Ahmedabad for about 9 months in a year fluctuates between hot, really hot and ridiculously hot. Between December and February, its pleasantly cold, especially late evenings and early mornings.
When we just moved here, it was the 'ridiculously hot' time of the year. And coming from Bangalore, that was unimaginable heat.

fruit chaat1

October is the time for the second summer (I really could do with just one) and the last couple of days have been bad.
Its always more difficult to eat regular hot food during summers and the body craves for liquids and cold food
I made this fruit chaat that was so soothing. It was my mid morning snack and my dinner. You could have it as a salad. Many fruits go well together in a fruit chaat - guavas and bananas work best. I used what I had at home and substituted fresh grapes with some raisins.

fruit chaat3

Quite predictably, TH didn't even want to try it. Fruits and TH have this complicated relationship. If he is to ever have it, it needs to be in the form of a fruit salad loaded with cream or ice cream, or with custard, or a pudding or something with a higher calorific count
The little one turned up his nose when he saw this and said it smelled spicy and that he didn't like spicy fruits, so I enjoyed a whole bowl of it for dinner.

This is the way Ma makes it. Its really simple, just that I am too lazy to cut those fruits up to make this. But I'm hoping I'll make it more often. I really enjoyed it. The black salt really adds the zing to these fruits.

fruit chaat5

Fruit Chaat

What you need -

2 bananas
2 guavas
2 apples
1/2 a pomegranate (or more)
2-3 tbsps raisins (use fresh grapes instead)
1 tsp lemon juice
1 tsp roasted jeera powder
a pinch of pepper powder
1 tsp sugar
1/2 tsp black salt (kala namak)
1/4 - 1/2 tsp chaat masala
(You can use any other fruits like pineapple or papaya)

What you do with it -

Clean and chop the apples and guavas into bite sized pieces
Remove the pomegranate seeds
Peel the bananas. Slice lengthwise and then cut into pieces
Place all the cut fruits in a bowl and sprinkle lemon juice over it (This helps it from turning brownish in colour)
Add the jeera powder, pepper powder, chaat masala, salt and sugar
Refrigerate. Tastes great when its cold.

Wednesday, October 3, 2012

Vegetable kurma

Here's another recipe I learnt from my mother-in-law. The only kormas I had had were the cashew nut based, rich creamy kormas - the very North western, Mughalai influenced gravies that were generally made with meat.
When I had this vegetable kurma, which has such distinct South Indian flavours, I was a little surprised. This is a coconut based curry, with vegetables and spices
That's when I realised the difference between a kurma / kuruma and a korma / khorma / qorma !

vegetable kurma

This goes pretty well with idlis, though initially I found it a little difficult to accept that combination.

I normally make it with jeera rice. Since it is loaded with vegetables, it pairs well with the mildly spiced rice

What you need -

2-3 cloves garlic
1" piece ginger
2 cloves
1 stick cinnamon
2 potatoes
1/2 cup shelled peas
2 carrots
1 cup cauliflower florets
8-10 french beans
1 onion
2 tomatoes
salt to taste
1 tbsp oil

For the masala -
2 tsp chana dal
3 green chillies
1/2 an onion
3 green chillies
1/2 cup grated coconut
1 tsp coriander seeds

What you do with it -

Fry in a little oil, all the ingredients listed under 'For the masala' and grind it to a paste
Chop the onions and tomatoes. Finely chop the ginger and garlic
Cut the beans, carrots and potatoes into bite sized pieces
In a pan, add a tbsp of oil and add the cinnamon and cloves. Then add the chopped ginger and garlic
Add the chopped onion and fry for 2-3 mins. Add the tomatoes and allow it to cook a little
Add the potatoes and beans first and then pour enough water to just cover it
After about 4-5 mins, add the remaining vegetables
Cover and allow the vegetables to cook. Once its almost done, add salt and the ground masala paste
Bring it to a boil and serve hot with rice, idlis or jeera rice

Thursday, September 27, 2012

Chickpea sundal

I had friends over for my Gauri puja last week. Traditionally, we make patolis, rice cooked with coconut milk and turmeric leaves and a simple sabji with some greens that are in season. The food is at its simplest and some women have it without salt on that day. Its supposed to be that a person who can't afford even something as basic as salt, can pray and make an offering without salt to Gauri.

I however wanted to serve my friends something more than just the patolis, so I made a quick sundal and coconut rice.

chickpea sundal

Sundal is a simple tasty snack, that's high in protein. Its made with chickpeas (kabuli chana), black chana or even peanuts. Soak, cook, season and you're done with it.

This is usually made during Navratri and served to all the people who come home to see the gollu (Navaratri decorations) in most Tamilian homes

Chickpea sundal

What you need -

1 cup kabuli chana (soaked for 6-8 hours)
1/4 cup grated fresh coconut
1 tsp mustard seeds
1 tsp urad dal
1 red chilli broken in half
1 tbsp oil
salt to taste


What you do with it -

Drain the soaked chana and rinse it with fresh water
Cook in a pressure cooker. Don't let it over cook, for me two whistles in the pressure cooker works fine
In a pan, heat the oil, add the mustard seeds. allow it to splutter
Add the urad dal and when it turns slightly reddish, add the broken red chilli pieces
Add the salt and the chana and mix well
Take it off the heat and garnish with grated coconut

Tuesday, September 25, 2012

Guest post for Suma Rowjee of Cakes and More

This is the very first time I am doing a guest post and its for the baking queen, Suma of Cakes and More...
I was really very honoured when she asked me do it, but also very nervous. She has the simplest and the most challenging bakes on her blog. I really didn't know what what I could make, that wasn't already there.

Then this recipe came to my mind - its an easy cake that is really moist and has a lovely flavour of dates. My aunt in Cambridge has this huge collection of recipes, especially related to baking. I picked this one since it seemed simple enough, though very delicious and moist, and I had all the ingredients on hand

banana date cake1

Suma is a huge inspiration for the baking that I do, especially breads. It was from her list of baking supplies in Bangalore, that I manage to get some beautiful instant yeast, that works so well. This post on GFA was especially useful and it introduced me to a store thats so close, and I didn't even know of its existence. Its on my list every time I visit Bangalore now.
I tried her no-knead bread to make a simple everyday multigrain bread and she is also the inspiration behind the stuffed aloo buns, which remind of of Bangalore so much

We met up last summer and it was fun chatting up about work, kids, cooking. Felt like I'd known her for a long time !
It thundered and poured the day I made this and it seemed like such a perfect weather for some hot tea with cake

banana date cake quarters

Thank you Suma for letting me do a post on your blog. It is such an honour.
Hop over here for the post

Tuesday, September 18, 2012

Patolis for Gowri / Gauri puja

Gowri / Gauri puja is celebrated by Konkanis and Kannadigas a day before Ganesh Chaturthi. Some families keep an idol of Gowri, others worship a printed picture. Among Konkanis, this day is also called 'Vayana puja'. Young girls and married women keep decorated coconuts and offer it to the Goddess. Then these coconuts are usually given to women older than you and you seek their blessings. Ma gifted me this silver Gauri that needs to be placed over a coconut. I have been using this for my puja for the last couple of years now.

Gauri pooja

I used to help my grandfather a lot with all the preparations for the puja, and the cooking was all done by Ma. We had the whole family come over, help with the cooking, especially for Ganesh Chaturthi and really enjoy the elaborate spread
Being in a place that is not so familiar with this puja, I have started celebrating it and call some friends over. The food cooked on this day is pretty simple, compared to the spread for Ganesh Chaturthi.
The main dish cooked for this puja is Patoli (paa-toh-lee). Its steamed in turmeric leaves and has a wonderful aroma. This dish is a favourite with my friends here, since its so new and different for them.

patoli 6

My dear Ma couriers the leaves across every year, since I haven't found any turmeric leaves here. I wrap it in a damp cloth and refrigerate it till I use it. Even if the leaves, turn a little yellow, they work beautifully and still have that distinct aroma.

Have a wonderful Gauri puja and Ganesh Chaturthi

Here's a step-by-step on making these patolis

Clean the turmeric leaves, wipe and place them in a plate. Grease the leaf with a little oil

patoli 1

Using your fingers, spread the maida paste over the leaf. It should not be too thin or too thick

patoli 2

Place a spoonful of the coconut-jaggery mixture on one side. You can do this vertically or horizontally

patoli 3

Fold the leaf in half (length-wise or width-wise, depending on how you placed the filling)

patoli 4

Place in a steamer and steam for 8-10 mins

patoli 5

Once done, gently lift one half of the leaf and serve with ghee

patoli 6

What you need -
(15 patolis)

15 turmeric leaves

For the filling
1.5 cups freshly grated coconut
3/4 cup grated jaggery (less or more depending on how sweet the jaggery is)
1/2 tsp powdered cardamom

For the paste
1 cup maida (rice flour can be used instead of maida, but maida is an easier option)
1.25 cups water approx

What you do with it -

In a non stick pan, add the jaggery and coconut and stir it over low heat till the moisture is all gone. Mine took about 15 mins on a really low flame
You can make this a day in advance
Mix the maida with the water, adding a little at a time, so you get a consistency of a dosa batter, not too thick, not too thin
Clean the leaves, wipe them and grease with a little oil
Spread the maida paste with you fingers over the leaves, keeping it as smooth as possible. This again should not be too thick
Place a spoonful of the coconut mixture on one side
Fold the leaves and steam it for about 8-10 mins
Gently open the leaf and enjoy your patoli with some ghee

LinkWithin

Related Posts Widget for Blogs by LinkWithin