Showing posts with label Baking Bread. Show all posts

Tuesday, August 26, 2014

Cottage cheese and mint stuffed bread

Its time for this month's bread for WKTB. Aparna was busy with organizing the fabulous Foodbloggers meet in Bangalore and I was miserable that I couldn't attend it. Have been reading about all the fun and learning that happened at the meet and can't help feeling sorry for myself for being so far away.

side800

This month, since she was all tied up, she asked us to bake a decorative bread, filled with something savoury. I really love baking bread and its so much simpler than it seems, but never thought about making a decorative one. The most creative experiment with bread was my braided bread and I wanted to try something new this time.
stuffed bread8

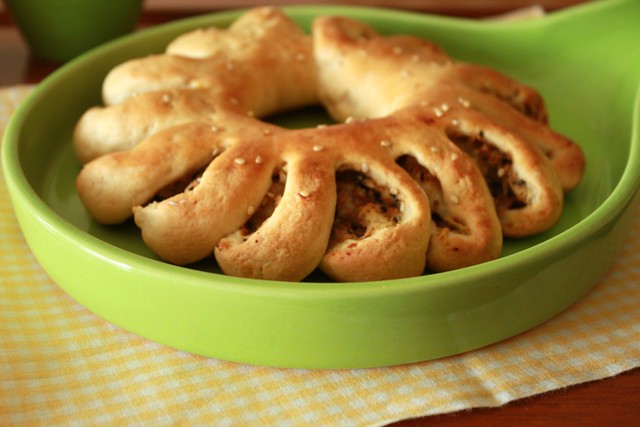
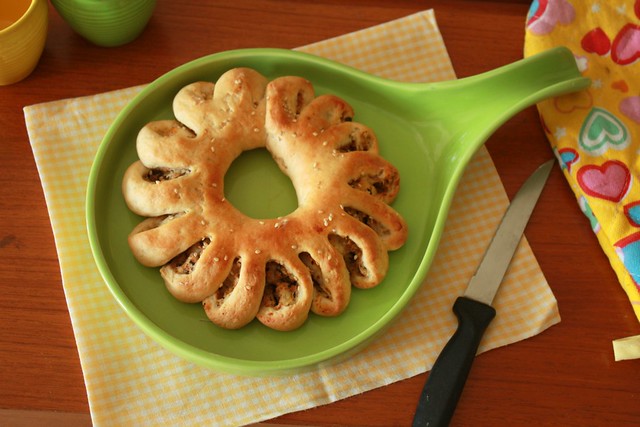
Inspired by this flower shaped bread here, I decided to make that. As usual, I was running late and though I was contemplating 20 different ideas for the savoury filling, I decided on this one with paneer and mint. It has lovely Indian flavours and the bread turned out quite pretty. I thought it looked like a flower, but my son insisted it looked like the sun !

coll5

It was quite a task to use the camera while shaping the bread. I used my phone and the pics aren't too great, but I hope it gives you an idea of how to make it

This bread is sent to Susan's Yeastspotting page.

Decorative stuffed bread
Adapted from ChefinDisguise

What you need -

2.5 cups maida / APF
1/2 cup wheat flour
3/4 cup warm milk
1/4 cup warm water
2 tsp instant yeast
4 tsp sugar
1/2 tsp salt
3 tbsp butter
For the filling -
1/2 cup cottage cheese / paneer
1/4 cup packed mint leaves
4 tbsp shredded cheese
1/2 tsp chilli powder
1/2 tsp cumin powder
a pinch of salt

What you do with it -

In a bowl, add the warm milk, warm water, butter, sugar and yeast and stir gently
In a large bowl, add the flours and salt
Make a well in the flour and pour in the yeast mixture
Knead for about 6-8 mins till a smooth elastic dough is formed
Place in a greased bowl and cover with cling wrap
Keep it in a warm place for about one and half hours or till it doubles in size
Meanwhile, crumble the cottage cheese and add the grated cheese to it
Chop the mint leaves really fine and add to the cheese
Add the spice powders and salt
Combine and set aside
Once the dough has risen, punch it down and divide it into two balls
Dust the surface with flour and roll out the ball of dough into a rectangle. Use a pizza cutter to cut the sides and get a rectangle shape
Place the filling on the rolled dough leaving about half an inch on each side
Start form the longer end and roll the dough to get a long pipe shape with the filling tucked inside
Turn the two ends towards each other and pinch the ends together to form a circle
Make slits at every 2 cms, a little more than halfway to the centre
Turn each slit to the right
Place a few sesame seeds on top and brush the bread with milk. Cover with a thin cloth and allow it to rise again for 15 mins
Pre-heat the oven to 200 C
Place the tray with the bread in the middle rack and bake for 25 mins
Brush with butter once its done.The stuffing has enough spice, but if you like, you could serve this with ketchup or a chutney


Monday, June 30, 2014

Komaj | Persian bread stuffed with dates

When I tried logging into my blogger account today, I actually needed a minute to remember my password. Either my memory is really failing me, or its been that long since I wrote a post. I know I enjoy cooking / baking and blogging, but some somehow the last couple of months, I just haven't been able to get myself to blog.

I am a part of this group called 'We knead to bake', started by Aparna of My Diverse Kitchen where we are given a new bread recipe every month. The fact that I might be out of that group if I skipped another month of baking made me finally get down to baking and posting. I'm glad there is some such rule, otherwise knowing me, I wouldn't get beyond the first month.

komaj5

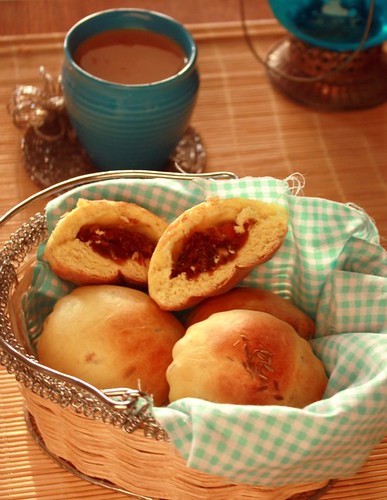
This month's recipe was Komaj, a Persian bread stuffed with dates. It involves 3 rises of the dough and sounded like a lot of work, but its actually quite simple. The stuffing is a lovely combination of dates, butter and cardamom. The dough also has a lot of Indian spices like turmeric and cumin. I was a bit skeptical about the combination of these very different flavours, but my love for dates made me try this and I'm glad I did !

openkomaj5

Have it as soon as you bake it and its wonderfully soft and delicious. The dates used are the dehydrated ones, but once baked, they almost melt in your mouth

Thanks Aparna for introducing us to this lovely bread. This bread is being Yeastspotted !

Komaj | Persian bread stuffed with dates

What you need -

Dough -
1 tsp instant yeast
1/8 cup warm water
3 3/4 cups APF / maida
2 1/2 tsp toasted and crushed cumin seeds
1/4 cup granulated sugar
1/2 tsp turmeric powder
1/2 tsp salt
1 egg (optional)
2/3 cups warm milk + 2 tbsp
1 1/2 tbsp olive oil

Filling -
12 seedless dried dates, chopped
1 tbsp butter, softened
1/2 tsp powdered cardamom
1 - 2 tbsp milk for brushing the dough

What you do with it -

If you use active dried yeast, dissolve the yeast in the warm water and keep it aside for 10 minutes till it froths up a little
I used instant yeast, so skipped this step and added it straight to the flour
Put the flour, 2 tsp of the crushed cumin, sugar, turmeric and salt in the bowl of your food processor and run a couple of times to mix. Then add the yeast, water and the egg and run the processor again, till it is incorporated.
Now add the milk and olive oil, and knead until you have a smooth and pliable dough that’s not sticky. I kneaded a little more milk that mentioned in her recipe. So added 2 tbsp of milk.
Shape the dough into a ball and place in a well-oiled bowl, turn to coat the dough and then cover with a damp cloth and let it rise till it has doubled (took me about 45 mins)
When the dough has risen, deflate it and then shape into a round. Put it back in the bowl for a second rise till it has doubled (another 45 mins).
Prepare the filling by mixing together the chopped dates, soft butter and cardamom together in a bowl.
Divide the dough in to 4 equal portions, and divide each in half so you have 8 portions. Working with one portion at a time, roll each one out into a rectangle that is about between 1/4" thick. I used a cookie cutter with a flower shaped edge that made the komaj look like a little tart !
Press it down lightly to make an impression on one half of the rectangle and add a tsp of the filling there

Brush with a little water over the dough and then fold over to encase the filling completely. Use the same cookie cutter and cut the dough. Press at the edges so the filling doesn't pop out during baking

Repeat with the remaining portions of dough. I got about 14 komaj since my cookie cutter was a little small.
Place these buns on a lightly greased baking tray leaving space between them because they will puff up on baking. Let them sit for about 15 minutes.
Pre-heat the oven to 200 C. Then brush them with a little milk / egg wash and sprinkle the remaining ½ tsp of crushed cumin on top, pressing it down a little with your fingers
Bake the Komaj at 200C (400F) for about 8 to 10 minutes
Allow them to cool slightly and serve with a cup of tea !

Tuesday, February 25, 2014

Pita bread

Bread baking was something I never imagined myself doing. It seemed like such a big task, with the proofing, kneading, rising, baking, browning...But after I baked my first ever bread, a pretty fail-proof focaccia, I was hooked to it. The most satisfying part is that the wonderful aroma of fresh bread that spreads all over the house. I've heard that kneading the dough can be therapeutic, but with the daily roti-dough kneading which is more a chore that I'd happily have someone else to do for me, this bit did seem a bit over-rated !

pita

I've always wanted to bake my own pita bread and it seemed like the simplest of things to bake, considering it was very much like an Indian flat bread / roti that I am used to making on a daily basis. The first time I made it, it didn't fluff up at all and it was really disappointing. I guess I had missed out on the temperature settings, which are really crucial here since the bake time is not more than 5 minutes. So I gave this a try this time around, baking it for Aparna's We Knead to Bake #14, where we could choose to bake anything we liked.

pita with hummus8

My son is over eager when the camera is out and insists on clicking pictures himself or arranging the setting. He was rushing around acting really busy with the camera dangling on his neck and looking for 'props'. I didn't want to spoil the fun for him, but I really had my heart in mouth, wondering just when that camera would crash into something. the only way I could get the camera back was by telling him that I needed to take a picture of him with the pita bread. Phew ! So here's a pic with him (and his big hands) holding the pita pockets

pockets

Serve the warm pitas with hummus or fill the pita pockets with falafels and some salad. Recipe for hummus coming up next

This is being YeastSpotted

Pita Bread
Recipe Source - The Kitchn

Makes 6-8 small pitas

What You Need

1/2 cup warm water (not too hot to the touch)
1 tsp instant yeast
1/2 tsp sugar
1.5 cups maida / APF
1/2 tsp salt
1-2 teaspoons olive oil

What you do with it-

In a bowl, add the flour, sugar and yeast. Slowly pour in the warm water into this and stir
Add the salt and oil and start kneading it. I prefer working with the dough on a clean counter-top
Add a little flour if it gets too sticky and knead till it forms a smooth dough
Place this in a well-oiled large bowl and allow it to rise for an hour or so, till it doubles in size
Once its rise, punch it down and then divide into 8 small balls
(At this point, the dough can be refrigerated in a cling wrap if its not going to be used rightaway)
Using a rolling pin and a little flour, flatten the ball to form a small round (about 3" dia and 1/2" thick)
Pre heat the oven along with the baking tray to 220 C or 450 F
Place the rolled-out pitas directly on the baking tray / baking sheet and bake for about 3 minutes
The pita will start to puff up after a minute or two
You can also bake them on the stove top using a skillet. You will need to flip over the pita and cook on both sides if using the stove-top method
Keep the baked pita covered in a clean cloth
Serve immediately to really enjoy the fresh and fluffy pita
Serve with some hummus or use the pita pockets and stuff with falafels and some salad

Friday, January 24, 2014

Focaccia Caprese | We Knead to Bake #13

I joined this group called 'We Knead to Bake' started by Aparna of the lovely blog, My Diverse Kitchen. I had to wait almost an entire year to get into this group, so this is really the first one I am baking with them, but their 13th.
It always fun to bake in a group, even if the group is a virtual one ! Its inspiring and you feel good about being in the company of some fantastic bakers and more importantly, people who like baking.

focaccia caprese

Aparna gives us a recipe each month and this time its Focaccia Caprese. This needed Mozzarella and fresh tomatoes. Here in Ahmedabad, the dairy products are really good, not surprising considering Amul is about an hour away from here! There is this other place called 'Jain Dairy', which has amazing dairy products. I got the mozzarella from there and it was fantastic !
Bread baking can be simpler than the regular Indian cooking, once you get the hang of the yeast beast. Thankfully, I've had a pretty good working relation with the yeast and so we get along just fine. What's made life easier is that I discovered instant yeast, thanks to Sayantani and Suma. Its a dream to work with, no worries about the proofing, just a fairly sunny day and you're set ! I've even tried it on a gloomy rainy day and it still worked fine.

This focaccia has this really aromatic herbed oil which gives it a great flavour, along with mozzarella and fresh tomatoes. Its a great recipe and it you are yet to begin baking with yeast, this is a great start. Focaccia is the easiest of breads and tastes great.
I baked mine for a minute or two more to allow the cheese to melt a little more. The one with the slightly melted cheese got chomped in minutes and I had no time to click the pictures. This one was made to my son's taste, who didn't want to see so much cheese!

focaccia800

This is being Yeastspotted !

Focaccia Caprese

Recipe Source : Aparna of My Diverse Kitchen, adapted from The Kitchen Whisperer

What you need -

For the dough :

2 tsp instant yeast
1.5 tbsp sugar
3.5 cups maida (I did not have vital gluten, used plain flour)
1 tsp salt
1/4 cup olive oil
1 to 1 1/2 cups warm water
A little more olive oil for brushing dough

For the Topping:

4 large tomatoes sliced
1 small round of fresh mozzarella
a few fresh basil leaves

For the Herbed Oil:

1/4 cup olive oil
1 tsp dried oregano
1 tsp dried basil
1/2 tsp red chilli flakes
1 tsp finely minced garlic/ paste
Salt to taste

Fresh basil leaves for garnishing

What you do with it -

To make the herbed oil, add all the ingredients listed under herbed oil and whisk well. Set it aside.

In a large bowl, add the yeast, sugar, flour, salt and oil. Combine and add 1 cup of warm water and knead until you have a soft elastic dough. I knead it on my kitchen platform (thats been scrubbed clean). Its much easier this way for me.

Grease a bowl with a little olive oil and place the dough in it. I tend to apply a little oil over the top of the dough too. Then cover the top of the bowl with a cling wrap. From my experience with breads so far, this works better than covering it with a thin cloth. Allow it to rise in a warm place. This could take between 40 mins to an hour

Once the dough has risen, divide it into 2,3 or 4 parts, depending on what size you want. If you are not using it all, wrap the unused dough in cling film and refrigerate it. Bring it to room temperature and then proceed. I used this dough to make 3 medium sized focaccia. I made 2 first, refrigerated the remaining dough, after the first rise and made the next one a day later. It turned out just as good.

Pre-heat the oven at 200-210 C

Roll out the dough or just use your hands to stretch it to the shape you want, it really doesn't matter. I prefer rectangle or oval. Place the dough in a greased baking tray. Allow it to rise for about 20 mins. the dough gets pretty springy at this stage. Oil your fingers slightly and then make little 'dimples' in the dough, that are fairly well-spaced. Grease the top of the dough with oil

Bake for about 15-20 mins till the sides are golden brown. Take it out of the oven and raise the temp of the oven to about 230 C

Using a spoon, pour the herbed oil over the focaccia and then place slices of mozzarella over it. Top the mozzarella with tomato slices. Bake for another 5-10 mins, till the cheese has melted. Remove from the oven and top with fresh basil leaves
We had this with minestrone soup for dinner and again for breakfast the next day, freshly baked, of course!

Thursday, April 18, 2013

Corn stuffed bread rolls

Ever since I saw this stuffed bread roll on Sara's Bake tales, I was itching to bake it. The recipe looked simple enough and I decided that a simple filling of corn, tomatoes and capsicum would work really well with this

stuffed bread

Since it was really hot in Ahmedabad, it hardly took any time for the dough to rise. I had left it by the light that streaked into through the glass windows of my balcony. When I went back to check on this, there were ants all over the bowl. Summer is a difficult time, dealing with the heat and these ants. They had gone right through the dough. Its just so frustrating when you are waiting to try something out and then something as silly as this happens !

bread roll slices

I just had to bake this and eat it that day, so I dumped the entire dough in the bin and started all over again. Since it was close to 5 in the evening, I was a little worried about the dough rising again, but it all worked out fine. I made two 8" size rolls with this dough and really enjoyed it

Sending this to Susan's Yeastspotting

Corn stuffed bread rolls
Adapted from Sara's Baketales

What you need -

For the dough

1 cup (250gm) flour / maida
1.5 tsp instant yeast
1/2 tsp salt
1 tsp sugar
2 teaspoons sugar
2 tbsp olive oil
1/2 -3/4 cup lukewarm water
1 tbsp butter for brushing over the loaf

For the filling

1 cup corn kernels
1/2 cup chopped capsicum
1 medium sized tomato
1 small onion
3 tbsp grated cheese
1/2 tsp crushed pepper
1/4 tsp salt
1 tsp oregano / Italian seasoning
1/4 tsp chilli flakes
2 tbsp olive oil

What you do with it -

Take the flour in a large bowl
In a bowl of water water (1/2 cup), sprinkle the yeast, salt, sugar and a spoon of olive oil
If using dry yeast granules, wait for it to froth up a little and then pour over the flour
With instant yeast, you can add it to the flour immediately
Knead the dough, adding little more water, only if required
Make the dough in a large ball and add the remaining olive oil
Place in a greased bowl and cover with cling film or a thin cloth
Keep aside for about 456 to 2 hours depending on how warm it is
Get the filling ready while the dough is rising
Heat a tsp of olive oil in a pan
Add the onions and capsicum pieces
Stir on high heat for 2-3 mins and then add the corn kernels
Once the corn is slightly cooked, add the tomatoes and all the seasoning, salt and pepper
Keep aside and allow it to cool
Once the dough has doubled in size, punch it down and knead for 2-3 mions on a floor dusted area
Roll into a 10"x 8" rectangle, sprinkle a little olive oil over it
Sprinkle the filling evenly over the top, about an inch away from the sides and then roll it up gently, using both your hands
Fold in the edges under the roll and roll it on the surface to smoothen out the edges, as evenly as possible
Make a few narrow gashes on the roll with a sharp knife
Place it on a greased baking sheet and allow it to rise for another 15-20 mins
Pre heat the oven at 180 C for about 10 mins
Bake at 180 C for 15-20 mins
Once its done, brush with a little butter and wait for it to cool slightly before you cut it

Wednesday, April 3, 2013

Grape and raisin flatbread (Vegan)

Food blogging is so much more than just blogging about food. It connects you to this whole new universe of people who are so passionate about cooking, baking and sharing it with the rest of the world. It has helped me learn so much about cooking, photography and nicest part has been getting to know like-minded people, even if they lived on the other side of the globe.

Thanks to the various interesting groups on facebook, I got to know Anusha of Tomato Blues and I was thrilled to know of a food blogger who is just a few hours drive from here. She asked me if I am interested in joining a group called Groovy Gourmets on facebook. They select a blog, book or recipe every month and you can choose what you'd like to make from it. Everyone then posts it on the 3rd of the following month.

grape and raisin focaccia

This month's theme was something vegan from Roxana's home baking.
There are plenty of black grapes in the markets now. Beautiful colour, seedless and delicious. I was contemplating making a grape focaccia for the longest time and then saw this on Roxana's blog.

Sticking to deadlines is something I manage to do, though most of the times, it happens a few minutes before the deadline. I finally baked it for breakfast this morning. Had it with cheese slices and the fig preserve that I made a couple of weeks back. The smell of freshly baked bread in the morning is something I would love waking up to, just that in my case I am the one who has to wake up and bake it...

focaccia slice

Working with a starter looked very daunting, and I had very little time on hand, so I made a few changes and thankfully, it all worked out in the end. Here's the link to Roxana's recipe and here's my version

This yeast beauty is off to Susan's Yeastspotting

Vegan grape and raisin flatbread

What you need -

1/2 cup whole wheat flour
3/4 cup maida / APF
1 tsp instant yeast
1 cup lukewarm water
1/4 cup olive oil
pinch of salt
1 tsp sugar
1/3 cup raisins
a few fresh black grapes

What you do with it -

In a large mixing bowl add the flours and the yeast along with the salt and sugar.
Pour the warm water over it and stir it in with a wooden spoon
Add 1/2 the olive oil and grease your fingers and gently mix in the flours to form a sticky dough
Add in the raisins and mix once more
Preheat the oven to 180 C
Transfer to a greased bowl and allow it to rise in a warm place till it doubles in size
Once the dough has risen, punch it down and shape it into a little circle
Dimple the dough with a few fresh black grapes and allow to rise for another 15-20 mins
Bake at 180 C for 15-20 mins or till the top turns golden brown
Let it cool for a couple of minutes and then enjoy it with butter, cheese or a preserve

Thursday, August 16, 2012

Basil and cherry tomato focaccia

Yesterday was Indian Independence day. My son had to go to school for the flag hoisting, and then we watched the movie Gandhi that was showing on TV here.
That movie manages to inspire me, irrespective of the number of times I've watched it. At some points in life, Gandhi-ism, as a concept may seem a little irrelevant, with all the greed, ego clashes and violence that goes on all around the world. A person who worked selflessly for his nation is something we find hard to understand in today's generation, where each one believes that the world revolves around us.

My 6-year old had a lot of questions for me while watching the movie and I hope he manages to imbibe something from Gandhi's life and learn some of the selflessness and dedication of the many freedom fighters who fought for the India's independence.

Since its a National holiday, TH was also at home. I wanted to bake something and decided on this lovely focaccia I had seen on SJ's facebook page. She led me to this link on Sara's page. Thank you SJ and Sara, this turned out so good !

cherry tomato focaccia

I followed the recipe for the dough from Sara's page but changed the toppings a bit. I have this eternal problem of the crust never really browning enough. I am guessing its got something to do with the fact that I use the convection mode of my microwave to bake. Maybe an OTG will solve the problem. I've been postponing buying one only because I want to be really sure I will use it that much. But considering I bake at least once a week, I think I should go ahead.

focaccia4

I have narrowed down on the 40L OTG from Morphy Richards. I have read up many discussions on various fb groups and this seems like a good option. If you do own this one, do let me know how you like it or if you own any other brand that you think is good, please drop in your suggestions here. I'd love to have some options.

focaccia3

My son has never been fussy about food and now he has started enjoying watching food shows on TV. Masterchef Australia is one of his favourites. When I make something that looks a little fancy, he tells me 'Mamma, this is a Masterchef dish !' His friends' moms are always happy to have him over since he is full of praise for their food !
This one according to my little critic was a 'Masterchef dish'

focaccia1

This goes to Susan's Yeastspotting

I don't know how, but I seem to to have lost all the food pictures in the first 50 odd posts - all these were directly uploaded into blogger. Its a good chance to make these again and put up the pics, but if you know how I could possibly recover them, do let me know. I had the pics on a older laptop that crashed, so no saved copies either.

I made chow chow over the weekend and updated the post with that pic. Take a peek here

Basil and cherry tomato focaccia
Recipe source - Bake tales

What you need -

1 cup APF / maida
1 tsp instant yeast (I used gloripan)
1/2 tsp salt
1/2 tsp sugar
1 tbsp olive oil
1/2 cup lukewarm water

Topping
1 sliced onion
a few basil leaves
1/4 cup mozzarella
10-15 cherry tomatoes, quartered
sea salt
crushed pepper
2-3 tbsp olive oil

What you do with it -

In a large bowl, add the flour and mix in the salt and sugar
Make a well, pour in lukewarm water, olive oil and sprinkle yeast over the top
Bring it all together to form a ball of dough. It will be a little sticky, but that's fine
Knead using the base of your palm. Stretch the dough, roll it back, do a quarter turn and stretch it out again. As you work the dough, it will tighten up and become soft and springy
Knead for about 10 mins and then place in a greased bowl, cover with cling wrap and leave in a warm place till it doubles in size. It should take about an hour. I left mine for close to two hours, because it was pretty cloudy here.
Punch down the dough to expel all the air bubbles. Place it on a dusted worktop and cover with the bowl for about 10 minutes.
Press the dough down and roll it using a rolling pin, into the shape of the pan you are using. I made a 9" x 9" square
Grease the pan, place the dough into it and stretch to fill up the pan around the corners. Cover and allow to rise for 10-15 mins and then dimple with dough with your fingertips
Place the sliced onions and the cherry tomatoes on the dough. Tear the basil leaves and sprinkle over this. Crush the sea salt and sprinkle over the dough, along with the ground pepper
Make pieces of the mozzarella and scatter over the toppings. Drizzle the olive oil over it
Pre-heat the oven to 200 C and then bake for 20-22 mins, till its done
Allow to cool for a few mins. Slice and serve hot.

Friday, August 10, 2012

Fruit purée and raisin loaf

The last couple of weeks have been really crazy. My domestic help seems to have disappeared and its been really difficult. I hate the fact that I am so dependent on help, but its really been tough managing all the work at home, alone. And the worst part is that all this cleaning, washing and cooking feels like such a thankless job. The daily routine just gets to me somedays. I really miss my work life, my friends and family back in Bangalore.
I get into this mode sometimes, and I sit and wonder what I am really doing with my life. Then the routine takes over, before I realise and I am hardly left with time to think about it all.

I decided to bake my blues away and came up with this delicious healthy loaf

fruity loaf5

It basically started off as a banana loaf, but then I added a pear and an apple and realised that I had a whole bag of raisins stashed up, so wanted to use that too.
I often use fruit purée as an egg substitute when I bake muffins or loaves. It adds great flavour, cuts down on the fat and is definitely healthier !
I used this purée of bananas, pear and apples to make this really moist raisin loaded loaf.
Hopefully it will help me get my life back in perspective.

fruity loaf 2

What you need -

2 small bananas
1 pear
1 apple
1 cup raisins
1 cup APF / maida
1 cup wheat flour
1 cup brown sugar
1/2 cup milk
4 tbsp unsalted butter
1 tsp baking powder
1 tsp baking soda

What you do with it -

Peel the apple, bananas and pear and chop into pieces.
Blend to a puree with the sugar and a little milk, if required
Melt the butter and add it to the puree
Pre-heat the oven to 180 C. Line a loaf tin with parchment paper
In a bowl, sieve the flours along with the baking powder and baking soda
Roll the raisins in the flour, so its coated well. This helps it from sinking to the bottom while baking.
Mix the dry ingredients with a spatula and add to the purée. Add as much milk as required to get the batter smooth enough.
Combine and pour into the prepared loaf tin
Bake for 45 mins at 180 C
Allow it to cool for 10 mins before you slice it

Thursday, July 19, 2012

Baked Doughnuts


For many years during my childhood, baking always meant a nice little home made chocolate cake. Ma had a standard fail-proof chocolate cake recipe that always worked well... I remember her making it in a gas-top oven and we filled sand in a plate at the bottom of the oven. Slowly the electric oven replaced it and we perhaps experimented with some variations, but almost always stuck to cake when it came to baking.

Pizza bases, bread, cupcakes were always something we bought out, I don't think we ever felt the need to bother making it ourselves, when it was always so easily available off the shelf...All this until I started reading food blogs and eventually started this one...Okay, I don't bake that much, but I definitely attempt baking a whole lot more than cakes now.

baked doughnuts with toppings

Doughnuts were something I first had at Hot Breads, the first cool looking bakery that opened up many years back in Bangalore...Chocolate coated doughnuts that looked absolutely delicious ! That was our special treat when Ma and me went shopping on Commercial street...

I was super excited when I tried baking these at home, didn't want fried ones, so used Aparna's recipe for the doughnuts, but baked them instead

I had attempted making these a couple of months back, and had a problem with the size of the doughnuts. It took forever, trying to bake these in my small oven.
This time around, it turned out much better. I bought this mini doughnut cutter when I was in Bangalore last time and the little doughnuts shaped up really well

baked doughnuts

I did have a some apprehensions about how the baked ones would taste, but I really needn't have worried. They were really soft and delicious. I made two topping for these doughnuts, I glazed the doughnuts with some warm butter and then pressed it down on a mix of cinnamon, vanilla sugar and dessicated coconut.

doughnuts with cinnamon and coconut

I did a chocolate topping with some sprinkles for the kids. I was a bit lazy and did not want to make the chocolate glaze, when I had this box of chocolate icing from my lamingtons. The chocolate was dripping off the sides, not that the kids complained, but just that it doesn't look so neat

chocolate coated doughnuts

This goes to Susan's Yeastspotting

Baked Doughnuts
Adapted from My Diverse kitchen

What you need -

5 cups APF / maida
1.5 cups milk
1/3 cup butter
2.5 tsp instant yeast (Gloripan / angel)
1 egg
1/4 cup granulated sugar
1 tsp salt

Coating
2 tbsp melted butter
1/2 cup dessicated coconut
2 tbsp vanilla sugar
2 tsp cinnamon powder

For the chocolate topping, I used the chocolate icing remaining from the lamingtons, which was not such a great idea. Check here for Aparna's beautiful chocolate glaze

What you do with it -

Warm the milk in a pan, keep two tablespoons of milk aside and add the butter to the rest and allow it to melt.
Sprinkle the yeast over the milk and then add it to the milk-butter mixture
In a large bowl, beat the egg and add it along with the sugar and salt to the milk-butter mixture
Add about 2.5 cups of the flour to this and mix well using a spatula, till the flour is incorporated
Add 2 more cups of flour and mix well. If the dough is too sticky, add little more flour and mix well. I used about 4.5 cups of flour for the dough.
Dust your palms with flour, and shape the dough into a ball. Keep in a greased bowl and allow it to rise for about 1 1/2 hours.Place the risen dough in the fridge for another hour or so till it is almost double in volume.
Dust your work surface with flour and place about quarter of the dough on it. Roll it out using a rolling pin and till it is about 1/2" thick. Use the cutter and cut out as many as you can from that dough. Repeat with the remaining dough
Pre heat the oven to 190 C. Place the doughnuts on a lightly greased butter paper and bake for 10-12 mins.
Allow to cool and then glaze them
Mix the dessicated coconut, cinnamon powder and vanilla sugar well and spread in a plate
Brush the doughnuts with some melted butter and then press it on the coconut-cinnamon-sugar topping
Goes great with some hot coffee or tea.

Wednesday, July 4, 2012

Walnut and Fig Loaf


There's an eternal fight for the TV remote at home - I'm not a part of it though, I gave up long ago. TH and my son are the warriors here and I just sit thru the endless news channels or the cartoon ones, depending on who won !
Ever since Masterchef Australia started screening here, we have peaceful TV viewing time. The little fellow is hooked on to it and has his favourites in each series, TH loves anything to do with food and I am more than happy to sit and watch something of my interest.

walnutfigloaftitle

When I saw Phillippa Grogan teach this walnut and fig loaf at the Masterclass, I was really tempted to try it. I don't have a regular oven, I just use the convection mode of my microwave to bake, and its been okay so far, but I never get that lovely browning when I bake bread. I decided to give this a shot anyway. I had a lot of figs (dried) and walnuts at home, so this was my afternoon experiment yesterday.

The browning was definitely not enough, but I did land up with a chewy crust. I used the tip of placing ice cubes in a try below. I placed a small ovensafe bowl with ice cubes under the baking rack.

I pretty much followed the recipe, (though that's asking for too much with me, I seem to have a problem sticking to measurements and following recipes to the exact detail) but I goofed up in a couple of places, though it wasn't disastrous

I landed up using extra wheat flour, since the dough got a bit too sticky (I'm guessing the water was little too much) and I needed the flour to get it into some shape. The bread was a slightly dense, or maybe I expected it to be lighter, but the figs in it tasted really nice.

The other mistake I made was that I put it in a plate with semolina during the first proofing (I just didn't read the recipe right) and so when I had to punch it back the next couple of times, the semolina got added into the dough. It wasn't such a bad idea after all, the coarse grains added a bit to the texture of the crust, but you may not want to do that.

I used APF / maida for the white unbleached flour in the recipe. The pre-heating is way faster in a microwave, so the one-hour of pre-heating did not happen, neither could I leave the door partially open in the last five mins

Other than that, it turned out to be a nice loaf. We had it for breakfast again this morning, some slices with cheese, some with honey and butter and another with orange marmalade. Tasted lovely. Thank you Phillippa.
Head over to the recipe here.

This is being Yeastspotted and sent to Let's Cook #17 - Breads at Ticking Palates

Tuesday, June 12, 2012

Mango loaf

During my visit back home, I managed to meet up with three friends who I only know through food blogs and facebook. We've commented on posts, 'liked' stuff on fb, but never really met. I met Geetha of Fragrant kitchen, who is a super creative baker and makes some amazing cake decorations, Suma of Cakes and More, who would love to bake every single day if she could and SJ of Masala Vade, who is seriously super fun !

mango loaf

It felt a little strange at first, since all I knew about them was through their blogs or fb updates. I knew that food always helps to bond better and it turned out to be so wonderful meeting all of them
I met Geetha at her place and she was busy decorating fondant animals for a little girl's birthday. Had a nice time chatting away with some tea and chocolate muffins loaded with nuts
Met Suma at Coffee Day and chatted away for hours, discussing baking, blogging, kids, family,...everything. She gifted me a bunch of vanilla beans that she had got from Kerala
SJ invited my son and me for lunch and had a huge spread ready. The kids played and we chatted away. Had a really great time...

Over the weekend, SJ asked me if I would be able to bake Dorie Greenspan's fresh mango bread, and I was more than willing. I tried my best to follow the recipe, but along the way, I made my own substitutions, and fortunately, landed up with one moist mango-ey loaf !

mango loaf slice

Here's a slice for you...

Mango Loaf
See original recipe here

What you need -

2 cups chopped mangoes (I used 2 badami mangoes)
2 eggs
1/2 cup mango puree (I used the kesar variety)
3/4 cup oil (I used safflower)
2 cups APF / maida
3/4 cup sugar
1/4 cup brown sugar
1 tsp baking powder
1 tsp baking soda
1 tsp ground cinnamon
1/2 tsp ground cloves
1 tsp zest of lemon
1/4 tsp salt
1/2 cup raisins

What you do with it -

In a deep bowl, mix the flour, sugars, baking powder and baking soda, clove powder, cinnamon powder and salt
Whisk the eggs, oil and mango puree, till it all comes together. You can skip the mango puree. I had it on hand and it made the loaf more moist
Pour the wet ingredients over the dry and mix till it blends well. In this recipe here, she mentioned that the batter will be more like dough, which it was, but the puree helped in bringing it all together
Add in the mango pieces, raisins and zest

Pre-heat the oven to 180 deg C and line a loaf pan with parchment paper. Leave a little extra paper coming out from the pan on all sides. Grease the paper, dust it with flour and pour the batter into it. I have tried this the last few times I baked bread in the loaf tin. It helps to keep the shape intact when you take the loaf out and also keep the loaf pan pretty clean
Allow to bake for about 80 mins or till done. I use the convection mode of my microwave to bake, so timing may vary with a regular oven. If the loaf starts to brown too much, cover with foil halfway thru the baking time
Allow it to cool for 5 minutes, then pull up the loaf using the edges of the parchment paper
Cut the loaf once its cooled to room temperature
Works great for breakfast with a cup of hot tea

Wednesday, April 18, 2012

Stuffed Buns / Aloo Buns / Potato Buns

Bakeries seem to be something very unique to Bangalore, or perhaps to the states in the South of India. I don't mean the fancy ones with croissants, macarons, cheesecakes, etc...I am talking about the ones with khara biscuits, masala bread, puffs, egg rolls and buns with different stuffing !
Anyone from Bangalore would know exactly what I mean. The residential localities are dotted by such bakeries, dishing out these goodies at a really reasonable price, all through the day...

Potato Buns

Here, in Gujarat, you get a lot of snacky food, made mainly of chickpea flour / besan like ghantiya, fafda, sev in various flavours, but I haven't come across any bakery that sells buns with filling, masala bread and those lovely puffs...
For me, the bakeries in Bangalore really rock !!

open bun

There is this 'Iyengar bakery' right down the road from my Ma's place..When I was working back in Bangalore, during the monsoons, I would go straight to the bakery and pick up these aloo buns / potato stuffed buns and then call Ma and tell her I am on my way and she would keep the tea ready. Savouring these buns with the hot chai and a nice conversation with my Ma was just the perfect thing to do on a rainy evening.
Its quite obvious that these buns mean so much more to me than just a snack, and I never miss a chance to go pick them up every time I visit Bangalore

aloo buns

I have been raving about these Iyengar bakery special aloo buns to my friend here for a while now. I've been wanting to try these from this recipe on Champa's blog, but have been postponing it. Finally got down to making these yesterday, when my friend was here. They turned out really well and I was pretty happy with the browning too, which has been a big challenge in my convection microwave oven.

stuffed buns

I am leaving for Bangalore in a couple of hours, and will get to eat these there again, but for all of you who love the aloo buns of Bangalore, give this recipe a try, its almost like the real deal !

Sending this to Susan's weekly YeastSpotting

Aloo Buns
Recipe source - Champa's Versatile Vegetarian Kitchen

Here's my slightly modified one

What you need -

For the stuffing

3-4 medium size potatoes
6-7 green chillies
1" piece ginger
1 tbsp oil
a handful of chopped coriander leaves
1/2 tsp mustard seeds
a pinch of turmeric powder
salt to taste

For the dough

1 cup APF / maida
2 cups wheat flour (or use any other combination of flours to make 3 cups)
1.5 tsp instant yeast
1 cup warm milk
2 tbsp oil
2 tsp sugar
1 tsp salt
4 tbsp melted butter

What you do with it -

For the stuffing -
Boil the potatoes, peel and mash coarsely
In a pan, heat the oil and add the mustard seeds, allow to splutter
Add the green chillies, chopped ginger and the turmeric powder
Add the mashed potatoes and sprinkle some water over it
Add salt and allow to cook for 3-4 mins
Add the chopped coriander leaves
Turn off the heat and keep it aside

For the dough

Add the salt and sugar to the warm milk
Stir in the flours, oil and yeast and knead well
If using dry yeast granules, add it to the warm milk with the sugar. Allow it to proof. Once the water gets bubbly, add the flours
After kneading for about 5 mins, add the melted butter and knead again for 3-4 mins
The dough turns a little springy at this stage
Cover with a damp cloth or a cling film and allow it to rise in a warm place for about 45 mins to an hour
Once the dough has risen, punch it down and knead for 2-3 mins
Then make equal size balls. I got about 14 such balls
Grease a pan with some oil
Flatten each ball and roll it out with your palm
Add a ball of the stuffing and then cover the dough from all sides and seal it
Repeat with all the dough and place the stuffed dough with the seam side down in the greased pan
Allow it to rise for another 30-45 mins
Keep the dough balls spaced apart, so that they don't stick to each other as they rise
Pre-heat the oven to 180 C and place the pan in the oven
Before you pop them into the oven, brush the dough with some melted butter and milk
Bake for about 20 mins
Brush with butter again if you'd like and enjoy it with a hot cup of tea !

Wednesday, January 4, 2012

Strawberry Scones and my blog is 3 !

Yes, my blog is 3 !! I can't believe I have been at it for 3 years...I am famous for taking up an interest with great enthusiasm and then one day, sooner than I'd like, its gone, just like that. Finito.

Morning walks, gymming, learning a musical instrument, dance, music, and too many others to remember...They all begin with a great determination and interest and I almost see myself like a pro in whatever I take up, but then the speed at which the interest declines surprises me (I guess those who know me are not so shocked or surprised anymore)

I must really like cooking and blogging (I really do), that's the only reason its seen me this far...3 years may not be such a big deal, but going by my history, its huge !!

strawberry scones

I've really enjoyed trying out new recipes from different books, blogs and some cookery shows in these three years. Substituting with what's available locally, slight twists and tweaks to the original recipes to suit my tastes, its been fun all along !

Here is one of those that I perhaps only read about in Enid Blyton books. Most of Blyton's books would have these grandmothers baking cakes, cookies and scones for their tea time, sunlit tables with a dainty tablecloth, vase with flowers - it all sounded just so beautiful...

I had never tasted scones till I tried baking these savoury ones with chives

For my blog's 3rd birthday, I have some seriously healthy strawberry scones for you. I had made some candied orange peels last month and added some of those along with the strawberries. This recipe is adapted from Indira's beautiful blog Mahanandi with a whole lot of changes
The wheat flour made it a bit dense, and more cake like, but the strawberries in between made up for it !

Thank you all for reading my blog...Its what keeps me going...Have a great year ahead !

Strawberry Scones

What you need -

1 cup maida / APF
1 cup whole wheat flour
4 tbsp brown sugar (add 1 tbsp more if you like it sweeter)
a pinch of salt
2 tsp baking powder
1/4 tsp baking soda
3 tbsp chilled butter, chopped into pieces
1 cup chopped strawberries
3-4 tbsp candied orange peels, cut into small bits
1/2 to 3/4 cup youghurt

What you do with it -

Sieve the flours, baking powder and baking soda
Add the salt and sugar to it
Add chopped butter. If the temperature is warm, please keep the butter in the fridge till you need it
To this flour mixture, add strawberries and candied orange peels
Add the yogurt gradually and mix to form a tight, sticky dough. Fold in gently and knead for 2 mins
Turn the dough out onto a floured or greased parchment paper covered baking sheet and press it out into a big round till its about 1/2 to 1 inch thick
I used my hand to flatten it out since the dough was too delicate to be rolled out
You could grease a rolling pin and roll out the dough to the required thickness
Preheat the oven to 220 C or 425 F. When the oven is ready, place the baking sheet and bake for 15-20 mins
The crust is crisp and the inside is soft. Slice into triangles and serve hot

Friday, December 16, 2011

No-Knead Multigrain Bread

With me, the baking attack always seems to strike in the cooler months and late in the evenings ! Its like a recipe for disaster with the yeast, and I have had some very disastrous bakes, but I don't give up very easily and I tried baking this bread at about 6 in the evening in winter! Thanks to the wonderful instant yeast and to this brilliant recipe by Suma of Cakes and More, I landed up with a really nice loaf of bread !

multigrain bread

Big thanks to Sayantani too, who was sweet enough to let me know that she had tried this brand of instant yeast and that it worked really well, no proofing and it made the dough rise, in any weather condition ! I had my mom pick it up for me in Bangalore and send it across to Ahmedabad !
The process of baking bread takes a minimum of 3-4 hours, but this was really fast. Start to finish in less than 2 hours, which I think is great by bread baking standards !

multigrain bread

I had picked up this multigrain flour by Pilsbury, which contains whole wheat, soy, oats, maize, raagi (finger millet), chana dal(bengal gram) and barley. I use it to make my rotis at home, and was very keen to try making bread with this flour. The temperature here has dropped quite a bit now and I started the process at about 6 in the evening,so I was really nervous if it would rise at all, but it turned out really well. Suma says that this bread doesn't really rise too much and I did use a largish loaf pan, so it was a flat, short bread, but tasted very healthy !

To add to the health quotient, I also threw in some sunflower seeds, pumpkin seeds, flax seeds and sesame seeds into the dough

Warmed this the next morning and had it with some orange marmalade and a cup of hot tea - perfect breakfast for a cold morning

Suma's directions are very precise and I tried to stick to it as much as I could, but had a few changes. Check here for her recipe

Sending this to Yeastspotting, Susan's weekly event for yeast breads

Multigrain Bread

What you need -

1 cup lukewarm milk
1/4 cup fresh orange juice
2 tbsp oil (I used sunflower oil)
1 tbsp honey
2 tbsp maple syrup (Use 2 tbsp of honey instead)
2 tbsp mixed seeds (sunflower, pumpkin, flax and sesame)
2 tsp instant yeast (I used Gloripan)
1 tsp salt
3 cups multigrain flour
3-4 tbsp water (if required)

What you do with it -

I used a 9 x 5 loaf pan, but a slightly smaller one should work better
Line with pan with parchment paper and grease really well
In a deep bowl, mix together the honey, yeast, warm milk, orange juice and the oil
To this, add the flour and salt and mix well using a hand mixer for 3 minutes
Add the seeds and mix well once more
Add the water, a spoon at a time, to make this dough really sticky and wet
Transfer the dough to the greased pan. Grease you hands with some oil and then smooth the top of the dough
Cover with a greased cling film wrap. Allow the dough to rise to the rim of the pan
This took about 45 mins
Pre-heat the oven to 180 C and bake for 45 mins
Allow to cool completely and then slice
Again, as she mentions, this is not a very high rising bread and since my loaf pan was bigger than the prescribed size, it did turn out quite short and flat

Monday, October 17, 2011

Eggless Banana Bread

I buy bananas almost every other week, mainly for my son - its a big energy boost and that sees him thru his non-stop activities thru the day
Unfortunately, I always land up with one or two overripe ones and nobody in the house will touch these bananas if they have more than a few black specks showing up, so I am always on the lookout for some interesting recipes using bananas
Have tried the muffins many times over, so this time went in for the banana bread that I saw on the RedChillies blog...

eggless banana bread

The bread was moist and tasted really good, not overly sweet and did not have the banana overpowering the taste...

Recipe Source - Redchillies.us

Followed the recipe except for a few changes, my version here...

What you need -

3/4 cup maida / APF
3/4 cup wheat flour
1 tsp baking soda
1/4 teaspoon salt
3/4 cup brown sugar
3 ripe bananas
1/3 cup milk
4 tbsp unsalted butter
1/4 tsp cinnamon powder
1/4 cup raisins
1 tbsp almond paste (6 almonds, soaked in hot water, peeled and ground to a paste)

What you do with it -

Preheat the oven to 180 deg C
Mix the maida, wheat flour, baking soda, sugar and salt in a large bowl
In a blender make a paste of bananas along with milk
Add the banana mixture and almond paste into the mixing bowl with the dry ingredients
Add the butter and the cinnamon powder and mix well
Add the raisins to this mixture
Grease a loaf pan and pour the batter into it
Bake for 45 minutes at 180 deg C
Cut into thick slices and enjoy with your coffee, tea or milk !

Wednesday, March 2, 2011

Pesto and Sun-dried Tomato Bread - Arusuvai Season II

This was the first time I tried braiding bread !! I have braided my hair, myself, almost all thru my school life, but when it came to braiding with these strips of dough, it was surprisingly confusing ! I guess I was so used to doing it with my hands behind my head, that with these in front, it was actually confusing !!

This bread had a lovely flavour, and we had it with some pasta for dinner..

braided bread

Here's a little story behind this...I received a parcel that had some dried active yeast...

The first time I read about Arusuvai,(a friendship chain between food bloggers in India) was on Miri's blog...

This was a really nice concept that was started off by Lathamma, Bharathy and Srivalli.
It was all about sending a 'secret' ingredient to another blogger, who then figured what it was and made something with it, and then in turn, sent some other secret ingredient to other bloggers. It was like a chain that carried on for a while between a lot of food bloggers in India.
Honestly, I felt quite sorry for myself, since I never was part of this chain. I was just about getting active with blogging then..


Thankfully, Sayantani of A Homemaker's Diary has now revived this chain with Arusuvai Season II and I was more than happy about it and signed up rightaway.

I waited (impatiently) for my parcel to arrive. There's something about the words 'secret / surprise', that brought back the child-like eagerness, to wait for the parcel
I got mine from Veena of Kitchen Celebrations, and it was a packet of yeast with a cute little card, a mixing bowl and 2 fruit bowls...I was really happy to see this big box waiting for me...
Thank you Veena, for these lovely gifts..

arusuvai

I have baked bread before, but wanted to try this braiding, and this was a fun experiment ! Sending this to Yeastspotting

Recipe Adapted from the book 'Baking', By Martha Day

What you need -

3.5 cups flour (I used 2.5 cups wheat flour and the rest maida/AP flour)
1.5 tsp yeast
1.5 tsp sugar
1 - 1.5 cups warm water
1 tsp salt
1/4 tsp ground pepper
2 tbsp chopped sun dried tomatoes
2 tbsp pesto (I used basil-almond pesto, on the lines of this one)
1 tsp coarse sea-salt

What you do with it -

Take one cup of the warm water and pour into a bowl. Sprinkle the yeast granules over it. Add sugar and mix well. Leave aside for 10-15 mins
Once you see the yeast getting all frothy, you know you are ready to go with the next step
Put the flour into a large mixing bowl. Add salt and pepper.
Make a well in the centre and add pour in the yeast mixture
Add the chopped sun dried tomatoes and the pesto
Gradually mix in the flour to make a soft dough. Add more warm water if required
Transfer the dough to a floured surface and knead well for 5 mins, till is is smooth and elastic
Return to a clean bowl and cover with a damp cloth and set aside in a warm place for about 2 hours, till it doubles in volume
Grease a baking sheet and set aside
Once the dough is all risen, transfer to a floured surface and knead again for a few minutes. Divide the dough into 3 equal pieces and roll to form 3 sausage shape pieces
Dampen the end of the three pieces, press down at one end and then loosely braid it. Dampen the other ends and press together to complete the braid
Place on the baking sheet and cover with the damp cloth again for about 30 mins, till it has risen well
Preheat the oven to 220 deg C
Sprinkle the braid with coarse sea salt
Bake for 10 mins and then lower the temp to 200 and bake for a further 15-20 mins
Cool on a rack and enjoy with a salad, soup or pasta

Sunday, February 7, 2010

Buttermilk Scones with Garlic Chives

The first time I had ever tasted scones were at Miri's place years ago...I remember they tasted really nice, but she doesnt remember ever making them !
Incidentally, Miri was in town for a training last week and managed to squeeze in few hours to meet up, almost everyday, which was so great for me, considering I barely have any friends here in Ahmedabad.
She was here when the scones were made and she liked them, so I am guessing I got it right !

I couldn't remember if the ones I had tasted earlier were flaky, crisp, bread-like, biscuit-like, but I liked what I finally came up with...

scones and tea

Looked up a whole lot of recipes in the blogging world and in my books...
I have this book called 'Baking' by Martha Day, that had this recipe for scones, using buttermilk. The idea of using chives was from Parita's sping onion scones

I had a few garlic chives ('hara lasan'/greens from fresh garlic), and here again its the first time I've ever used them. Its available here in winter and is used in the famous Gujarati 'undhiyu'.
Most scone recipes used cheese for the savoury ones, but I intended keeping them as low fat as I could, so skipped the cheese.
The buttermilk (from the churned out home made butter) was buttery enough, so cut down on the additional butter and these turned out to be a nice, light snack.
I got some really helpful tips from JoyOfBaking one of which said that if you used buttermilk, it took slightly longer to bake, gave a more light bread-like scone, with a crisp crust and tender inside...

scones

The chives gave it a mild garlic flavour, and the pepper and chilli powder added to the spice factor...The crust was crisp and inside, it was soft and tasted absolutely great when eaten hot !
I'm sure they would taste good with a nice hot soup too, but couldn't wait till dinner time, so had this with a cup of hot tea instead.

What you need -

2 cups wheat flour
2-3 stalks of garlic chives
1 tsp baking powder
1/2 tsp bicarbonate of soda / baking soda
1 tbsp cold butter
upto 1/2 cup buttermilk
1 tsp chilli powder
1 tsp fresh ground pepper
1 tsp salt

What you do with it -

Preheat the oven to 220 deg C. Grease a baking sheet / pan
Combine the flour, baking powder and baking soda
Rub in butter using your fingertips till it resembles breadcrumbs
Now add in the chopped garlic chives and salt to taste
Gradually, pour in the buttermilk as required and make a soft dough (softer than the one used to make rotis)
On a floured surface, roll out the dough to about 3/4 inch thick
Sprinkle chilli powder and crushed pepper powder on the rolled out dough
Using a sharp knife, cut the dough into 8 wedges, like a pizza or use cookie cutters to make little rounds
Bake this at 220 deg C, for about 30 mins

Wednesday, July 15, 2009

Spinach bread and Pesto Pasta

Last week, Ahmedabad finally saw some rains...Its almost like a desert here, hot, real hot dry summers and the winters are short, but quite cold.
Monsoon is not an official season here, it cant be, because it lasts for about 2-3 days..Last year, it rained for a day, the entire day, but that was it...complete dry spell after that

The hot weather here is great for baking, only because the yeast comes up beautifully, otherwise, the entire house feels like an oven. Temperatures are around 41 C - 44 C, for at least 4 months in a year and it just doesnt seem to be the right time to bake anything

Spinach bread

This particular day, it was sunny, but there was a lovely breeze, I decided to put my yeast to test again, made this spinach and cheese bread. By evening, the winds were really strong and in the apartment I live in, you could hear eerie sounds of the wind go thru the columns...It started pouring and went on for about 3 hours

Made this pesto pasta to go with the bread, sat out in our balcony and enjoyed the lovely weather, while muching on the bread and pasta. S was back home early and the change in weather was really welcome. I think this was the first day that I enjoyed being here.

Pasta

For the Pesto Pasta

What you need -

2 medium sized tomatoes
3 cloves garlic
2 cups of pasta / spaghetti
1/2 tsp salt
1 tsp red chilli flakes (optional)
2-3 tbsp milk

Pesto
1 1/2 cup packed, cleaned and chopped coriander
1/2 cup walnuts
4 cloves garlic
1/4 cup cheese
1 tsp olive oil
1/2 tsp salt
1/2 tsp pepper corns

What you do with it -

Grind together all the ingredients under Pesto to a smooth paste, without adding any water. Add more olive oil if required.
Add salt to water and bring to boil. Cook pasta in it as per instructions on the packet
Chop the garlic and tomatoes
Add a little olive oil in a pan and add then the garlic
Add in the pesto and stir, adding spoonfuls of milk
Add the pasta, salt and chilli flakes
Add tomatoes and turn off the heat
Add grated cheese over the pasta if you like

(You could substitute the coriander with spinach / basil)

Spinach Bread

This one is adapted from this wonderful book 'Baking' by Martha Day, which has well-explained simple steps to baking and great for a beginner like me
Skipped the bacon and use wheat flour instead of the AP flour

Sending this to Yeastspotting, hosted by Nick of imafoodblog this week

What you need -

4 cups wheat flour
1 1/2 cups water
1 onion
2 tsp active dry yeast
1 tsp sugar
2 cups chopped spinach
1 tbsp olive oil
1 1/2 tsp salt
1/4 cup grated cheese

What you do with it -

Put water in a bowl, sprinkle yeast and add sugar
Mix and allow to proof for 10-15 mins
Heat oil in a pan and fry the onion
Add the chopped spinach to this and stir till the spinach is cooked and dry
In a large bowl, add the flour and salt
Make a well in the centre and pour the yeast mixture
Add the onions and spinach and knead to make a soft dough, using a little more olive oil if required
Cover and keep aside for about an hour or till the dough has doubled
Grease a pan / loaf tin
Punch the dough down and knead lightly and transfer to the greased tin and allow to rise again for about 30 mins
Sprinkle the grated cheese over it
Preheat the oven to 200 C / 400 F
Bake the loaf for 25-30 mins. Transfer to a wire rack to cool

Monday, May 4, 2009

Not really a "Foot Long"

Bakeries are very popular here in Bangalore, and have been around ever since I remember, but till about 15-20 years back, they weren't so many hip ones that served up croissants, fancy breads, pastries and exotic looking sandwiches.

They were more the 'Iyengar' bakery types that had fresh bread, puffs, cakes with pink and green icing (!!), buns with various fillings and the open bread sandwich which has a slice of bread, with a topping of carrot, onion, chillies and coriander -a pretty popular snack and cream rolls, which was my all time favoutire.
There is also this disc shaped pastry filled with coconut and cherries and called 'dilkhush', which translates to 'happy heart' !! Ma bought it last week for old times sake and my dil was really khush
For the ones who are not familiar with 'Iyengar bakeries', Iyengar is a Brahmin (vegetarian) community in South India and I am not sure how many bakeries were owned by Iyengars, but people felt they were in safe vegetarian hands if they bought from an Iyengar bakery and so the term is still very popular.


The nicest bakery at that time was 'Nilgiris' and 'Sweet Chariot'.
Then came the spanking new and hip 'Hot Breads' - I must have been in school that time and it was a very very popular place to hang out, order cakes, buy some nice fancy bread, croissants, cheese cakes...
They had this really nice bread called 'footlong'. Like you must have guessed, it is a roll which is a foot long. The bread was generally spiced with some herbs/garlic or chillies.


When I made the broccoli and pasta bake the other day, I made a footlong(thats more the name, it really wasnt a foot long) with onions, garlic, herbs and roasted tomatoes. Made thick slices and toasted it with some garlic salt and butter...


What you need -

1 tbsp yeast
1 tbsp sugar
1 cup lukewarm water
1.5 cups maida / flour
1.5 cup whole wheat flour
1/2 tsp salt
3 tbsp olive oil

Filling and Topping

1 tbsp oregano
2 onions
3 cloves garlic
1/2 tsp salt
1/2 tsp crushed pepper
1 firm tomato sliced
1 tbsp olive oil

What you do with it -

In a bowl, stir together yeast, sugar and the lukewarm water and proof yeast for 10-15 minutes, or until foamy.
(I had made my last bread in a really hot weather and here, its nice and pleasant and yeast just wouldn't foam up, so I pre heated the oven to 180 deg C and turned it off and kept the bowl of yeast in it)
Stir in flour and wheat flour, 1 tbsp olive oil and the salt, adding as much of the flour as necessary to form a soft and slightly sticky dough
Transfer to a lightly-oiled bowl, cover with cling film or a muslin cloth and let it rise in a warm place(popped it in the over again) for 1 hour until double in size
Meanwhile, chop the onions and garlic lengthwise
In a small pan, heat a tbsp olive oil and fry the onions and garlic
Add the oregano, crushed pepper and salt
To make up for sun dried tomatoes, I cut slices of the tomato, add some oregano, sprinked a pinch of salt and some olive oil
Grilled it for 10 mins in the oven at 200 deg C
Once the dough has risen well, knead it down and press with lightly-oiled hands
Fold in the roasted onion mix, leaving a little for the topping
Make into a long roll and place it on a greased pan
Keep this for about 30 mins till it rises again
Preheat oven to 180 degrees C. Set rack in center of oven.
Smear a bit of olive oil on top of the dough and sprinkle this fried onion mix on it
Place the tomato slices on the roll and bake for 30 mins

Saturday, March 28, 2009

Spiced Pumpkin Bread and Potato Mushroom stew

It was another of those weekdays, when I was done with my work, little one was asleep and S was working late.
I wanted to make something different, something interesting - the boredom of seeing the same vegetables was getting to me. I didnt have the most interesting vegetables, other than mushrooms, (my vegetable vendor always gives me this - i seem to be his only customer for mushrooms in this area) and I had decided I will not go out buying any more, because I was well stocked, but I didnt want to cook anything that I had made earlier..

Scanned the 'fridge, surfed for recipes, rummaged through recipe books, looked thru my grocery, but still couldnt make up my mind about what I wanted.
After spending close to an hour on this fairly mindless searching, I decided on making the pumpkin bread, but i knew i didnt want it sweet.
I had to use up the mushrooms too, before they got blackish in colour - i like them really clean and as white as possible.

Tweaked around with the recipe i saw here and came up with this really nice spicy pumpkin bread. The fennel seeds and mustard gave it a really nice taste


Made a mushroom and potato stew to go with it - i had always made the Indian 'ishtew' with coconut milk, but wanted this one to be really different - the dinner turned out really good - i was terribly apprehensive about my 'different' menu, but S and I enjoyed it so much, that I have promised myself to make these 'different' menus more often


What you need -

Spiced Pumpkin bread

1 cup wheat flour
1 cup oatmeal (I used quick cooking oats and powdered it in the blender)
1/2 teaspoon of salt
1 teaspoon baking soda
2 cups pumpkin pieces
1/2 cup olive oil
2 eggs beaten
1/4 cup water
1/2 teaspoon powdered cinnamon
1/2 tsp fennel seeds
1/2 tsp mustard powder
1/2 cup chopped walnuts

What you do with it -

Make a purée of the pumpkin. I scooped out the seeds and the peeled the skin and microwaved the pumpkin pieces in 1/2 cup water for about 7 mins and then mashed the pieces with a fork
Mix, in a large bowl, the wheat flour, oatmeal, salt and baking soda
Preheat oven to 180 deg C
Mix the pumpkin, oil, eggs, 1/4 cup of water, cinnamon powder, mustard powder
Combine with the dry ingredients (Do not beat / blend)
Stir in the nuts and fennel seeds
Pour into a greased loaf pan
Bake 30-3 minutes until a thin skewer poked in the very center of the loaf comes out clean
Turn out of the pan and let cool on a rack

Mushroom Potato Stew

What you need -

15-20 mushrooms
2-3 medium potatoes
1 onion
4-5 pods garlic
1 stick cinnamon
1 tsp oregano
1 tsp mixed herbs
1/2 tsp crushed pepper
1/2 tsp red chilli flakes
2 tbsp olive oil
1 cup stock / water
1/2 tsp salt

What you do with it -

Wash the mushrooms well and chop in 4 quarters
Peel and chop potatoes into cubes
Chop onion into big chunks and chop garlic lengthwise
In a deep pan, heat the olive oil
Add cinnamon, onions, garlic and stir till onions are translucent
Add mushrooms, potato cubes, salt and pepper
Fry till the mushrooms are done, then add water or stock and cover till potatoes are cooked
If its too watery, mix a tsp of flour / cornflour in water and add to this to thicken
Add the oregano and mixed herbs and the chilli flakes
Adjust salt if needed

Sending the spiced pumpkin bread recipe to BBD#18-Quick Breads hosted by Mansi of the Fun and Food Blog

LinkWithin

Related Posts Widget for Blogs by LinkWithin