Merry Christmas to all of you !
May this festive season bring peace, happiness and love in your lives...
I baked my first Christmas cake thanks to Nags, who posted this link, and Swapna who posted this very detailed recipe for a delicious Christmas cake
I took the picture above in a real rush before our friends came over for a Christmas eve dinner...The cake was moist and tasted really awesome, and the picture doesn't do any justice to how good this cake was !
Update : This picture was taken the next day, when we had some cake and tea at leisure...
The soaked steamed fruits made the cake really rich and the rum in it made it quite heady :)
We had a small Christmas tree, with some lights around it and stockings with gifts for the kids... They were so excited and waited till midnight to see Santa...Of course, we sneaked in and put in the gifts...
Its lovely at this age they are at, when they truly believed that Santa came in thru the window with gifts for them...
Christmas isn't really big here in Ahmedabad, but we wanted the kids to understand and appreciate the celebration of all faiths
I followed her recipe exactly as given, so am not posting it here again. Here's the link to her Christmas cake
Sending this to "Jingle all the way", event hosted upto 31st December
Have a wonderful Christmas !
Sunday, December 25, 2011
Wednesday, December 21, 2011
Paneer, Babycorn Stir fry with Kasuri Methi
I've always liked cooking, though before I was married, it was just an occasional fancy sounding dish, once in a while and I'd never bothered with the basics like roti, dal, sabji...
After I got married, with both of us working really long hours and fairly far from home, we lived off Maggi(instant noodles), omelettes, bread, butter and jam and invariably landed up at Ma's place for dinner and ate out on weekends !
The regular LPG cylinder used for cooking, which lasts about 28-30 days now, lasted for about 11 months, so you get the idea !! I think we had a party when it finally got over, and we got the cylinder replacement :)
Over the years, I got more interested in trying out various cuisines and only after starting my blog, did I really attempt baking and trying out dishes that I hadn't even heard of before
I tend to rely on blogs more than cookbooks, when I am trying out something for the first time. There is so much information on how to go about the dish, the potential mistakes, substituting local ingredients and of course, the fact that these recipes are tried, tested and tasted !
This is one really simple, quick dish that also looks pretty because of the colours of the vegetables used. The main ingredient that contributes to the flavour here is kasuri methi / qasuri methi, which is dried fenugreek leaves. They have a bitter taste and a characteristic smell. Used in small quantity, these leaves enhance the flavour of any dish...
Here it is used with cottage cheese / paneer and baby corn, which on their own, really do not have any distinct taste or smell
I hope to put up more recipes which are simple to make and something that new cooks can easily make...
Paneer, baby corn with kasuri methi
What you need -
10-12 baby corns
150 gms cottage cheese / paneer (10-12 long slices)
2 onions
2 medium size tomatoes
1 green bell pepper / capsicum
1 yellow bell pepper (feel free to use any coloured pepper instead)
1 tbsp kasuri methi
1 tsp salt
1 tsp lemon juice
1 tsp cumin seeds
1 tbsp oil
1/2 tsp cumin powder
1/2 tsp red chilli powder
1/4 tsp amchur powder
1 tsp sliced garlic
coriander leaves to garnish
What you do with it -
Cut the baby corn into half and then slice into 4 lengthwise
Blanch in salted water for 7-8 mins or put them in the microwave for about 3-4 mins
This is important because baby corn doesn't cook as fast as the other vegetables used here
If the paneer is frozen, allow to thaw and then cut into long slices. Heat water and then put the paneer pieces in it and simmer for 3-4 mins and keep covered
If the paneer is fresh, just dip in hot water for 2-3 mins
Cut the peppers, tomatoes and onions lengthwise
In a pan, heat oil and then add cumin seeds and kasuri methi
Add the sliced garlic and fry for 2 mins, then add the onions and peppers and saute till the onions become translucent
Add the baby corn, cumin powder, chilli powder, amchur powder and salt
Add the tomatoes and paneer and saute on high heat for 2 mins
Lower the flame and cover for 2 mins and take it off the heat
Garnish with coriander leaves and sprinkle some lemon juice over it
Serve hot with rotis
Friday, December 16, 2011
No-Knead Multigrain Bread
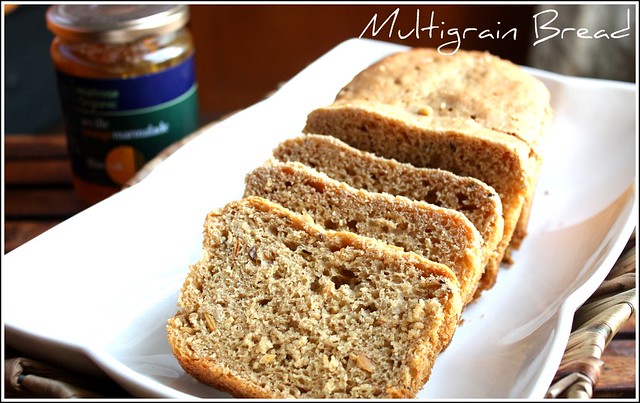
With me, the baking attack always seems to strike in the cooler months and late in the evenings ! Its like a recipe for disaster with the yeast, and I have had some very disastrous bakes, but I don't give up very easily and I tried baking this bread at about 6 in the evening in winter! Thanks to the wonderful instant yeast and to this brilliant recipe by Suma of Cakes and More, I landed up with a really nice loaf of bread !
Big thanks to Sayantani too, who was sweet enough to let me know that she had tried this brand of instant yeast and that it worked really well, no proofing and it made the dough rise, in any weather condition ! I had my mom pick it up for me in Bangalore and send it across to Ahmedabad !
The process of baking bread takes a minimum of 3-4 hours, but this was really fast. Start to finish in less than 2 hours, which I think is great by bread baking standards !
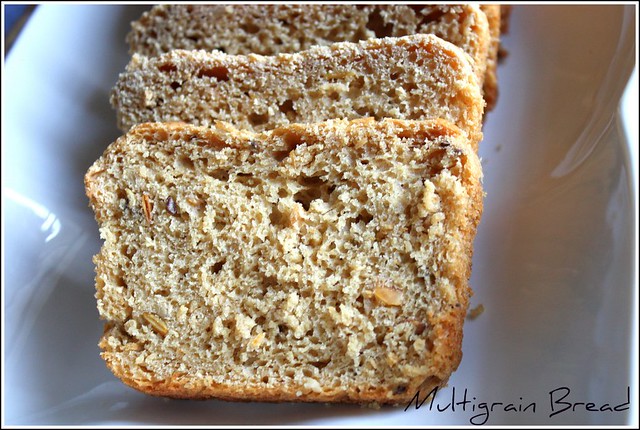
I had picked up this multigrain flour by Pilsbury, which contains whole wheat, soy, oats, maize, raagi (finger millet), chana dal(bengal gram) and barley. I use it to make my rotis at home, and was very keen to try making bread with this flour. The temperature here has dropped quite a bit now and I started the process at about 6 in the evening,so I was really nervous if it would rise at all, but it turned out really well. Suma says that this bread doesn't really rise too much and I did use a largish loaf pan, so it was a flat, short bread, but tasted very healthy !
To add to the health quotient, I also threw in some sunflower seeds, pumpkin seeds, flax seeds and sesame seeds into the dough
Warmed this the next morning and had it with some orange marmalade and a cup of hot tea - perfect breakfast for a cold morning
Suma's directions are very precise and I tried to stick to it as much as I could, but had a few changes. Check here for her recipe
Sending this to Yeastspotting, Susan's weekly event for yeast breads
Multigrain Bread
What you need -
1 cup lukewarm milk
1/4 cup fresh orange juice
2 tbsp oil (I used sunflower oil)
1 tbsp honey
2 tbsp maple syrup (Use 2 tbsp of honey instead)
2 tbsp mixed seeds (sunflower, pumpkin, flax and sesame)
2 tsp instant yeast (I used Gloripan)
1 tsp salt
3 cups multigrain flour
3-4 tbsp water (if required)
What you do with it -
I used a 9 x 5 loaf pan, but a slightly smaller one should work better
Line with pan with parchment paper and grease really well
In a deep bowl, mix together the honey, yeast, warm milk, orange juice and the oil
To this, add the flour and salt and mix well using a hand mixer for 3 minutes
Add the seeds and mix well once more
Add the water, a spoon at a time, to make this dough really sticky and wet
Transfer the dough to the greased pan. Grease you hands with some oil and then smooth the top of the dough
Cover with a greased cling film wrap. Allow the dough to rise to the rim of the pan
This took about 45 mins
Pre-heat the oven to 180 C and bake for 45 mins
Allow to cool completely and then slice
Again, as she mentions, this is not a very high rising bread and since my loaf pan was bigger than the prescribed size, it did turn out quite short and flat
Wednesday, December 14, 2011
Moroccan chickpea soup with harissa
Winter has finally set in, in my part of the world !
It was really sunny and hot till the weekend, but on Sunday the temperatures really dropped...My little one heads off to school really early in the morning and we now have to bundle him up in his woollens...The days are pretty warm, but the evenings get really chill
Made Moroccan chickpea soup with harissa and some thyme roasted potatoes to go with it, for dinner last night
There's this lovely restaurant for Mediterranean food here in Ahmedabad called Souq, which we have been frequenting regularly since they opened. Had this chickpea soup here for the first time and loved it - everything on their menu is really really good !
Last month I was in Bombay for a few days and on one of our shopping sprees, my cousins and I landed up in Moshe's thrice in one day ! Its a lovely cafe, that serves Mediterranean and some super awesome desserts !! We first went to the one that's in the Fab India store at Kalaghoda. While one cousin was helping an uncle with his shopping, the other one and I chatted endlessly about food ! We then ran up to the Moshe's there and picked up some kiwi and green apple jam and a bottle of harissa...
We went to another Moshe's for lunch and the third for dessert after our shopping had drained us out and we needed the sugar rush to keep us going !
Harissa is a hot chilli paste, popular in North African cooking. Add it to pasta, soup, couscous to make a spicy tasty difference. This can be made at home
With this store bought harissa on hand, I decided on the chickpea soup with harissa. Got the recipe from OneTribeGourmet, a blog that's a visual treat !
Moroccan Chickpea soup with harissa
Recipe Source - One Tribe Gourmet
What you need -
1 cup cooked chickpeas / kabuli chana / garbanzo beans
3 cups of stock (I used the liquid from cooking the chickpeas)
1 small onion
5-6 cloves garlic
2 tomatoes / 6-8 ripe cherry tomatoes
1/2 tsp saffron threads
1/2 tsp roasted and powdered cumin seeds
1/2 tsp chilli powder
1/4 tsp black pepper powder
1/2 tsp salt
4 tbsp olive oil
1 tsp harissa sauce
1 tbsp lemon juice
1/4 cup chopped cilantro / coriander leaves
What you do with it -
Soak the chickpeas overnight in a pot of water and then cook in pressure cooker / stove top
Drain and reserve the water
Chop the onion, garlic and tomatoes
Heat 2 tbsp olive oil in a deep pan
Add the garlic and onion and saute until translucent
Add the cumin powder, saffron threads, salt, pepper and chili powder
Saute for 2 mins and then add the tomatoes
Add the cooked chickpeas along with the stock or the water the chickpeas were cooked in
Mix well and cover and allow to simmer for about half an hour
Add chopped coriander lemon juice and let it simmer for 10 more minutes
Use a hand held blender to pulverize the chickpeas but don't mash it up completely
Spoon into the soup bowls and garnish with coriander leaves, lemon wedges, a spoon on olive oil and a tsp of harissa sauce
Serve hot !
Thursday, December 8, 2011
Bhubhus Roti / Sweet puri / Mangalore buns
TH loves anything sweet and these are a favourite. Its called Bhubhus roti in Konkani and famous as buns in Mangalore. Its more like a sweet banana-flavoured puri. I've made these after ages, though everytime there is an overripe banana, TH suggests I make these !
Yesterday, I finally gave in and made these and he really enjoyed them, along with our son, who has inherited his sweet tooth !
Surprisingly, banana happens to be optional in the original recipe, though I can't imagine these without that lovely banana flavour. This recipe if from Rasachandrika, the complete Saraswat cookery book...This book was gifted to me when I got married and I have really used it so much over the years - if you'd like to try cooking authentic Konkani food at home, this one is extremely useful...
Bhubhus Roti
Recipe Source - Rasachandrika
What you need
1 overripe banana
2 cups maida / all purpose flour
1/2 cup curd
1/2 cup powdered sugar
a pinch of salt
1/2 tsp baking soda
2 tsp ghee (clarified butter)
oil for deep frying
What you do with it
Mash the banana. Add the flour, sugar, salt and baking soda
Then add ghee and curds and mix well
The dough gets very sticky, but that's how its supposed to be
Cover it and set aside for an hour (I left mine for 4 hours)
Divide the dough into small balls and roll out the dough into a small thick round
Heat oil in a deep pan and deep fry the puris till golden brown
These can be made and stored in an air-tight box for about 4-5 days
Wednesday, November 30, 2011
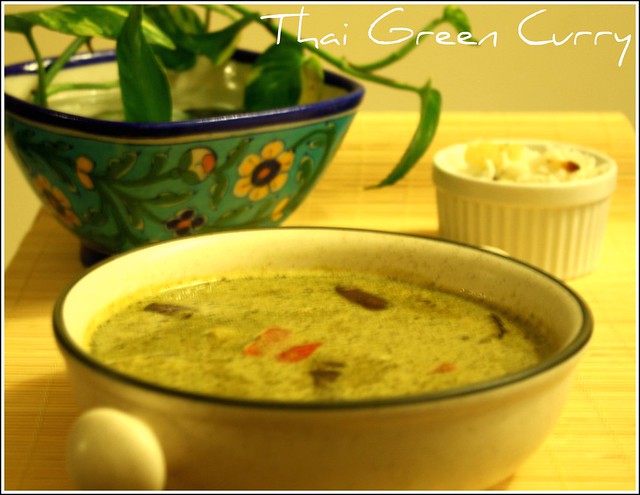
Thai Green Curry with Pineapple Basil Rice
Thai is one of my favourite cuisines, mainly because of the beautiful balance of flavours, spice, sweet, sour and coconut milk...
Back in Bangalore, we had quite a few restaurants serving really awesome Thai food, but here, I have had it at two places where they had added besan / chickpea flour for thickening the dish - it was a disaster. I prefer my home cooked Thai food now !
This may not be considered authentic enough, because it doesn't have galangal or kaffir lime leaves, but if you crave Thai curry and you don't have access to these ingredients, this is as good as the real deal...
A nice, flavourful Thai green curry can easily be made with these ingredients which are quite common in any Indian kitchen.
Thai Green Curry with Pineapple basil rice
Recipe Source
For the curry - Adapted from Neeta Mehta's Thai Vegetarian Cooking
For the rice - A good friend in Bangalore
What you need -
3-4 small eggplants
1 large red pepper / capsicum
(You can also use mushrooms, green peppers and yellow peppers)
1.5 cups thick coconut milk
1/2 cup water
1 tsp soy sauce
1 tsp salt
1-2 tsp sugar
2 tbsp oil
3-4 stalks of lemon grass
For the curry paste:
1/2 onion chopped
5-6 green chillies
1 tbsp chopped garlic
1/2 piece ginger / galangal (if you find it)
1 tbsp lemon juice
rind of 1 lemon
1 tbsp coriander seeds
1 tsp cumin seeds
1 cup fresh basil leaves / 1/2 cup coriander leaves
(I used 1/2 cup coriander leaves and 1/2 cup basil leaves)
Pineapple Basil Rice -
1.5 cups basmati rice
2-3 slices of pineapple (canned or fresh)
2-3 cloves of garlic
1/2 tsp salt
3-4 leaves fresh basil
What you do with it -
For the curry paste :
Roast the cumin and coriander seeds till fragrant
Add all the ingredients listed under 'curry paste' and grind to a fine paste using a little water
For the rice :
Clean the rice and soak in water for 10 mins
Cut the pineapple slices into bite size pieces
Tear the basil leaves
Chop the garlic into thin slices
In a large pot, add 3 cups of water and bring to boil, add the rice, garlic, basil, pineapple and salt and cook till done
Add a drop or two of sesame oil, so the rice doesn't get too sticky
You could also put all the ingredients with the water into a rice cooker and cook till done
For the curry :
Clean and chop the eggplants and the peppers and the mushrooms, if using
Heat 2 tbsp oil in a large deep bottomed pan and add the curry paste and fry for 2-3 mins. Keep it on a low flame, or the paste might splatter
Add the vegetables and fry for another 3-4 mins
Break the lemon grass stalks into 2-3 pieces and add to the pan
Add the salt, sugar and soy sauce
Dilute the thick coconut milk with water and add to the pan
Allow to simmer till the vegetables are just cooked. Don't let the vegetables get too soft or mushy
Take out the lemon grass stalks from the curry before you serve
Serve hot with pineapple basil rice
Want some other Thai dishes ? Check here, here and here
Monday, November 28, 2011
Eggless Butterless Chocolate Cupcakes
My little boy turned six last week and on Saturday, we had a party for him at home. Called about 16 kids, all 6 year olds, mostly boys, some totally destructive ones, others plain naughty !! You can just imagine what my house looked like after that !!
My cousin and another friend were here to help around with the cooking, we decided on making everything at home, including the cake ! My son is a huge fan of Chhota Bheem, an animation TV serial hero, who is 9 years old and super strong !!
We decided on a Chhota Bheem cake, the recipe used for the eggless chocolate cake, is from my previous post and my creative cousin did all the icing to make it really look like Chhota Bheem ! We used chocolate shavings, icing sugar, butter and some almond meal (when we needed to thicken it, for the eyes). Its not a smooth complexion and he looks slightly tanned, but my son loved it, and that's all mattered :)
We also had fries, macaroni in cheese sauce, frooti, sandwiches, steamed and buttered corn and these mini chocolate cupcakes...
I searched around that morning for the recipe and found this here, its a brilliant recipe and came about so easily !
I slathered on some homemade buttercream icing on the cupcakes and then decorated with little sugar animals and some sprinkles...I would have loved to do some really pretty icing, but this was my first attempt with icing, and with kids, I knew I wouldn't be judged on the way the icing looked !!
The cupcakes were really soft and moist, and all this without butter !!
I followed the recipe exactly as she says, so I am not rewriting it here. Please take a look at this link for the cupcake recipe
Thank you so much !!
Tuesday, November 22, 2011
Eggless Chocolate Cake with Ganache
It felt quite funny to put up this recipe just after an egg curry !! I mean, why would I make an egg curry and then an eggless cake ? Honestly, I really never bothered with making eggless cakes, not till I moved to Ahmedabad. Most people here do not eggs for religious reasons and really, its no fun to make muffins and cakes and not share them, right ?
I got this recipe from my friend here, when I needed to bake an eggless cake for my son's class party at school. If you've always wanted to, but never tried an eggless cake, you should try this, you will not miss the eggs at all...Its really soft, and keeps well for 2-3 days, without refrigeration. I have made this many times now, and this particular one was for my son's friend, for his birthday last week. My son was all excited about decorating it. So I made the ganache and he did all the decorating...
This friend who gave me the recipe is a great cook and comes up with interesting dishes. She has started her own food blog, which I hope will be updated more often !
This is a really simple cake and it tastes awesome...add the ganache and it takes it to another level altogether !!
What you need -
For the cake -
1.5 cups maida / APF
3 tbsp cocoa powder
1 tsp baking powder
1 tsp baking soda
1/2 tsp salt
1 cup powdered sugar (you can cut down to 3/4 of a cup, if you are using a ganache)
3/4 cup curd / yoghurt
3/4 to 1 cup milk
vanilla essence / extract
6 tbsp melted butter
For the ganache -
6 tbsp cream
10 tbsp grated chocolate (I used Morde dark chocolate)
What you do with it -
Sift the flour, cocoa powder, baking powder, baking soda and salt in a bowl and keep aside
Pre-heat the oven to 180 deg C
Beat the butter with the sugar. Add the curd and the vanilla essence and mix well
Then add the dry ingredients, 1/2 cup at a time and the milk and beat till you use up all the flour mix and milk
Grease a baking tin with butter and dust with some flour
Pour the batter into the tin and bake for 30-35 mins at 180 deg C
Once its done, allow it to cool
Heat water in a large pan. In a smaller bowl, add the cream and the chocolate and hold it above the pan, so the small bowl is just immersed in the hot water. Mix the chocolate and cream with a spatula, till it turns to a thick smooth sauce
Once the cake is cooled completely, pour the ganache / chocolate cream sauce over it and ensure it covers the entire cake
Allow it to cool - you can refrigerate for an hour or so
Add decorations or eat as is :)
Saturday, November 12, 2011
Mangalorean Egg Curry
I just realised a couple of days back that I haven't made an egg curry in over a year, which is very strange because I really like it. Eggs have only got into some cake or muffins, and maybe some breakfast omelettes over the last one year !
I decided I just had to have egg curry for dinner and called up Ma for her recipe. She gave me this one. Its typically Mangalorean - its got coconut, red chillies, tamarind and coriander seeds, which is a standard base for so many Konkani dishes...
Had it with steamed rice and a salad and it felt like such a perfect meal...
What you need -
4 eggs
1/2 cup grated coconut
4-6 red chillies
1 stick cinnamon
3 cloves
1/2 inch piece ginger / 1/2 tsp ginger paste
3 cloves garlic
1 tbsp coriander seeds
1 tsp cumin seeds
1/2 tsp tamarind paste
5-8 curry leaves
1 medium onion
1 tomato
1 tsp mustard seeds
What you do with it -
Boil the eggs, allow it to cool
Peel and cut into half lengthwise
Heat oil in a small pan
Add the coriander seeds, cumin seeds and red chillies and fry taking care not to burn the chillies
Add the cinnamon, cloves, garlic, ginger and coconut and fry for two more minutes
Keep aside and allow it to cool
Then grind all the ingredients along with tamarind, using about 1/2 cup water into a smooth paste
Chop the onion and tomato into small pieces
In a pan, add a tsp of oil and the mustard seeds - allow it to splutter and then add the curry leaves, onions and tomatoes
Sauté till the onions are brownish and the tomatoes are squishy
Add the ground paste and salt and bring it to a boil, adding more water if required
Lower the flame and add the eggs
Boil for 2 more mins and take it off the heat
Serve hot with rice, parathas or bread
Monday, October 17, 2011
Eggless Banana Bread
I buy bananas almost every other week, mainly for my son - its a big energy boost and that sees him thru his non-stop activities thru the day
Unfortunately, I always land up with one or two overripe ones and nobody in the house will touch these bananas if they have more than a few black specks showing up, so I am always on the lookout for some interesting recipes using bananas
Have tried the muffins many times over, so this time went in for the banana bread that I saw on the RedChillies blog...
The bread was moist and tasted really good, not overly sweet and did not have the banana overpowering the taste...
Recipe Source - Redchillies.us
Followed the recipe except for a few changes, my version here...
What you need -
3/4 cup maida / APF
3/4 cup wheat flour
1 tsp baking soda
1/4 teaspoon salt
3/4 cup brown sugar
3 ripe bananas
1/3 cup milk
4 tbsp unsalted butter
1/4 tsp cinnamon powder
1/4 cup raisins
1 tbsp almond paste (6 almonds, soaked in hot water, peeled and ground to a paste)
What you do with it -
Preheat the oven to 180 deg C
Mix the maida, wheat flour, baking soda, sugar and salt in a large bowl
In a blender make a paste of bananas along with milk
Add the banana mixture and almond paste into the mixing bowl with the dry ingredients
Add the butter and the cinnamon powder and mix well
Add the raisins to this mixture
Grease a loaf pan and pour the batter into it
Bake for 45 minutes at 180 deg C
Cut into thick slices and enjoy with your coffee, tea or milk !
Thursday, October 13, 2011
Mirchi / Spice Roasted Green Chillies
I was invited to my friends place for lunch. Her mother-in-law was visiting and she had called us over to taste some authentic UP (Uttar Pradesh) style food.
There were green puris (the inspiration behind these rotis), dahiwale aloo(potatoes in a yoghurt gravy), turai (ridge gourd with spices in a peanut paste) and some awesome mirchis/roasted green chillies...
Though I can't eat food thats very spicy, these chillies were finger licking good, the spice of the chillies had mellowed down quite a bit with the besan and other spices. TH enjoys spicy food, so made this the very next week...Goes great with rice and dal or rotis or just as it is !
Spice Roasted green chillies
Recipe Source : Mrs Shukla
What you need -
3-4 tbsp mustard oil
1 tsp mustard seeds (use a combination of the yellow and black, if you have both)
1/4 tsp hing / asafoetida powder
1.5 tsp saunf / fennel seeds
1/2 tsp turmeric powder
1 tsp dhania / coriander powder
1 tsp amchur / dry mango powder
4 tbsp besan / gram flour
20 fresh green chillies
What you do with it -
Roast the besan on a low flame for 3-4 mins and set aside
Take the stalks off the chillies, wash, wipe and slit them in two along the length and keep aside
In a pan, add the mustard oil and when it is really hot, add the mustard seeds
Once they splutter, add the saunf and hing
Add turmeric powder and dhania powder and stir
Add the slit chillies, salt and amchur and fry on a low flame. Add more mustard oil if the chillies start drying out
Add the besan. Don't add too much or it will completely mask the taste of the chillies
Fry this on a low flame for 3-4 mins
Allow it to cool. Can be kept outside for about 4 days or store in the fridge for about a month
Tuesday, October 11, 2011
Pedatha's Andhra Chutney Powder
A couple of weeks back, I chanced upon Pedatha.com, when I was following some links from some other sites. 'Cooking at home with Pedatha' has become a standard reference book specially for chutneys, ever since I was gifted this book by Miri
I got to know thru this, that she had passed away earlier this year, and though my association with her was just this book, I did feel a loss...
I regularly try recipes from this book, but the chutneys are my favourite...I knew I just had to make something as a tribute to this very wonderful and charming woman.
I had never tried any of her dry chutney powders, so decided on making this one, a famous Andhra spicy chutney powder...
Thank you Jigyasa and Pratibha for this wonderful book. May her soul rest in peace...
Andhra Podi Chutney
Recipe Source - The vegetarian cookbook of traditional recipes "Cooking at home with Pedatha" by Jigyasa Giri and Pratibha Jain
What you need -
4 tbsp oil
2 tsps ghee
salt to taste
To be roasted without oil
1 cup bengal gram dal / chana dal
1 cup split black gram husked / urad dal
1 tbsp poppy seeds / khus khus
3/4 cup grated dry coconut / kobri
To be roasted in oil
2 cup red chillies ( I used about 20 byadgi chillies)
1/2 cup cleaned and wiped curry leave
1/2 tsp asafoetida / hing
lemon sized ball of tamamrind
Tempering
1 tbsp Split black gram / urad dal
1 tsp mustard seeds
1/2 tsp asafoetida / hing
What you do with it -
On a low flame, dry roast the grams, each separately to a deep brown. I use a tava to do this, given a more even heat to the grams
Dry roast poppy seeds and dry coconut each to golden brown
Heat 3 tbsp oil and roast the chillies until crisp and bright red, but not brown Remove the chillies from oil and set aside
Roast the curry leaves in oil until crisp and dark green, set aside
Dry roast the asafoetida powder
Next, roast the tamarind, Press with a ladle so it roasts well and set aside
Grind all these ingredients with salt to a coarse powder
Heat the remaining oil for tempering. Add the urad dal, as it turns golden, pop the mustard and switch off the flame. Add the asafoetida and pour this tempering into the prepared powder and mix well
Pour in the warm ghee and mix well. Cool and store in an airtight jar
Friday, October 7, 2011
Eggles Oatmeal Chocolate chip Cookies
Last weekend, I was itching to bake, tried these pesto rolls from Shaheen's blog, they looked pretty, but I had messed up on the yeast and they landed up getting a bit too yeasty had to just throw those beauties :(
Disheartened, yes, but the itch to bake was still on, so made a batch of cookies from this recipe here
Refrigerated the remaining batter and then baked the next lot 2 days later
Simple recipe, crunchy cookies, with lots of chocolate chips
My son loved them and when we set up to take these pics, he came up with his story books and toys and more toys, which is when the cookies almost fell off and we took more pics of him with his toys...He loves to pose and has a special pose and smile everytime the camera is out !
Eggless Oat Chocolate chip cookies
Adapted from Allrecipes.com
What you need (For about 30 cookies)
1 cup unsalted butter
3/4 cup packed brown sugar
1/4 cup white sugar
1 teaspoon vanilla extract
1.5 cups APF / maida
1/2 teaspoon salt
1 teaspoon baking soda
1/4 cup boiling water
2 cups quick cooking oats (I used Quakers)
1.5 cups chocolate chips
What you do with it -
Beat the butter, sugars and vanilla until light and fluffy
Add flour and salt, mix well
Dissolve baking soda in boiling water and add to mixture
Stir in the oats and chocolate chips.
Scoop the batter with an ice-cream scoop and drop on the cookie sheet
Bake at 180degrees C for 12-15 minutes
Allow it cool before you take it off the sheet
Some turned a bit soft, so I put them back in for 2 more mins at 180 deg C
My son enjoyed it with his milk and his favourite stories
Monday, September 19, 2011
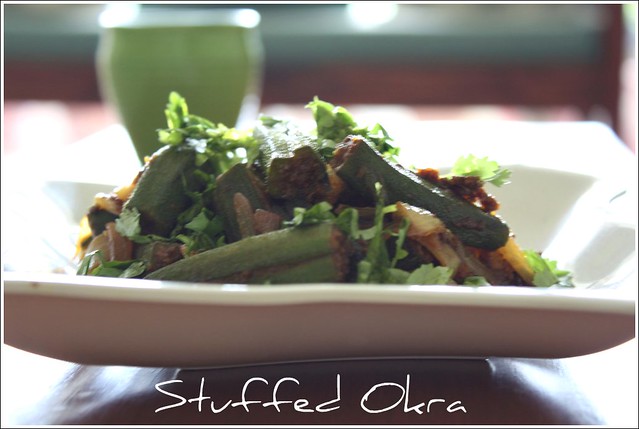
Stuffed Okra / Bharwan Bhindi
Ladies finger / okra is one of my favourites and features at least once a week in my kitchen...Surprisingly, I don't seem to have put up too many recipes with okra here.
Stuffed okra tops the list of al the okra recipes and I realised it had been a really long time since I made these.
There are two types of stuffed okras I make, one is what I learnt after coming to Gujarat - its a mild, flavourful one with besan, coconut and spice powders, the other is what I have here for you today...spicy, tangy and served with fried onions !!
Tava vegetables was a very popular dish at buffet lunches at one point and they are lip-smacking, different vegetables, stuffed with spices and served out straight from the tava. Thats where I had these roasted onions with the okra and they make a lovely pair...
What you need -
15-20 fresh tender okra
2 tbsp cleaned and chopped coriander leaves
2 onions
3-4 tbsp oil
Spice powder
2 tbsp cumin/jeera powder
1 tbsp coriander seed / dhania powder
1.5 tbsp chilli powder
1 tbsp dry mango / amchur powder
1 tsp salt
1 tbsp aniseed / saunf (whole)
1/2 tsp turmeric powder
What you do with it -
Wash the okra, dry them with a kitchen towel
Cut off the two ends and make a slit lengthwise on one side of the okra, without cutting thru it
Keep the okra aside
Chop the onions lengthwise
Mix all the ingredients listed under 'Spice powder' with a tbsp of oil
Add half of the coriander leaves to this
Stuff the okra with the spice powders
Heat 2 tbsp oil in a shallow pan and then add the okra to it
On a low flame, fry the okra till it changes to a dark green colour
Take the okra off the pan and add the onions to the oil remaining in the pan
If you have any of the spice mix remaining, add it to the onions
Once the onions are nice and brown, add the okra back to the pan for a minute and mix with the onions
Serve hot, garnished with coriander leaves
You could add the juice of half a lemon to this to make it tangier
Serve hot with rotis/ parathas / rice and dal
Saturday, September 3, 2011
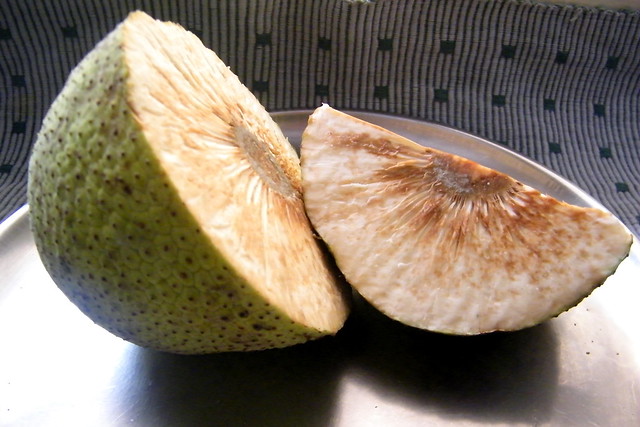
Divkadgi Phodyo / Breadfruit fritters
This looks like a jackfruit, but is less spikey...Its called divkadgi in Konkani or breadfruit...Its not really like a fruit, though.
When I googled for this, I realized that this seems to be a popular vegetable / fruit in the tropical islands of the Pacific Ocean too !
Check this link for more information on breadfruit...
This was not really easily available in Bangalore and we used to wait for Thursdays when the trucks from Mangalore would bring in all the Mangalore-special vegetables into the stores in Bangalore. I guess the trucks come in more frequently now
Ma generally makes fritters / phodyos (pronounced as 'fod-yos') with this. They have a very different texture and they taste absolutely yummy.
Really soft on the inside, this is an absolute treat...
What you need -
1 medium sized divkadgi/ breadfruit
1/4 tsp salt
1/2 tsp turmeric powder
1/2 tsp chilli powder
1/2 cup rice flour
4-5 tbsp oil
What you do with it -
Cut the divkadgi into 4 quaters. Remove the centre portion which is a little hard
Carefully cut out the skin of the divkadgi
Then cut into slices, about 1/4" thick
Wash and put them in a flat bowl
Sprinkle turmeric powder, chilli powder and salt
Mix well and then sprinkle about 2 tbsp of rice flour over the pieces. Toss and add more rice flour if required. Toss again to ensure all pieces are coated well
Heat a pan with about 2 tbsp of oil
Place the pieces in the pan and fry on both sides till they are golden brown
Fry in batches till all pieces are done
You could deep fry them too, if you like
You could also add salt after frying - this helps them remain crisp for a longer time
Thursday, August 25, 2011
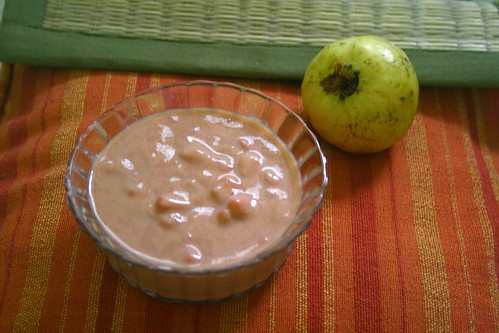
Guava Kheer
Here's an absolute winner of a recipe..Very simple to make and tastes awesome !
All you need to have is really ripe pink guavas. The only catch is you cant really tell if the guava is pink on the inside or not, you just have to trust your fruit vendor with this !
This is one more of Ma's favourite desserts when we have people over !
What you need -
3-4 large ripe pink guavas
1/4 tin condensed milk
upto 1/2 cup milk
What you do with it -
Peel the skin off the guavas, not too thick, we just want a thin layer removed here
Scoop out the portion with the seeds
Cut out the pink portion that has no seeds, into tiny pieces and keep aside
Add the portion with the seeds with the skin that was peeled off. Add a little water to cover it and then cook for 10 mins in a pressure pan prefereably
Cool it and then sieve out the seeds. Keep the pulp aside
Add the condensed milk to the pulp and mix well
If its too thick or too sweet, add as much milk as needed to get the right consistency and sweetness
Add the chopped pieces and mix well
Refrigerate for an hour at least before serving
Tuesday, August 23, 2011
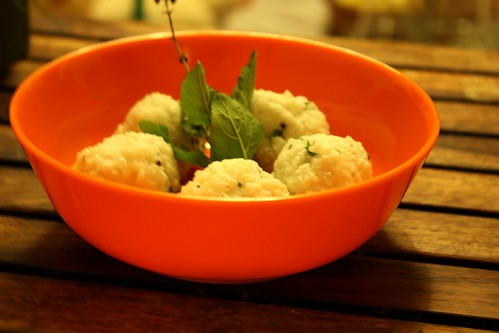
Curd Poha / Dhaiya Phovu for Janmastami
Yesterday was Janmastami / Gokulashtami - a festival that celebrates the birth of Lord Krishna. Since Krishna is believed to be born at midnight, this puja is generally done at midnight.
Since my childhood, I remember helping my grandfather set up the cradle for Lord Krishna and placing the baby Krishna idol into the cradle, do the puja and then we would all go give a cradle a tug. As kids, my brother and I would dress up as Krishna and Radha and go to the local Krishna temple and see all the boys, break the dahi handi. This is a fun event where the boys make a tall pyramid and a little boy, dressed like Krishna climbs right up and breaks the pot with curd inside it.
In the Tamil customs, patterns of tiny feet are drawn, reaching into the puja area, indicating that Krishna is entering the house
The food made on this occasion varies across regions. In the Konkani tradition, we make ladoos, panchukdayi, panchamrit and dhaiya phovu or curd poha
In Gujarat, a prasad called panjiri is given for Janmastami.
We did a combination of all these customs, bought the panjiri, drew the tiny feet of Krishna and made dhaiya phovu...
Curds poha (Recipe Source - Rasachandrika)
What you need -
1 cup beaten rice / poha
1 cup curds
2 tbsp fresh grated coconut
1 tsp sugar
2-3 green chillies
1 small piece ginger
salt to taste
a few curry leaves
1/4 tsp mustard seeds
2 tsp chopped coriander leaves
1 tsp ghee
What you do with it -
Wash the beaten rice and squeeze out the water
Grind the coconut, green chillies and ginger to a coarse paste
Add the salt, sugar and curds and mix well and add to the beaten rice
Prepare a seasoning with ghee, mustard seeds and curry leaves and add to the beaten rice
Once the beaten rice soaks it all up, make into little balls
Saturday, August 20, 2011
Spiced Spinach Rotis
We were in Bangalore for a few days to attend the wedding of my not-so-little-anymore cousin. She's the one I remember holding as a little baby, I know it makes me feel terribly old, but it was wonderful to see her getting married...It was a beautiful wedding and a great time to meet up with family..
Its always terrible getting back to the grind here and these last few days its just been my son and me. Cooking just the basic food for the two of us made it worse...
To slightly spice up the regular roti-sabji, I made these spiced green rotis.
This is a great idea to add a little colour to an everyday meal, with some healthy spinach added to it...
What you need -
2 cups wheat flour
1/2 tsp ajwain /carom seeds
1 tsp salt
2 tsp oil
To grind
1 cup cleaned and chopped spinach
1/2 cup of cleaned coriander leaves
small piece of ginger
2-3 cloves of garlic
1-2 green chillies
1 tsp saunf / fennel seeds
1 tsp dhania / coriander seed powder
2 tsp roasted jeera / cumin powder
What you do with it -
Grind all the ingredients mentioned under 'To grind' to a smooth paste
In a big bowl, add the wheat flour, ajwain, salt and oil
Add the ground paste to the flour and knead well, adding as much water as needed to make a smooth dough
Divide the dough into 10-12 even-sized balls
Roll out on a floured surface
Heat a griddle / tava and cook the rotis on both sides till the brown a little
You can use a little oil while cooking it or just skip it - works well both ways
Serve hot with some pickle and curds or any side dish you like
Tuesday, August 2, 2011
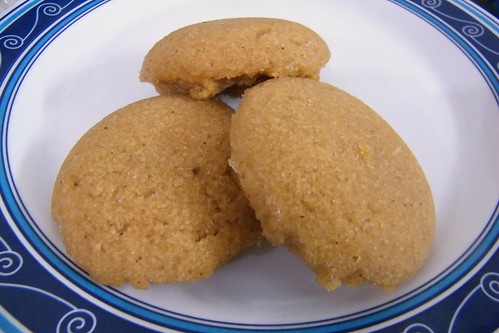
Ripe Jackfruit Idlis / Phansa Patoli
My mom made these when we were in Bangalore and my son relished them. He now calls my mom the 'best jackfruit idli maker'..
I cant remember when I had this last, I get a taste of all the dishes I had during my childhood, now, thanks to my son !
Jackfruits are easily available in Bangalore and you have roadside vendors cleaning and cutting them - its a huge effort to cut the jackfruit - its sticky and messy
Havent seen them in Gujarat though, there are many people who have never had it..It does have a distinct smell and taste, but I love it !
This is generally steamed in turmeric / banana leaves, but Ma made them like idlis in the idli steamer
What you need -
2 cups ripe jackfruit sections deseeded
1/2 cup grated coconut
3 tbsp grated jaggery
1 cup sooji / rava
a pinch of salt
What you do with it -
Cut the jackfruit sections into pieces
Grind it along with the coconut to a smooth paste
Add the jaggery and salt
Mix well and then add the sooji
The consistency should be like that of idli batter
Grease the idli moulds and place in the steamer
Fill up the idli moulds and steam for 10-15 mins
If you are using turmeric or banana leaves, spread a portion of the batter on the leaf and then close it. Place the folded side down and steam for 10-15 mins
Add a little ghee on the ready idlis / patolis and enjoy !
Saturday, July 16, 2011
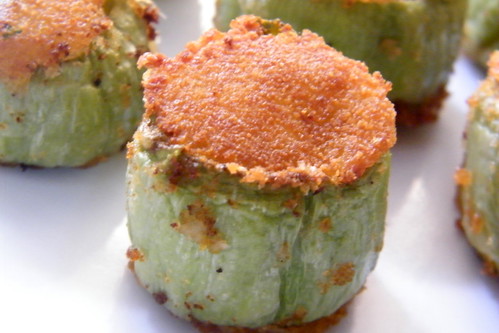
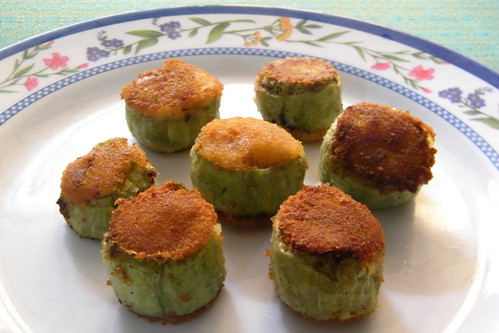
Dumbbells (Stuffed snakegourd)
I am not sure how this dish got its name, because this is a part of the Konkani cuisine, so cant imagine how this word crept its way in, but if you look real hard, you can see it resembles the little dumbbells from the gym, perhaps !
Snakegourd dishes aren't exactly the most inviting ones, but in this avatar, it sure is...
Dumbbells are basically potato patties encased in a snakegourd shell...
Simple recipe, looks nice, tastes great, that's reason enough to make it !!
What you need -
1 long snakegourd/padavalangai/paddul
4-5 potatoes
2 green chillies
3-4 pods of garlic
1 tsp cumin seed powder
2 tsps chopped coriander leaves
1 cup bread crumbs
salt to taste
oil to shallow fry
What you do with it -
Cook the potatoes, peel and keep aside
Scrape off the skin of the snake gourd with the edge of a knife
Don't use a peeler here, it takes away too much
Chop the snakegourd into about 1.5" pieces
Bring water to a boil in a large pot with a little salt
Once the water comes to a boil, drop in the pieces of snakegourd. Take the pot off the heat and cover with a lid. Leave aside for 5-6 mins
This helps the snakegourd pieces get steam cooked, but they are still firm and will take lesser oil while shallow fry
Grind the garlic and chillies with salt. Add the cumin seed powder and chopped coriander leaves
Mash the potatoes and add the ground paste and mix well
Fill this into the snakegourd pieces
Cover both sides of the snakegourd pieces with bread crumbs
Heat oil in a shallow pan and shallow fry the pieces on both sides
Sunday, July 3, 2011
Mango in Coconut milk / Ambe Rasayan
The good thing about being here in Ahmedabad is that we get mangoes for almost 4 months in a year...The last of the season is the 'kesar' which comes from Junagadh in Gujarat and is almost as good as the famous Alphonso mango...They are really sweet and its still available in the market !!
If mangoes are not in season, you can make this with bananas, honeydew melon, or a combination of grapes and bananas
This is a classic Konkani recipe that uses mangoes, coconut milk and jaggery. Can be eaten as a dessert or as the main meal with puris.
Ma has made this when we were in Bangalore and my son relished the combination of the mangoes and coconut milk...
What you need -
2 ripe mangoes
1 cup coconut milk
2 tbsp jaggery (add more if you want it sweeter)
1 cardamom powdered
What you do with it -
Cut the mangoes into bite size pieces
Add the jaggery to the coconut milk and mix till it dissolves well
Add the mango pieces and cardamom powder
Mix well and refrigerate
Serve with hot puris
Thursday, June 23, 2011
Kairas - Capsicums in a sweet, spicy coconut masala
This is one more of my favourites from Ma's kitchen...
I love the flavours that come from this dish. Its sweetish, spicy and sour, all in one bite. Its a perfect side dish since it has the right amount of masala and goes well with rotis or dal-rice
What you need -
1 tsp mustard seeds
1 tsp methi / fenugreek seeds
1.5 tsp dhania / coriander seeds
1.5 tsp chana dal
4-5 red chillies
4-5 pepper corns
1 tbsp white til / sesame
1 tsp tamarind paste / small ball of tamarind
1/2 cup grated coconut
1-2 tsp jaggery
peanuts / cashewnuts
1-2 capsicums
2 potatoes
1 raw mango(optional)
salt to taste
2 - 3 tsp oil
Seasoning
1/2 tsp mustard seeds
pinch of hing / asafoetida
a few curry leaves
pinch of turmeric powder
What you do with it -
Cook the potatoes. Peel, cut into bite size pieces and keep aside
The peanuts / cashwenuts used here need to be cooked, so I generally cook it along with the potatoes
Wash and cut the capsicums into bite size pieces
Dry roast the white til, powder and keep aside
Clean the raw mango and cut into pieces, if using
In a little oil, roast the mustard, methi, dhania seeds, chana dal and red chillies
Add the coconut and roast for a minute or two
Take it off the heat and grind along with tamarind, adding a little water
In a another deep bottom pan, heat a tsp of oil and and prepare a seasoning with mustard seeds, hing, and curry leaves
Add the turmeric powder and then add the chopped capsicums. Fry for 2-3 mins
Add the ground coconut masala, peanuts / cashewnuts, potatoes, raw mango, til powder, salt and jaggery Add a little water, if required
Serve with hot rotis or dal and rice
Wednesday, June 15, 2011
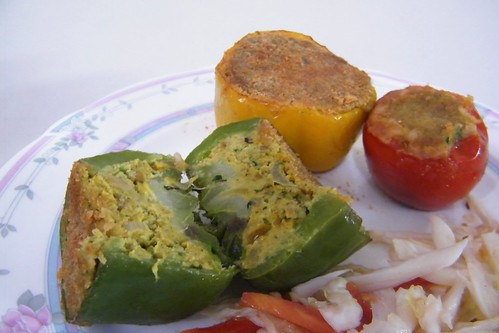
Stuffed Capsicum / Tomato...Ma's style
Am back from a really long break.
From the scorching heat in Ahmedabad, I left for my good old Bangalore, where the April showers, May flowers, friends and family brought the much-longed-for happiness...
Left that for the sweltering heat in Chennai, for a wedding in the family..
There was a lot of cooking that eating that happened over the last two months and its really showing up now :(
I did not have my camera cord and so there was no blogging for all this while, though I kept visiting my favourite blogs...
I have a lot of Ma's cooking to show off over the next few posts...One of my all time favourites, which is Ma's speciality, comes up first - Stuffed Capsicum and Tomato
We basically ran out of red capsicum, so used a tomato instead, which also tasted really good !
What really makes this stand out is that she doesn't stuff with the potato, which is the most common stuffing...This has a spicy chutney-chickpea flour filling, which makes all the difference...
Stuffed Capsicum / Tomato
What you need -
2-3 medium sized capsicums (different colours make it look really nice)
1/2 cup chick pea flour / besan
1.5 cups chopped onions
1 cup coriander leaves chopped
2-3 green chillies
1/2 cup grated coconut
2 cloves peeled garlic
1/2 tsp salt
small piece of ginger
1/2 tsp tamarind paste
1/2 tsp turmeric powder
1/2 cup breadcrumbs / sooji
oil
What you do with it -
Cut the caps of the capsicums and then de-seed as carefully as possible without breaking the capsicum. Wash and keep aside
Fill water upto about 6 inches height in a large vessel. Bring to a boil and then turn off the heat. Place the capsicum in the water for about 5 mins, so that it gets a nice steam bath, but doesn't shrivel up
Grind the coconut, coriander, tamarind paste, ginger, salt, garlic and green chillies to a fine paste, adding only as much water as required
In a pan, heat the oil and add the onions, frying them, till they turn brown. Add the turmeric powder and then the chickpea flour. Fry on a low flame till the chickpea flour turns brown. Turn off the heat and add the ground paste. Allow it to cool
Stuff the capsicums with this masala and top it with breadcrumbs or sooji
In a shallow pan, heat some oil and place the capsicums with the crumbed portion on the pan. Once it turns slightly brown, turn it up and keep for a minute or two
You could use tomatoes also for a variation
Sunday, April 10, 2011
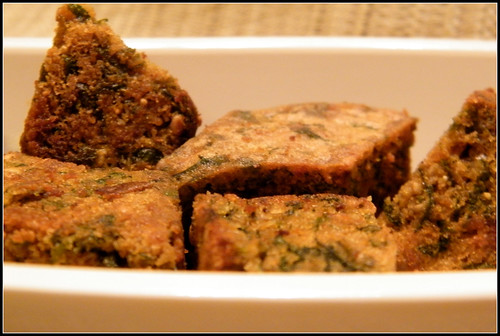
Kothimbir Vadi (Steamed Coriander Cake)
I have always been used to regular staple meals. Ma is a wonderful cook and very experimental, but we always had proper meals - which had rotis, sabji, rice, dal and curd.
Snacks, especially the fried variety, were never a part of our everyday meal. On some occassions, like in the lovely Bangalore rainy weather, bhajiyas / pakodas were made...On more special occasions, we bought out the samosas and kachoris..
Mumbai has always been our snacky food paradise since my childhood. Frankies, vada pav and dabeli was always on the must-have list. In the last couple of years, kothimbir vadis were added to that list. These are steamed coriander and gram flour cakes, cut and fried crisp, available in many Maharashtrian restaurants and stores..They are absolutely delicious with some spicy chutney.
I had been saving up my stock of coriander leaves for a couple of days and decided on making one of my favourite - kothimbir vadi
I checked with Ma for her recipe, but hers needed the dal to be soaked and ground, and I wanted to make it right away...The next best place was to check Nupur's blog 'One Hot Stove'. I absolutely love her A-Z series of Maharastrian cooking...I knew this just had to be there, and sure enough, it was !!
Sending this to the Herbs and flowers in my platter event featuring Coriander this month. This event is the brainchild of PJ of Seduce Your Tastebuds
Here's a link to Nupur's kothimbir vadi. Mine has some minor variations
What you need -
2 cups of cleaned and chopped coriander leaves (I used all I had which came up to 1.5 cups)
1 cup gram flour / besan
1 tbsp rice flour
2 tbsp wheat flour
2 tsp chopped chillies
1 tsp ginger garlic paste
1 tsp sesame seeds
1 tsp poppy seeds
1 tsp lemon juice
1 tsp turmeric powder
1/4 tsp asafoetida/hing
1 tsp chilli powder
1/2 tsp goda masala / garam masala
1/2 tsp baking soda
salt to taste
3-4 tbsp oil for frying
What you do with it -
Mix in all the flours with the coriander leaves
Add the green chillies, ginger-garlic paste, sesame seeds, poppy seeds, lemon juice, chilli powder, goda masala, turmeric powder, asafoetida and salt to the flour
Add some water to make a thick batter. Mix well so its a smooth paste without lumps
Grease a flat vessel / dhokla plate and pour in the batter
Steam in a pressure cooker without the weight or in a steamer for about 15 minutes
Once its done, allot it to cool and then cut into diamond shaped pieces
You can deep fry the pieces in oil, till crisp. I heated 2 tbsp oil in a shallow pan and then put the pieces in. Fry on a low flame, turning the sides, till they brown well, adding about 1-2 tbsp more oil
Serve hot with chutney or ketchup
Monday, March 28, 2011
Eggless Banana Almond Muffins
What did I do with over ripe bananas before I started this blog ? I threw them away...
What do I do after I started this blog ? I make banana muffins !!
I make butter at home now and almost always make muffins when I have butter on hand, I use the butter milk (from churning out the butter) to make scones.
Starting this blog has helped me discover the use of a whole lot of new ingredients and made me appreciate what I can make with what I have on hand...
My son loves muffins and every time he sees bananas going black, he asks me if we are making muffins !
I have this icing set that I got a while back, but havent really used it...He calls it the injection for cakes and has been pestering me to use it...thats the next project on hand !
These are fairly simple ones that I have made something similar earlier, with oats. This time, I used only maida / AP flour. Add chopped almonds for the crunch and a little powdered cardamom for flavour...
Used this recipe from Nithya's beautiful blog, with a few changes...
What you need -
4 ripe bananas
1.5 cups maida / AP flour
8-10 almonds chopped
a pinch of powdered cardamom
3/4 cup sugar
1/3 cup white butter
pinch of salt
1 tsp baking powder
1 tsp baking soda
1/2 tsp vanilla extract
What you do with it -
Mash the bananas
Beat the butter and sugar in a bowl till they combine well
Add the vanilla extract and mashed bananas to the butter
Combine the baking powder, baking soda and powdered cardamom with the flour
Pre-heat the oven to 190 deg C
Gently fold in the wet ingredients with the dry ones
Add chopped almonds and mix once more
Grease the muffins pans or use the paper liners
Fill in the batter upto 3/4th level in the moulds or liners
Bake for about 20-25 mins
Enjoy with some hot tea
Friday, March 18, 2011
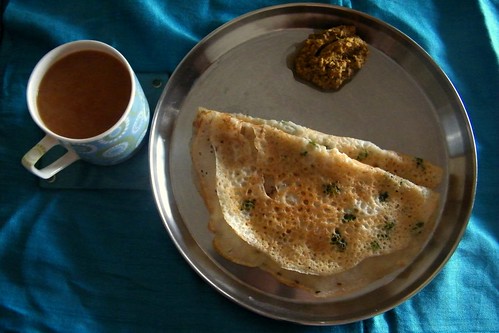
Instant Dosa
TH loves dosas, I prefer idlis, he loves chutney, I prefer sambhar, but over the many years that we have been married now, I have started enjoying dosas and he likes idlis !!
Initially, making dosas seemed like the the most cumbersome task...soak, grind, ferment, was really too much of advance preparation for a simple breakfast...
Instant dosas were a saviour...You can have the dosa in less than 10 mins from the time you decided on eating one !
This recipe is from my friend Lal, who had brought them to office once...
Its my emergency dosa recipe - gets done in a jiffy...
What you need -
1 cup maida / AP flour
1 cup rice flour
1 cup rava / sooji / semolina
1 tsp cumin seeds
2 tsp grated fresh coconut
2 tsp chopped coriander leaves
4-5 cups water
1/2 tsp salt
What you do with it -
Mix the maida, rice flour and rava in a large bowl
Add water to make it into a smooth paste
4-5 cups is an approximation here - I really dont measure the water - the consistency should be thinner that the regular dosa batter
Add cumin seeds, chopped coriander leaves, coconut and salt
Heat the tava and add a few drops of oil
This dosa cannot be spread out like the usual rice-urad dal dosa batter
Take the batter in a big ladle and start from the sides, then bring it to the centre. What I do is move the tava to make the batter fill in the gaps, if any
Cover and let it cook for a minute or two
Then flip over and fry for another minute
Serve with a freshly ground chutney or a chutney podi, like this one
Tuesday, March 15, 2011
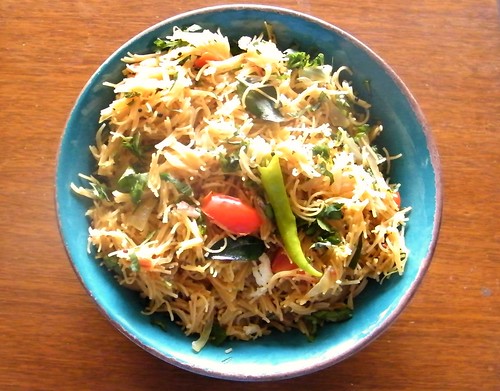
Vermicelli / Seviyan Upma
Upma is a fairly standard breakfast option in most South Indian homes...Seviyan upma is made from vermicelli and was a big challenge for me to get it right most times...
The last few times, however, I managed to nail it...
Its very very important that you follow the instructions to cook it, as given on the pack. There is the rice vermicelli, wheat vermicelli, roasted wheat vermicelli (which I used here, and is most fool-proof)
Simple recipe for a simple breakfast...
You can add vegetables of your choice to add to the colour, flavour and health quotient of this dish !
What you need -
1/2 tsp mustard seeds
1/2 tsp urad dal
2 green chillies
a few curry leaves
1 onion chopped
1 tomato chopped
1 cup roasted wheat vermicelli
2 cups water (please check the instructions mentioned on the pack)
2 tsp grated coconut
salt to taste
1 tsp chopped coriander leaves
1 tsp oil
What you do with it -
Heat oil in a deep bottom pan and add the urad dal and mustard seeds
Once they splutter, add the curry leaves and green chillies
Add the chopped onions and fry for 2-3 mins
Add the tomato pieces, salt and water
Once the water comes to a boil, add the vermicelli and cook on a low flame till done
Take it off the heat and garnish with grated coconut and coriander leaves
Wednesday, March 9, 2011
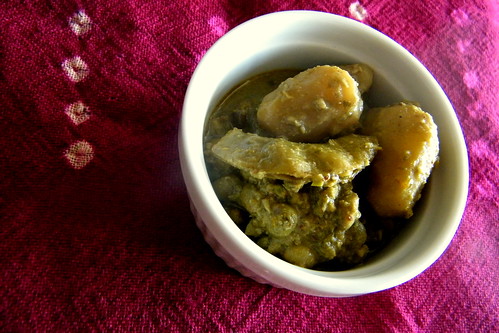
Lilva Bataka nu Shaak - Gujarati style spiced vegetables
This is a halfway Undhiyu - a famous Gujarati winter dish..
The spices used here are pretty much the same, but the undhiyu has a lot more vegetables added to it - kand (purple yam), sweet potatoes, bananas and of course, muthias...
This shaak (with some vegetables added or excluded) is a must in all the Gujarati thalis (special meal served in a huge round plate) and I love the taste of it...Described the dish to my friend here, who then gave me this recipe...
It turned out exactly like the one we have in the restaurants and is really yum with some hot rotlis (Gujarati mini phulkas)..Thank you A, for this recipe - it really works !!
What you need -
1 cup Surti lilva(avrekai) or tuvar lilva
1/2 cup papdi / flat beans
12-15 baby potatoes
1/2 tsp ajwain / carom seeds
a pinch of asafoetida
1/4 tsp turmeric powder
1 tsp chilli powder
1 tsp dhania/ coriander seed powder
1 tsp jeera / cumin powder
1/2 - 1 tsp grated jaggery / sugar
salt to taste
2 tsp oil
To grind -
1/2 cup grated coconut
1/2 cup coriander leaves
3-4 garlic pods
3 green chillies
What you do with it -
Grind all the ingredients listed under 'To grind' to a smooth paste
Peel the potatoes and cook along with papdi beans and lilva, with a little salt added
Heat oil in a pan and add the carom seeds and asafoetida
Add turmeric powder and the ground paste
Saute the masala till it changes colour
Add the dhania powder, jeera powder, chilli powder and then add the cooked vegetables
(You can add brinjals too - adds a lot to the taste)
Mix well so that the vegetables are coated with the masala
Add the jaggery and salt and 1/2 cup of water and bring to a slow boil
Serve with hot rotlis and a salad
Wednesday, March 2, 2011
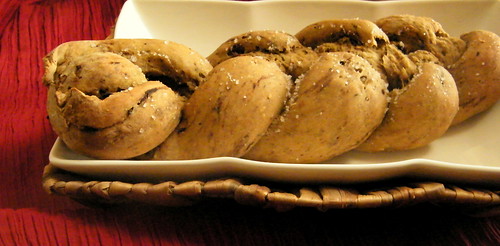
Pesto and Sun-dried Tomato Bread - Arusuvai Season II
This was the first time I tried braiding bread !! I have braided my hair, myself, almost all thru my school life, but when it came to braiding with these strips of dough, it was surprisingly confusing ! I guess I was so used to doing it with my hands behind my head, that with these in front, it was actually confusing !!
This bread had a lovely flavour, and we had it with some pasta for dinner..
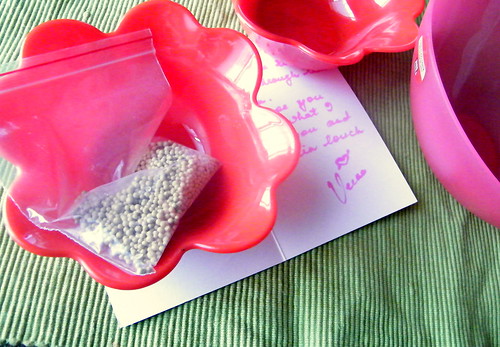
Here's a little story behind this...I received a parcel that had some dried active yeast...
The first time I read about Arusuvai,(a friendship chain between food bloggers in India) was on Miri's blog...
This was a really nice concept that was started off by Lathamma, Bharathy and Srivalli.
It was all about sending a 'secret' ingredient to another blogger, who then figured what it was and made something with it, and then in turn, sent some other secret ingredient to other bloggers. It was like a chain that carried on for a while between a lot of food bloggers in India.
Honestly, I felt quite sorry for myself, since I never was part of this chain. I was just about getting active with blogging then..
Thankfully, Sayantani of A Homemaker's Diary has now revived this chain with Arusuvai Season II and I was more than happy about it and signed up rightaway.
I waited (impatiently) for my parcel to arrive. There's something about the words 'secret / surprise', that brought back the child-like eagerness, to wait for the parcel
I got mine from Veena of Kitchen Celebrations, and it was a packet of yeast with a cute little card, a mixing bowl and 2 fruit bowls...I was really happy to see this big box waiting for me...
Thank you Veena, for these lovely gifts..
I have baked bread before, but wanted to try this braiding, and this was a fun experiment ! Sending this to Yeastspotting
Recipe Adapted from the book 'Baking', By Martha Day
What you need -
3.5 cups flour (I used 2.5 cups wheat flour and the rest maida/AP flour)
1.5 tsp yeast
1.5 tsp sugar
1 - 1.5 cups warm water
1 tsp salt
1/4 tsp ground pepper
2 tbsp chopped sun dried tomatoes
2 tbsp pesto (I used basil-almond pesto, on the lines of this one)
1 tsp coarse sea-salt
What you do with it -
Take one cup of the warm water and pour into a bowl. Sprinkle the yeast granules over it. Add sugar and mix well. Leave aside for 10-15 mins
Once you see the yeast getting all frothy, you know you are ready to go with the next step
Put the flour into a large mixing bowl. Add salt and pepper.
Make a well in the centre and add pour in the yeast mixture
Add the chopped sun dried tomatoes and the pesto
Gradually mix in the flour to make a soft dough. Add more warm water if required
Transfer the dough to a floured surface and knead well for 5 mins, till is is smooth and elastic
Return to a clean bowl and cover with a damp cloth and set aside in a warm place for about 2 hours, till it doubles in volume
Grease a baking sheet and set aside
Once the dough is all risen, transfer to a floured surface and knead again for a few minutes. Divide the dough into 3 equal pieces and roll to form 3 sausage shape pieces
Dampen the end of the three pieces, press down at one end and then loosely braid it. Dampen the other ends and press together to complete the braid
Place on the baking sheet and cover with the damp cloth again for about 30 mins, till it has risen well
Preheat the oven to 220 deg C
Sprinkle the braid with coarse sea salt
Bake for 10 mins and then lower the temp to 200 and bake for a further 15-20 mins
Cool on a rack and enjoy with a salad, soup or pasta


Wednesday, February 23, 2011
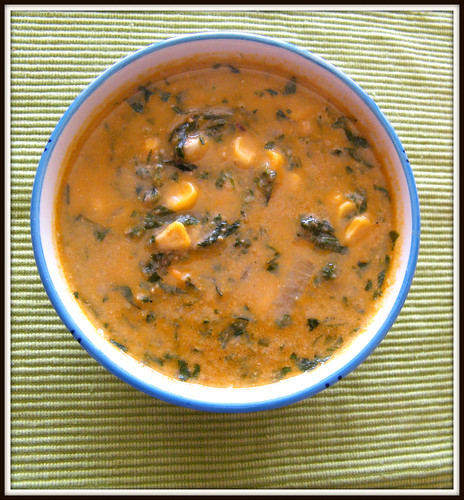
Methi makai - Fenugreek and corn in an aromatic gravy
This is the low-cal version of the popular methi malai matar (fenugreek, cream and peas in a cashew-rich gravy)
I substituted the peas with corn, cashews with pumpkin seeds and did away with the cream. I had saved the seeds the last time I bought a pumpkin - rinsed them well and dried them in the sun and stored them in an air tight jar
Pumpkin seeds are a pretty good substitute for cashews. I discovered this on one of the episodes of Master Chef India and gave it a try here.
The masala is very aromatic, so try not to substitute with store-bought garam masala
The original recipe is from a caterer based in Mumbai. He makes some absolutely fabulous food and caters at most of our family get-togethers there (We have a large family, we need caterers, honestly...)
What you need -
3 cups chopped methi/fenugreek leaves
2 chopped onions
2 tomatoes
1 cup cooked corn kernels
1/2 - 1 cup milk
1/2 tsp sugar
salt to taste
Masala 1 -
1 onion
4 green chillies
1/2" piece ginger
3 cloves garlic
2 tbsp pumpkin seeds (or cashew nuts, if you like)
2 tsp khus khus / poppy seeds
Masala 2 -
2 sticks cinnamon
4 cloves
4 cardamoms
4 pepper corns
1 tsp cumin seeds
What you do with it -
Roast and powder all ingredients for Masala 2
Grind all the ingredients listed under Masala 1
Wash the methi leaves. Add 1/2 tsp salt and soak the methi leaves and salt for 15 mins and then drain out
Blanch the tomatoes, peel the skin and puree it
Heat a tbsp of oil in a deep bottomed pan and add the cumin seeds
Add methi and cook for 3-4 mins. Remove and set aside
Heat oil, add onions and the ground paste (masala 1)
Fry till the raw smell goes away. Add tomato puree and dry masala and fry a bit
Add corn, methi leaves, milk, sugar, salt, 1/2 cup water and bring to a slow boil
Monday, February 14, 2011
Oatmeal chocolate chip cookies
Some good-for-the-heart oatmeal cookies for Valentines Day...
Simple, easy to bake, crunchy oat cookies that I made straight from this recipe here.
Have a great day people...
Simple, easy to bake, crunchy oat cookies that I made straight from this recipe here.
Have a great day people...
Thursday, February 3, 2011
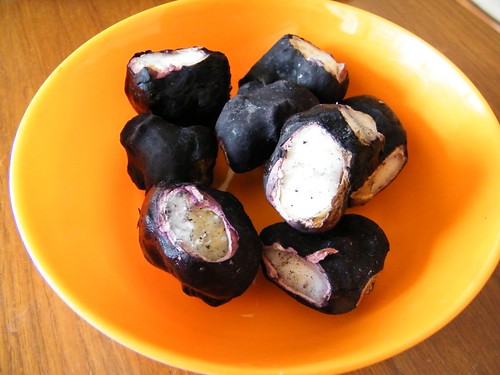
Water chestnut, mushroom and broccoli stir fry
I've seen these water chestnuts (singhada) a lot around here...never tasted them before, but seen them at roadside stalls, steamed and served up especially during winter..
They don't look very pretty, and they don't have a distinct taste of their own, but having read about these used in stir frys, I decided to give it a shot..
Once they were cleaned and peeled, the texture was like any other tuber. It added to the crunch in this dish, but would I like it on its own, I'm not so sure !
To clean these, I first put them in a big bowl of water and washed them. Then used a knife to peel the skin off. Washed them again and cut them in slices
What you need -
3-4 cloves garlic
1 fresh red chilli / red capsicum chopped
1 small broccoli cut into florets
2 cups mushrooms, cleaned and quartered
2 tsp soy sauce
1 tsp vinegar
salt and pepper to taste
1/2 tsp sugar
1 cup chopped water chestnuts
1 tbsp sesame oil
What you do with it -
Heat the oil in a wok and add chopped garlic
Add broccoli and water chestnuts and sprinkle a little water over it
Turn heat on high and allow the broccoli to cook slightly
Add the mushrooms and chilli / capsicum along with soy sauce and vinegar
Add salt and pepper and sugar and stir on high heat till the sauces are absorbed
Serve with fried/steamed rice or noodles
Thursday, January 27, 2011
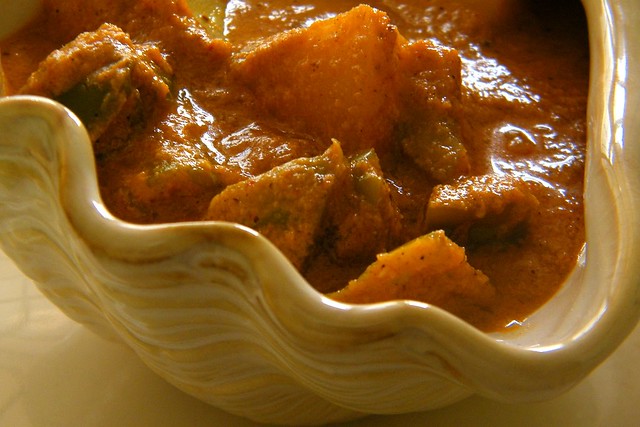
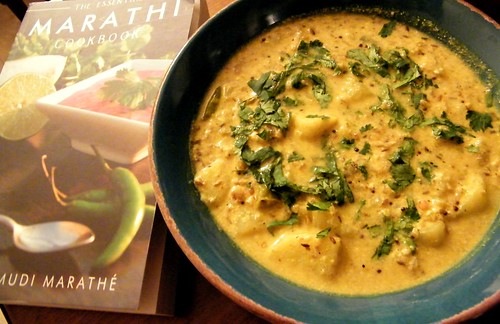
Batatyachi Bhaji / Potatoes in a yoghurt-peanut gravy
My cousin dropped in as a surprise on my birthday a week back and it was really the most pleasant surprise I've had in a long time...
She brought me a bag full of gifts and I realised that I still am so excited about opening gifts...growing older hasn't changed that, not as yet !
There were bamboo steamer baskets, that I was enquiring on my last visit to Bombay and she thoughtfully went hunting all around for it...Also got a very nice book on Marathi cuisine and this totally cute chocolate SMS...
This book called 'The Essential Marathi Cookbook' by Kaumudi Marathe has simple, easy to make authentic recipes...What I like best about this cuisine is the use of peanuts in a lot of dishes, which gives it a nice crunchy feel and also helps in thickening the gravy.
The regular batatyachi bhaji is a simple one with just the seasoning and dash of lemon juice. The peanuts and yoghurt addition was mentioned as a variation. Since we were having this with rotis, I decided to go ahead with the variation...Simple, delicious flavours and a great accompaniment with rotis
Recipe Source: The Essential Marathi Cookbook by Kaumudi Marathe
What you need -
2 large potatoes
2 small onions finely chopped
1 tsp salt
a pinch of sugar
1 1/2 tbsp powdered roasted peanuts
1/4 - 1/2 cup buttermilk/ yoghurt
Seasoning
2 tbsp oil
1/2 tsp mustard seeds
1/2 tsp cumin seeds
2 green chillies, sliced
6-8 curry leaves
a pinch of asafoetida/hing
1/4 tsp turmeric powder
Garnish
1 tbsp chopped coriander leaves
What you do with it -
Boil potatoes till well done. Peel and cut into cubes
Heat oil for seasoning. Add mustard seeds. Once they pop, add cumin, chillies and curry leaves. Stir in turmeric and asafoetida
Add the chopped onions and stir fry for 2-3 mins, till light brown
Mix in the peanut powder with the yoghurt and add along with the potatoes, to the seasoning
Reduce heat and let it simmer for 4-5 mins
Sprinkle salt and sugar and garnish with coriander leaves