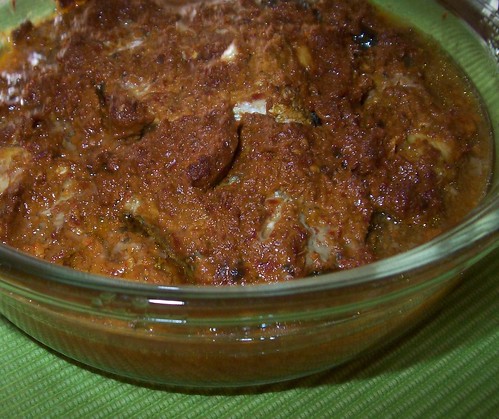
Remember I told you about this book I got from my dad's friend. Its got awesome recipes, by chefs from The Taj group of hotels
Some recipes are really interesting, some too complicated to try out and some everyday recipes that work best for me...
This particular one is one of the easier recipes, with ingredients that are easily available.
Spinach is something which is on our plates at least once a week if not more and thankfully TH and the son seem to really like it
Palak paneer, keerai molagutal, soppu palya and a lot more variations have been made fairly often now. I saw the lasooni palak in this book and knew I had to try it out. Its got a lovely texture with the puree and chopped spinach, cream and yoghurt as part of it
This one's also from the Taj at Nashik
What you need -
3 bunches spinach
1/4 tsp cumin seeds
1/4 tsp mustard seeds
2 tsps oil
pinch of hing / asafoetida
1 medium onion
1 tbsp chopped garlic
1 tbsp chopped ginger
1 tomato
2 green chillies
1/2 tsp coriander powder
1/2 tsp chilli powder
pinch of turmeric powder
3 cloves of garlic, minced and browned
puree of 2 tomatoes
1/2 cup plain beaten yoghurt
2 tsps cream
salt to taste
What you do with it -
Clean and chop the spinach. Puree two bunches by blanching it and passing it thru the blender. Keep once bunch chopped, aside
Heat oil, crackle cumin and mustard seeds. Add asafoetida, ginger, garlic and green chillies
Add onions and saute till brown
Add chopped spinach and tomatoes and cook till spinach is done and tomatoes are mushy
Add all the powdered masalas and saute
Add spinach puree and tomato puree, yoghurt and cream
Bring to a slow boil
Garnish with browned garlic
Serve hot with rotis and raita
Wednesday, December 23, 2009
Tuesday, December 8, 2009
Podi Idli (spicy fried idlis) and Appe
Bangalore has restaurants serving south indian food at every nook and corner, small places serving fresh hot tasty idlis, variety of dosas and mixed rice variations.
Popularly called 'darshini', these are quick efficient places, where you may need to stand around a table and gobble down your food..The menus are written on a black board or in more fancy ones, displayed with colourful pictures alongside...
This reminds me of a place I had gone to with a friend, who was not too familiar with the local language and cuisine...On the menu, they had a line saying 'hot baths available' and she couldn't understand how a person could have a hot bath here !
It was really hilarious because the 'bath' here was actually a misspelt 'bhath', which means rice and 'hot baths' meant you would get hot tamarind rice, lemon rice, coconut rice, etc...
With so many little restaurants all over the place, I was pleasantly surprised to see 'South Indies', a very upmarket, fancy place open in Bangalore, serving vegetarian South Indian food...The first time I have ever eaten 'podi idlis' was at this place and they were really delicious...Simple to make with leftover idlis, and really tasty, its a standard snack at home now...
I tend to get bored having the same type of breakfast everyday, so when I make the batter for idlis, its idlis on day 1, podi idlis with the remaining idlis, as an afternoon snack, appe/paniyarams on day 2, dosas on day 3 and if there is any batter remaining, it becomes rava dosa on day 4 !
Here's a look at the appe getting done on the pan...
I make my molaga podi from Usha's recipe. It turns out so good, that my MTR chutney podi has been neglected completely now
The idlis from Madhuram's recipe on Beyond Curries
Podi Idli
What you need -
4 idlis (these should ideally be leftover idlis, not hot ones)
2 tbsp molaga podi
1 tsp mustard seeds
a few curry leaves
2 tsp til / gingelly oil
What you do with it -
Cut the idlis into wedges or bite sized pieces
Heat the oil in a pan, add mustard seeds and curry leaves
Once the mustard splutters, add half the podi
Add the idli pieces and stir
Add the remaining podi and another tsp of oil
Fry on low heat till it gets a nice brown colour
Serve hot
Appe
2 cups idli batter
1 onion
handful of coriander leaves
1 tsp cumin seeds
1 tsp salt
Mix all the ingredients
Heat the appe kadai / paniyaram chaati / Aebleskiver pan on a low flame
Put in a dot of oil in each cavity and swirl the pan around so the oil coats the entire cavity
Spoon in the batter into the cavity, upto 3/4th level of the cavity
Cover the pan and keep on low heat
After about 3 mins, turn each appe over and keep on heat for 1 more min
Serve with chutney, sambar, molaga podi
Saturday, December 5, 2009
Dudhi Muthias
I've tried and loved the methi muthias - whats not to love about deep-fried food anyways !
Then I had these dudhi muthias, they are healthier and something you can make more often if you are not too keen on deep frying...Its steamed, got dudhi (bottle gourd), which is extremely healthy. It is highly alkaline and helps in balancing the acidity level in the body. It contains over 95% water, rich in iron, vitamins B and C.
Agreed, its not the tastiest vegetable on its own, but in this form, its really really tasty. I realised that bottle gourd is used a lot in Gujarati cuisine and in very different, tasty snacks..Handvo is another dish that uses dudhi and its so tasty !
Its a regular snack here in Gujarati homes and I had mine with some coriander-mint chutney. My friend here told me that she generally adds leftover rice and vegetables like carrot, cabbage, methi, etc
I used some leftover rice in mine..they turned out nice and soft and really tasty
Goes great with a cup of hot tea
What you need -
1 bottle gourd grated (about 2 cups)
3/4 cup wheat flour
1/4 cup chickpea flour / besan
3 tbsp semolina / rava
1.5 tsp ginger-chilli paste
2 tsp of dhania-jeera powder (cumin & coriander powder)
1/2 - 3/4 cup cooked rice (optional)
1/2 cup curds
1/2 tsp baking soda
1 tsp salt
1/2 tsp sugar
a pinch of turmeric
1/2 tsp red chilli powder
1 tbsp sesame seeds
1 tsp mustard seeds
1/2 chopped coriander
2 tbsp dessicated coconut
What you do with it -
Grate the bottle gourd and keep aside
Mix the wheat flour, besan, ginger-chilli paste, dhania-jeera powder, salt, sugar, turmeric powder, cooked rice and baking soda into the bottle gourd
(If you are not using the cooked rice, use may need more flour to bind it)
Add as much rava as required to make it a soft dough
If it gets too mushy, add more rava and besan
If its too dry, add upto 1/2 cup curds
Smear some oil on your palms and roll out the dough cylindrically, about 1" thick, the length would depend on what the steamer can accomodate - the ones I made were about 5" long
Steam this for about 20 mins. I used my idli maker to steam it. You could also use a cooker, without the pressure weight
Once its done and completely cooled, cut into pieces
Heat about 2 tsp oil in a pan and add sesame seeds, mustard seeds and red chilli powder
Add the steamed muthias and fry on low heat till they turn slightly brown
Garnish with dessicated coconut and chopped coriander leaves
Enjoy with a cup of hot masala chai
Tuesday, December 1, 2009
Quintessential Punjabi fare - Makki di roti, Sarson da saag
For me, it doesnt get more Punjabi than this...Move over aloo gobi and paneer makhani, here's the real signature dish of Punjab - Makki di roti, sarson da saag !
For some reason, this reminds me of Kapil Dev, the cricketer...I think in one of those old Palmolive ads, he mentions something about this and that perhaps was the first time I had heard of it..
I've heard so much about it since then and sometimes, you get a bit disappointed when you hear so much about a dish and then when you taste it, its like 'oh, this is it'...
I remember having it once, ages ago at a restaurant, but didnt think too much of it then..Maybe they got it wrong or my taste buds just weren't as developed...
Sarson / Mustard leaves are available only during winter, so this is a winter special dish. I have never seen it in the Bangalore markets, or perhaps never bothered checking, because it wasnt in my usual list of vegetable shopping...
This time I saw it in the markets in Ahmedabad and then thought I must give it a try..Sanjeev Kapoor to the rescue again - found his recipe for the roti and the saag in the set of books I told you about in my earlier post
I also got the makai/cornmeal from the local 'chakki' - the place where they grind all the flours for you
This was one delicious combination. The creamy saag was finger-licking good and makai rotis were just perfect with it.
The rotis were a first time for me and I was never too great with making rotis this way, where you need to flatten them with your palm, no rolling it out here...
I also got this 'tava', from the local potters. Its used to make bhakris, but I thought it really added a nice earthy smell and taste of the rotis...
It turned out to be such a good meal - I am definately making this again, very soon !
From Sanjeev Kapoor's books -
Makki di roti
What you need -
1.5 cups Makai ka atta / Cornmeal
1/4 cup wheat flour (optional)
1 tsp salt
oil and butter
What you do with it -
Mix cornmeal, wheat flour and salt Add lukewarm water and make a medium soft dough, it shouldn't be too sticky or too hard
Divide the dough into 10 equal proportions
Start making the rotis as soon as the dough is ready. If you wait too long, the dough harden up and the rotis tend to crack
Moisten your palm with some water and on a wet polythene sheet (I used a milk cover), flatten each into a disc, using only your palm
The size of each disc should be about 4-5 inches in diameter, not too thin
Heat the tava and add a little oil and then transfer the roti to the tava, taking care not to break it
Cook on low heat for 1 min and flip over and cook for another minute or so
Serve with a dollop of butter and hot sarson ka saag
Sarson da saag
What you need -
2 bunches fresh sarson ka saag / mustard leaves
1/2 bunch spinach leaves
1/4 bunch bathua leaves (I didnt find these, so left it out)
2 onions
big piece of ginger
6 cloves garlic
4 green chillies
2 tbsp cornmeal / makai ka atta
2 tbsp oil
1 tsp red chilli powder
2 tbp butter
salt to taste
What you do with it -
Clean, wash, drain and roughly chop the sarson, spinach and bathua leaves
You need to clean the stalks of the sarson really well, or it tends to get a little stringy
Peel wash and chop onions, ginger and garlic. Chop green chillies
Blend the cornmeal in half a cup of water
Heat oil in a pan and add onions. Saute for 2-3 mins
Add ginger, garlic, green chillies and stir fry for a bit Add red chilli powder, sarson, spinach and bathua leaves. Stir in half a cup of water and cook on medium heat for 10 mins, stirring occasionally
Mix in the blended cornmeal and cook for 5 more mins. I though this really added to the texture and taste of the saag
Cool this and grind to a coarse paste
Reheat, adding butter and salt
Thursday, November 26, 2009
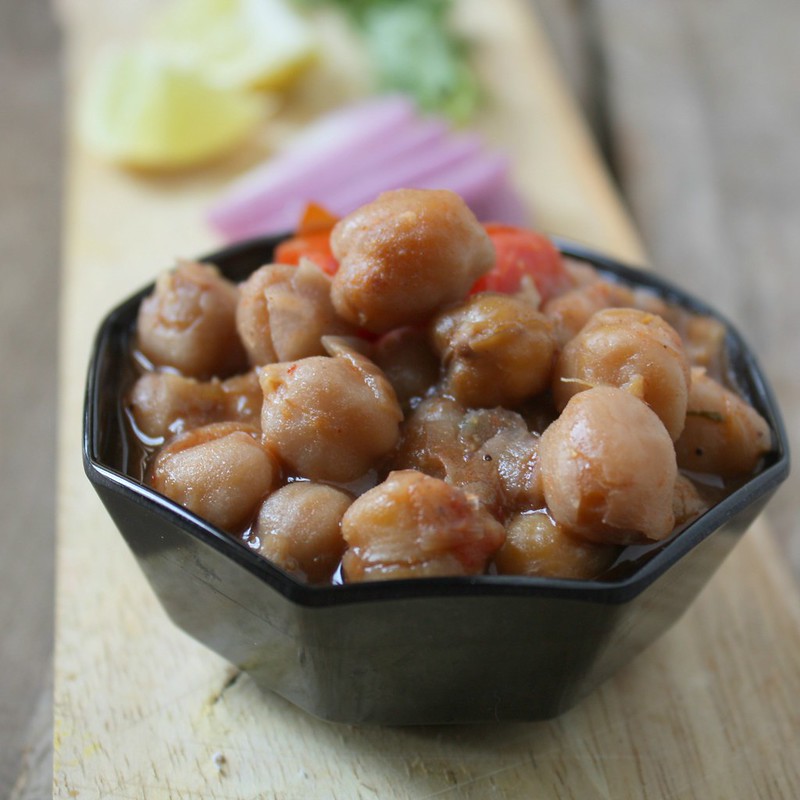
Masaledaar Chholay (Chickpeas in a spicy masala)
Last evening, after I was done with my work, I sat down with my favourite time-pass - reading recipe books! There is this set of 8 little books by Sanjeev Kapoor featuring salads and soups, maincourses - vegetarian and non-vegetarian, accompaniments and desserts. Total value-for-money pack, nice, simple do-able recipes...
I wanted to make something with chickpeas and was bored of the usual onion-tomato-chana masala. I had once tried pindi chholay from these books and it turned out awesome.
This time I tried the masaledaar choley which had a bit more masala compared to dry pindi choley. Also tried out the lachcha parathas from Tarla Dalal's site. Turned out to be a real hearty meal.
Topped it up with a glass of sweet lassi to complete the 'Punjab' experience !
Masaledaar Choley / Punjabi Chana Masala
Adapted from Sanjeev Kapoor's book
What you need -
1 1/2 cups Chickpeas / kabuli chana
2 tsp tea leaves
3 onions
6 cloves garlic
1 inch piece ginger
2 green chillies
3 tomatoes
handful of fresh coriander leaves
2 tbsp cumin seeds
2 tsp coriander powder / dhania
1 tsp chilli powder
1 tbsp coarsely ground anardana / pomegranate seeds
salt and oil
What you do with it -
Tie the tea leaves in a muslin cloth like a little potli / bundle
Soak the chana for 6-8 hours. Drain and cook in 3 cups water with salt and the potli of tea leaves
The tea leaves give the chana a nice dark colour
Peel, wash and chop onions. Peel, wash ginger garlic and grind together with the green chillies to a smoooth paste.
Chop tomatoes and coriander leaves
Dry roast cumin seeds and grind to a powder
Heat oil in a pan. Add chopped onions and saute till brown. Add ginger-garlic-green chilli paste and saute for 2 more mins
Add coriander powder, cumin powder, red chilli powder and anardana powder and saute well
Add drained chana and mix well Add tomatoes and half a cup of the water that the chana cooked in
Bring to a slow boil and garnish with coriander leaves
Sunday, November 22, 2009
Sabudana Khichdi
There are a few things that I really like, but have completely given up on making them. 'Shavige bhath'(Vermicelli upma) and Sabudana Khichdi being among them...
It was always important to get the right brand from the right store and then soak it the right away for the exact amount of time...Somehow, these detailed procedures never work for me..My vermicelli upmas have almost always been a flop except for the times when I bought it from this particular shop near my mom's place - that was the only time it turned out right...
Vermicelli upma I can live without, but I really enjoy my sabudana khichdi and have tried it so many times, but got it right only this time, thanks to a great tip from my friend here, who had made some awesome sabudana khichdi...It was not the soaking, but the step after that which was more important apparently, and that one step I had never tried...
Sabudana khichdi is a popular 'upvaas' snack for Maharashtrians - their upvaas food / food during fasting for religious reasons is so totally yummy..
There is this simple, no-frills place called 'Prakash cafe' close to my cousin's place in Mumbai and their sabudana khichdi, batata vadas and sabudana vadas are to die for !
What you need -
1 cup sabudana / sago pearls
1/2 cup roasted peanuts
1 boiled potato
2 green chillies
1 tsp cumin seeds
1 tsp mustard seeds
1/4 tsp turmeric powder
1/2 tsp salt
juice of half a lemon
coriander leaves / dessicated coconut to garnish
What you do with it -
Soak the sabudana in as much water as required to level the sabudana
Keep this for about 30 mins
Then drain the water out and spread the sabudana on any absorbant paper for about 15-20 mins, till all the water is completely drained out
They glisten like little pearls once this is done
Chop the boiled potato and coarsely crush the peanuts
Heat a tbsp of oil in a pan and add cumin and mustard seeds
When they splutter, add the turmeric powder, green chillies and cut potato
Fry till the potato is coated well and browned a bit
Add the sabudana and salt and cover and cook on a low flame for about 4-5 mins
Add the crushed peanuts and stir for minute more
Turn off the flame and add the lemon juice
You can garnish with coriander and grated coconut
Friday, November 6, 2009
Green papaya salad (Thai)
This is my second year in Ahmedabad and like it always happens, though I hate admitting it, we have settled in better - got used to the weather to some extent, though I cant stop complaining about it after living in my dear ol' Bangalore for almost all my life this far...
What has made me feel most 'settled in' here is that I know few more people here now and that I've had visitors almost every month since July...parents, in-laws, cousins, and last weekend, my dear friend from Bangalore was here...
Shopping, eating, chatting up, it was such fun, just like the good old days from college, though we now also discussed hair colours to hide the greys !!
We decided on a Thai menu for lunch - green papaya salad, green curry and pineapple basil rice...
Raw papaya was something we had to go looking for in Bangalore, but here its used pretty frequently in cooking, and I was so excited the first time I saw one in the market
The salad has a lovely combination of heat from the chillies, garlic, sugar and the tangy taste from the lemon...the raw papaya and the peanuts add the crunch factor
Adapted from Nita Mehta's Thai Vegetarian Cooking
What you need -
1 medium sized raw papaya
1 tomato
1/2 cup roasted peanuts
Dressing -
1 tsp soya sauce
3 tbsp lemon juice
4 tsp sugar syrup (I used 3 tbsp of sugar, didnt have time to make the syrup)
1/2 tsp red chilli flakes
1/2 tsp salt
3 green chillies
1 clove garlic
What you do with it -
Crush together the green chillies and garlic to a rough paste Mix this with all the other ingredients of the dressing
Peel and grate the papaya into thick long shreds
(In the book, she says you can cut into juliennes, I tried that once and its really painful - grating is an easier option)
Cut the tomato into four, deseed and cut into small squares
Add the grated papaya and tomato to the dressing and mix well
Cover with a cling film and chill for at least an hour so the flavours penetrate
Mix in half the roated peanuts
Lightly crush the remaining peanuts and top the salad with it
Monday, November 2, 2009
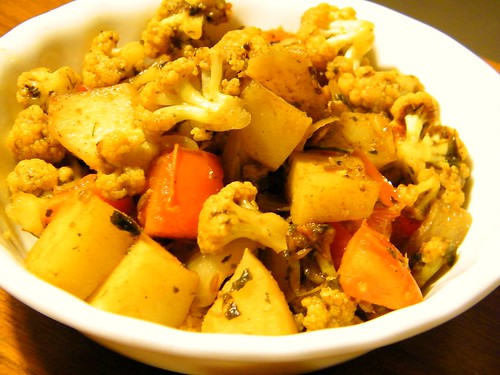
Kasuri Methi Aloo Gobi
After an action packed holiday in Bangalore-Coorg-Chennai-Pondicherry, all in 10 days, we were back home and wanted some simple food. As usual, we had overeaten at every single meal and just wanted the basic roti-sabji dinner.
This aloo-gobi is simple and tasty and gets done in about 20 mins. With hot phulkas and a cool cucumber raita, it was a fast and easy dinner.
I also managed to unpack the bags and set up my shiny new 'Preethi' mixer from Chennai, which many friends had suggested. This apparently works really well with the idli-dosa batter grinding. Haven't started using that option as yet, but will do, very soon...
This aloo gobi I make, uses a lot of kasuri methi (dried fenugreek leaves), which is one of my favourite herbs...It has a slight bitter taste and a strong smell especially when fried in oil, but does a lot to the taste of what you add it to.
What you need -
2 tsp kasuri methi
3 medium sized potatoes
2 cups cauliflower florets
1 tomato
1.5 tsp chilli powder
1/2 tsp turmeric powder
1 tsp cumin powder
1 tsp coriander powder
1.5 tsp amchur powder
1/2 tsp chaat masala
2 cloves garlic chopped
small piece of ginger sliced
1 tsp salt
What you do with it -
Peel the potatoes and cut into bite-sized pieces
Rinse the potatoes and cauliflower in some water with turmeric powder
In a deep bottom pan, add 2 tsp of oil and the ginger, garlic, kasuri methi, turmeric powder, chilli powder and let it sizzle
Add the potatoes and cauliflower and then add the coriander powder, cumin powder and salt and mix well so that the powders coat the vegetables well
Add 1/4 cup of water, cover and cook for 5-7 mins
Add the chopped tomato and stir once
Cook for another 2-3 mins or till done
Sprinkle amchur powder and chaat masala
Serve hot with rotis
Tuesday, October 13, 2009
Eggless Oat Banana Walnut Muffins
I've made muffins a number of times since this first attempt of mine...Its simple, quick, tasty and a big hit with kids. I've tried various combination based on what I had on hand - with eggs, eggless, with fruits, chocolate, oats, wheat and thankfully, so far, its always turned out quite successful !
These banana muffins turned out really awesome and I managed to take a picture before it was all devoured...
The milk we get here, from Amul, is really rich and I collect all the cream and make butter at home..I simply love the white butter with parathas and dosas and everytime I make butter, I make muffins ! This one is with oats and bananas. Turned out soft and yum !
I pretty much followed the recipes from Mytheyee's blog Paajaka, but substituted AP flour with oat flour, added some ground cinnamon and increased the quantity a wee bit
This made about 15 muffins
Here's the recipe...
What you need -
5 ripe bananas
2 cups oat flour (I used quakers oats and put it thru the blender)
1/2 cup unsalted butter
1/2 - 3/4 cup powdered sugar (depending on how sweet the bananas are)
1/4 tsp ground cinnamon
1 tsp baking powder
1 tsp baking soda
1/2 cup walnuts
What you do with it -
Keep the butter out for at least 15 mins before you use it
Chop the walnuts into little pieces
Line a muffin pan with the cups
Mash the bananas. I used a potato masher and the bananas were ripe, so they turned into a nice puree
Add the butter and sugar to the bananas
Pre heat the oven to 200 C
In a bowl, add the oats flour, baking powder and baking soda
Add the cinnamon powder and mix with a spoon or rubber spatula
Add this four to the banana and stir in well using the spatula
Stir in half the walnuts
Top the muffins with the remaining walnuts
Bake for 20-25 mins
The muffins turn out real soft and was soft even after I kept it out for 3 days
Reheat in the oven if needed
Thursday, October 8, 2009
Really Simple Moong Dal with Ridge gourd
During my pregnancy, all I wanted to eat was bland simple food - it was just idlis and pongal / khichdi, every alternate day. Didnt seem to want to even look at anything spicy. Onion, ginger, garlic and masalas, without which I wouldn't begin cooking on most days, were banished from the kitchen. I seemed to get nauseated with just the smell of it.
After months of this idli - khichdi, I was finally tired of it and then my mom made this really simple, but very comforting and total feel-good dal. I seemed to relish the little heat from the chillies and it became a favourite for the next few months.
My little one seems to love this dal too and its made very often now...Seems like the best way to get ridge gourd into our diet !
What you need -
1 long ridge gourd (2 cups of ridge gourd pieces)
1 cup yellow split moong dal
1 tsp mustard seeds
1 tsp cumin seeds
5-6 curry leaves
2 green chillies
1/2 tsp turmeric powder
pinch of asafoetida / hing
1 tsp salt
2.5 - 3 cups water
1 tsp oil
What you do with it -
Scrape the skip off the ridge gourd. You can leave a little on, but be sure to scrape off the ridges, they tend to get a bit sharp
Wash and cut into thick slices
Rinse moong dal in water and then cook the moong dal with the ridge gourd pieces with 2 1/2 cups waterin a pressure cooker till soft (2-3 whistles)
Cut the chillies length-wise
In a pan, add a tsp of oil
Add the mustard seeds, cumin seeds, curry leaves and asafoetida and wait till the mustard seeds splutter
Add the green chilles and turmeric powder. Fry till the chillies change colour
The add the dal with the ridge gourd. Add half a cup of water if its too thick
Add salt and bring to a boil
Enjoy with hot rice and a little ghee !
Tuesday, September 29, 2009
Cottage Cheese and Bean Enchiladas
This is my Indianized version of Enchiladas. Am not sure if it looks or tastes anything like the original, but it sure was a good meal..
I feel terrible when I read recipes that require ingredients that I cannot even pronounce, and most often, cannot source from any store here. I then become the 'Queen of substitution' and just add the next thing that I think would smell / look / taste like what is mentioned in the recipe..
I could call this a rajma-paneer kathi roll, its that Indianized :) but lets stick to Enchiladas for now...
I started with the recipe from Nita Mehta's book on Vegetarian Mexican cooking and then surfed across a few more sites and came up with this
The list of ingredients looks long, but it really isnt, go ahead and give it a try...
What you need
For the wheat tortillas (simply put - chapatis)
2 cups whole wheat flour
1/2 tsp salt
1 tbsp oil
1/2 cup warm water
For the Filling
1 cup rajma / kidney beans (soaked overnight in water and cooked)
1 cup crumbled cottage cheese / paneer
1 tbsp oil
3-4 cloves of garlic
1 onion
1 capsicum chopped
1 tsp salt
1 tsp oregano
1 tsp chilli powder
2 tomatoes
For the sauce
1 tsp flour / maida
3 tomatoes
1 tsp sugar
1/2 tsp salt
1 tsp oregano
1 cup vegetable broth / water
1/2 cup cheese
For the topping
1/2 cup grated cheese
1 tomato chopped
5-6 low spice chillies
1 capsicum (I used half yellow and half green)
1 onion chopped
(For the topping, just the cheese would do, but I went ahead and added a whole lot more)
What you do with it -
For the tortilla -
Mix together the flour, salt and oil in a bowl
Add water gradually to make a pliable dough
Cover with a moist cloth and keep aside for about half an hour
Divide the dough into 8-10 parts
Roll out each using a little flour into thin chapatis
Heat a tava. Place the rolled dough onto the tava
Cook lightly on both sides
Remove from heat and keep wrapped in a foil
For the filling -
Heat the oil, add chopped garlic and capsicum
Add onions and fry for 2-3 mins
Add the cooked beans, salt, chilli powder and oregano
Add chopped tomatoes and the crumbled paneer and stir till dry
For the sauce -
Puree the tomatoes and grate the cheese
Bring the broth / water to a slow boil
Add the flour and stir well
Slowly add the puree and cheese and then the salt, oregano and sugar
Mix well on low heat till it thickens
Assemble and Bake -
Fry the prepared tortillas for a few seconds. They should not turn brown or crisp
Spread a spoon of sauce on the tortilla
Add the filling in the centre and roll in the sides
Do this with all the tortillas
Grease a oven proof dish and place the tortillas tucked side down
(Ideally a rectangular dish, so the tortillas are placed side by side, but I had only a round one)
Pour the remaining sauce on top and then top with grated cheese, chopped tomatoes, onions and slit chillies
Bake at 180 C for 20-25 mins
Monday, September 21, 2009
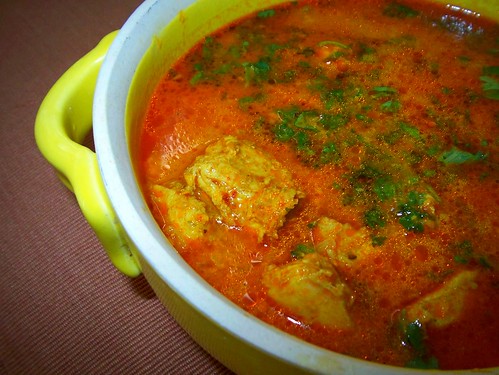
Recipes from the Taj - Kombdicha Rassa (Maharashtrian style Chicken Curry)
A few years back, I had to go for dinner at a place where I didnt know too many people. It was one of my dad's friend who was hosting a big dinner at his house, for a whole lot of people. I am terrible at making general polite conversation with people I dont know too well and was wondering how I would get thru the evening...
I tried to keep myself busy by flipping thru the various magazines when I saw this book there
It was a book of Chef's recipes from the Taj group of hotels, featuring non-vegetarian recipes. The foodie in me went drooling over the recipes and pictures, but I was surprised that this book was here, considering this was a strictly vegetarian household. It happens that my dad's friend was a frequent visitor to one of Taj group hotels in Sri Lanka and they had come out with this special edition and gifted it to him
He did eat chicken once in a way, but his wife never did and they never cooked / brought anything non-vegetarian at home...
The great thing was that the lady there asked me if I liked that book and I said its really interesting...She promptly asked me to take it, because if it was spotted by anyone from her family, they would not be too pleased seeing a book on non-vegetarian cooking in a strictly vegetarian household
This book has some really awesome recipes and I have tried quite a few...
I bought a packet of goda masala from my last trip to Bombay and have been trying a lot of Maharashtrian recipes with it... I love the flavour and this recipe used goda masala...Had this with steamed rice and a cucumber raita for lunch on Sunday...
This recipe is from Panchratna at Taj Residency, Nashik by chef Ratnakar Prabhu
What you need
200 gm chicken
1 tsp ginger-garlic paste
1/2 tsp green chilli paste
100 gm dry coconut / kopra
1 tsp coriander seeds
2 red chillies
1/2 tsp sesame seeds
2 tbsp oil
1 small onion
pinch of turmeric powder
1 tbsp chilli powder
1 tbsp yoghurt
whole garam masala - 2 cardamoms, 1 piece cinnamon, 3 cloves and a bay leaf
1 tsp goda masala
1 tsp coriander leaves
salt
1.5 cups water
What you do with it -
Cut the chicken into pieces and wash well
Chop onion into small pieces
Marinate chicken pieces with half of the ginger-garlic and green-chilli paste
Keep aside for at least 30 mins
Heat oil and add the whole garam masala (not powdered), remaining ginger-garlic and green chilli paste and onions
Fry till onions are brown
Add marinated chicken pieces, salt, chilli powder, turmeric, goda masala
Stir till the pieces are coated with the powders
Add the water and saute till its cooked
Grate the dry coconut. Roast coconut, coriander seeds, red chilli and sesame seeds and grind to a paste with as little water as needed
When the chicken is cooked, add yoghurt, ground masala and sprinkle some goda masala
Garnish with coriander leaves.
Serve with steamed rice
Wednesday, September 16, 2009
Tambde Duddhya Doddak (Red Pumpkin Dosa)
Breakfasts were always important at my mom's place, but somehow after I got married, it took a back seat. Early working hours, managing all alone, packing lunch, all this seemed to take a toll on my breakfasts.
Bread was what I could manage, if at all. I was never a cereal person. I'd rather skip breakfasts that have cereals ! After about 2 years of completely messing up with my system - No breakfasts, just mugs of coffee at work and eating at wrong hours and I was suffering from terrible acidity. After that I got more serious about breakfasts, and now over the years, getting older and wiser(!) I realised how important breakfasts are...
So please guys, if you aren't eating breakfasts, time for you to seriously consider starting on them
Doddak (Thick dosa) was made very often for breakfast at Ma's place. I had almost forgotten about it till I saw this post for taushe doddak on Vani's blog. I made it every week after that. I then remembered Ma making this red pumpkin doddak. It had a sweetish taste and was one of the few sweet things I really enjoyed.
This one was what my son had with some jaggery syrup smeared on top..he can eat anything with jaggery syrup !
And this is my spiced up version...
What you need -
2 cups grated red pumpkin
1 cup grated coconut
2 tsp grated jaggery
1/2 tsp salt
1.5 cup semolina / rava /sooji
3/4 - 1 cup water
oil
What you do with it -
Mix all the ingredients, except semolina, water and oil
Keep aside for about 10 mins. The salt added to this will make it a little watery
Add semolina to this and add water just enough to make a thick batter. It should way thicker than what we make for a regular dosa batter
You may not need to use all the water - it needs to be a really thick batter
Heat the tava and smear a little oil on it
This batter cant be poured out, so spoon the batter onto the tava, maybe 2-3 spoon fuls
Spread as much as you can and then cover and allow to cook for 2-3 mins on medium heat
Flip over and cook for another minute or so
Serve hot with jaggery syrup / honey / butter
If you are like me and dont like the sweetish taste too much, add a few cumin seeds, chopped green chillies and chooped coriander. The sweet / spicy taste, I think, is way better !
Monday, September 14, 2009
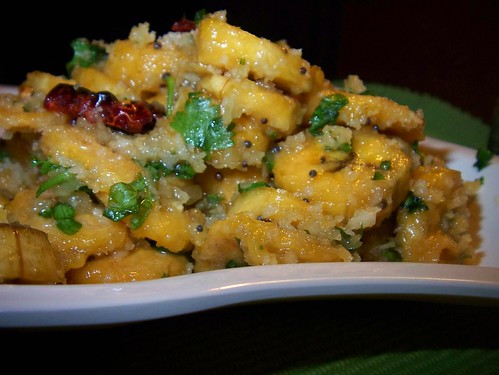
Kela Sukke (Raw banana in a coconut masala)
I was never too fussy with my veggies even as a child. I liked most of what I ate and it was a rule at home, that we couldn't waste anything. We had to finish what we were served on our plates.
A friend once noticed that my brother and I had always managed to finish what we had on our plates (or leaves) when we once sat together at a traditional Kannada wedding lunch ('madhuve oota'). I am hoping its the good childhood habit that surfaced more than the greed !!
Raw bananas were not made that often at my mom's place, but TH's family seemed to use it and like it a lot. Pakodas, dry curries, kuzhambu, lots of different things are made from raw bananas at their place. I have started using it quite a bit too now and this is one of my favourites...
Sukke in konkani means 'dry', here its more like a thick gravy.
This goes best with some hot rice and dal
Recipe adapted from Rasachandrika, an excellent book on Saraswat cooking
What you need -
3 medium sized raw bananas
1/2 cup grated coconut
1/4 tsp turmeric powder
4-6 red chillies
a handful of chana dal / bengal gram
1 small ball of tamarind
1.5 tsp salt
1 tbsp grated jaggery
1.5 tsp coriander seeds
1/2 tsp urad dal / black gram dal
1/4 tsp fenugreek / methi seeds
1 tsp mustard seeds
a few curry leaves
What you do with it -
Soak the chana dal in water for 4-5 hours
Scrape the skin off the bananas and cut it into broad and long pieces
Keep the pieces dipped in water to prevent them from darkening
Cook the soaked chana dal in a vessel with enough water to cover the dal
Once its cooked, add the banana pieces, salt and jaggery
Allow the banana pieces to cook well
Fry the coriander seeds, urad dal and methi seeds in a tsp of oil
Grind the grated coconut, turmeric powder, chillies and tamarind to a coarse paste
Add the fried ingredients and grind to a paste
Add the masala to the cooked bananas and bring to a boil on a low flame
Heat 1/2 tsp oil in a small pan and add mustard seeds and curry leaves and pour over the banana curry
Friday, September 4, 2009
Thai style Noodles
On one of the quieter tree-lined streets in Bangalore, there was this really beautiful restaurant called 'Spiga'. It was a really pretty house and the informal atmosphere made the whole experience so much nicer.
They had an interesting menu, with a few options from various cuisines
I am a big fan of Thai food and invariably ordered that when I went there and it was simply perfect every single time
The street is now busier and is more like a high-fashion street with all Indian and global designers having a showroom there and Spiga has closed down
The good news is that they have opened their restaurant in another area in bangalore, the bad news is that I dont live there anymore *sob*
In memory of all the lip-smacking food i have had at Spiga, I made this Thai style noodles for dinner last night.
I found brocolli and coloured peppers here and I knew I had to make this. I made a little red curry paste, added peanuts, got the veggies together and made a little red curry out of it. Added a bit of soy sauce, sugar, chillies and noodles and it tasted real good, almost as good as the one from Spiga...
What you need -
1/2 cup peanuts
2 tsps soy sauce
1 cup coconut milk
1 cup brocolli florets
2 coloured capsicums
1 onion
1/2 cup chopped spring onions
chilli flakes
1/2 tsp sugar
1 tsp salt
(You can add tofu or mushrooms to this)
For the paste -
4 red chillies
1 tbsp coriander seeds
1 tsp cumin seeds
5 cloves of garlic
1/2 inch piece ginger
1/2 tsp lemon rind
1 tbsp lemon juice
1/2 onion
What you do with it -
Roast the peanuts and crush them into small pieces
Chop the peppers lengthwise. Wash and keep aside
Chop the onion into large pieces lengthwise
Cook the noodles as per the instructions
I dropped it in how water with a little salt, for about 5 mins
Drain water. Add a tsp of oil and spread it in a large plate to avoid it getting all sticky
Soak the chillies in warm water for about 10 mins
Put thru a blender all the other ingredients under 'For the paste'
Add half the roasted peanuts and blend one more time
In a large deep pan, add the paste and fry, adding a little oil
Add sugar and salt
Add the onions, capsicums and brocolli
Add the soy sauce and stir on high heat
Lower the heat and add the coconut milk
Cover and allow to cook for 6-7 mins
To serve, place the noodles in a plate and spoon the curry over it
Garnish with roasted peanuts and spring onions
Sunday, August 30, 2009
Goan Egg Curry
Most families from the Konkani speaking community have a 'family deity' temple in Goa. Goa, best known for its beaches, food and as a great holiday destination also houses a whole lot of temples and churches.
I remember my friends from school who would be so awed that Goa is my temple town !! Our 'kuladevi' (family deity) is Shantadurga and there is this really beautiful temple in Goa that we have often visited when we were kids.
Rice, coconut and fish is the staple food in most homes in Goa. The cooking styles of the Hindu and Catholic community in Goa varies slightly, in that, the Catholic style of cooking generally uses more vinegar. There is a lot of Potuguese influence in the this cuisine.
The Hindus do not eat fish/meat on Mondays ('Shivraak', the day they pray to Lord Shiva) and do not eat beef for religious reasons.
There are a lot of fresh spices used in this cuisine and along with the coconut, it adds a lot of flavour to any dish.
This recipe was written down in a big hurry, from a recipe book at my uncle's place. He is a great cook and the lunch that day was all Goan cuisine, made from this book. This egg curry was brilliant and I have made it many times after that.
Cant remember the name of the book or author - will definately update it once I check with them.
What you need -
6 eggs
1 cup grated coconut
4 red chillies
1 tsp cumin seeds
1 tsp mustard seeds
5 cloves garlic
1/4" piece of ginger
1 tsp turmeric
1 onion
1 tomato
2 tsp tamarind extract / extract from a few rinds of kokum soaked in water
1 tbsp chopped coriander leaves
What you do with it -
Hard boil the eggs and cut in half
Grind coconut, chillies, cumin, mustard, garlic and ginger to a paste
Mix in with tumeric and tamarind extract / kokum water
Slice the onion and chop the tomato
Fry onions in a kadai till it turns brown and add the ground masala, salt and chopped tomato
Fry for 2 more mins and add a cup of water and bring to a boil
Cook for 5 mins
Place the eggs over the masala
Cover the pan and cook for 4-5 mins
Garnish with chopped coriander leaves
Wednesday, August 26, 2009
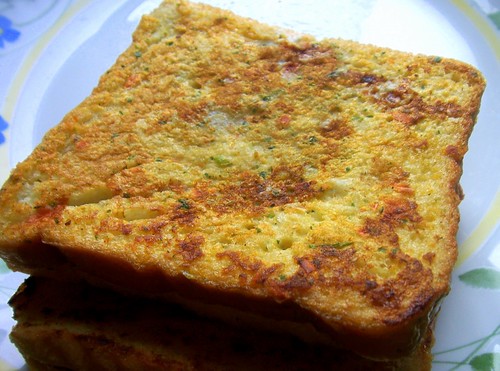
'Toast' to Friendship
I cant remember when I last hand-wrote a letter to anyone or sent a card for someone's bday. Its emails, e-cards and even websites/mobiles/e-calenders that send you reminders about your friends' birthdays and anniversaries.
I hate myself for using this 'technology' like a crutch to remember a few dates, but I guess thats how life has become now, though I am glad I belong to a generation where hand-written notes were valued so much...
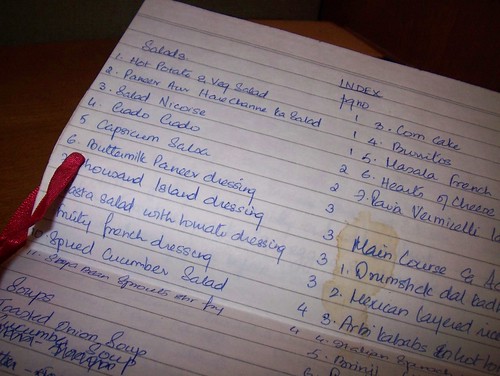
On one of my birthdays a few years back, I received this small packet by courier. It had about 20 sheets of hand written recipes, neatly indexed and tied up with a little red satin ribbon.
I think that was one among the most thoughtful and touching gifts I have received in a long time. Sometimes, a really 'little something' can make you feel so good...
Miri, who's been a very dear friend for a long time now (way before I knew what food blogging was !!) had sent me this as a birthday gift.
I had visited her a while before that and seen that she has this book with a whole load of recipes and I told her I must get down to noting some - someday.
The sweetheart that she is, sat and wrote down about 40 recipes and sent it for my birthday ! Can't tell you how touched I was...
Thank you Miri, you're the best !!
This is one of those recipes and the one I make most often. I dont like my bread sweet, so that version happens for the husband and son and I love this one
Dont know how 'french' this is, but this is what Miri called it...
What you need -
1/2 onion
1/2 tomato
4 green chillies
1/2 cup coriander leaves
2 eggs
1/3 cup milk
6 bread slices
salt to taste
What you do with it -
Grind onion, tomato, chillies, coriander leaves, and salt to a paste
Beat the eggs, add the masala paste and milk
Heat a tava, add a little butter
Dip the bread slices one at a time in the egg mixture and fry on the tava till both sides are done
Tuesday, August 18, 2009
Handvo (Baked version)
One thing you can never run short on in Ahmedabad is FOOD - fancy restaurants to roadside carts with some amazing food dished out all thru the day. My favourite is the awesome Gujarati thali, and there are restaurants at every corner serving these thalis. Its convenient, you dont need to order, just sit and a stream of people queue up to serve you in the this really big round thali / plate(my little one can easily sit in it), with a minimum of 7 bowls placed neatly in it.
There is this order in which people come to serve you and each item goes into the designated bowl.
'Farsaan' is a common word for a snack, which could be deep fried like kachori, samosa or somthing like khamman dhokla, sandwich dhokla, and is a integral part of every thali.
Handvo is a snack which you dont get so easily in these restaurants or the 'Ganthiya' stores. Its more of a regular home made healthy snack.
My friend here had made handvo once, it looked more like a well-done uttapam and was made in a deep pan /kadai
My aunt (whose husband is Gujarati) was visiting and she told me she baked the handvo, it takes lesser oil and tastes much better !
Now that sounded really nice..
I found this 'handva nu loth' / handvo flour at the flour mill close by, and tried the handvo. It turned out so good and was a real healthy snack with a whole lot of vegetables. I've bought a lot more of the flour now and I'm sure this will be made more often at home...The flour is a mixture of various dals made into a coarse powder
What you need -
3 cups handvo flour
(you can blend 1 cup rice, 1/4 cup moong dal, 1/4 cup ural dal, 1/4 cup chana dal and 1/4 cup tur dal into a coarse powder if you cant find any ready handvo flour)
2 cups curd / enough to soak the handvo flour
1 medium sized bottle gourd
2 carrots grated
1/2 cup coriander leaves
1 cup corn kernels
1 tsp ginger-green chilli paste
1 1/2 tsp salt
1/4 tsp turmeric powder
a generous pinch of asafoetida
1 tsp sesame seeds
1/2 tsp chilli powder
1/2 tsp baking powder
1/4 tsp baking soda
1 tsp oil
Seasoning
2 tsps oil
1 tbsp sesame seeds
1 tsp mustard seeds
1/2 tsp chilli powder
What you do with it -
Soak the handvo flour in curd and mix well. Allow to ferment overnight
Mix the ginger-green chilli paste and turmeric in the fermented batter and mix well
Add the chopped coriander leaves and salt to the batter and keep aside
Peel and grate the bottle gourd and carrot. Squeeze the water from the gourd
Add the gourd, grated carrot and corn kernels to the batter
Heat a tsp of oil and add 1/2 tsp chilli powder in it. when it sizzles, pour it into the batter and mix well
Prepare the seasoning with the mustard seeds, sesame seeds and chilli powder
Preheat the oven to 190 C
Grease a pan with oil or butter and pour the batter into it
Add the baking powder and baking soda in 1/2 tsp oil. Mix and pour into the batter
Mix well, add the seasoning and immediately transfer it to the oven
Bake for about 40 mins at 190 C
Cut into squares or triangles and serve with coriander-mint chutney
Monday, August 3, 2009
Masala Keli (Spiced Bananas)
When I was out grocery shopping last week, I found this 'Kerala Store' that stocked a lot of white pumpkins(the veggie vendors here never have this), small red pumpkins and the famous 'nendra pazham'/kerala bananas. I had never seen these bananas or even the elaichi bananas that you get in Bangalore, in a real long time. I was so thrilled to see all this, that I bought a cute little red pumpkin and 4 of the nendra pazhams.
I made the mathanga erissery from Nags' blog with the red pumpkin and Ma made this masala keli with the nendra pazhams. The masala keli / spiced bananas is traditionally made with a chutney stuffed in the bananas, but this is Ma's easy version, and I totally love it
You could try making this with any variety of bananas I guess, but the nendra bananas have a very different flavour and it suits this the best
What you need -
4 nendra pazhams / ripe bananas
3/4 cup dessicated coconut
2 red chillies
1 tsp mustard seeds
1/2 cup chopped coriander leaves
3 tbsp grated jaggery
1/2 tsp salt
1/2 tsp ghee
What you do with it -
Peel the bananas and make thick slices
In a bowl, add the bananas, coconut, jaggery, coriander leaves and salt
Toss and keep aside for about 10 mins
For the seasoning, heat the ghee add mustard seeds and the broken red chillies
Add the seasoning to the bananas
If you try this with any other variety of bananas, do let me know how it turns out
Will try the authentic version of stuffing the bananas with the chutney and post it soon
Thursday, July 30, 2009
Peach Cobbler
Last week was wonderful..Cousins and ma were visiting and the weather was really nice..After one year of living here and cribbing endlessly about how hot it was, it finally cooled off and its been raining almost everyday for the last two weeks...
The nicest thing about this part of Ahmedabad is the number of peacocks we have walking around here. They stroll around even in the apartment complex. The rains made these birds wake up real early...you could hear them (and they dont sound so nice, they cry like little kittens, just much louder) from about 4 in the morning...A few weeks back, one of them had flown up to my balcony (on the 3rd floor) and till then I never knew peacocks fly !!
After telling you so much about the peacocks, I am really tempted to post one picture of them taken at a museum garden..Here are the handsome fellas...
Like it always happens when family is visiting, we did a lot of shopping, eating, chatting, even played scrabble till really late at night ! Made a whole lot of stuff from other blogs and mine - Red Chillies' baked nippattu, Miri's carrot coconut muffins, Sia's rhengan reveya, Ginger potatoes, Pesto Pasta, Corn Chowder, Spaghetti Bolognese with soy flakes(cousin's recipe) and the simple dal chawal, roti sabji on some days !
One evening, we had a chaat party - aloo tikki with Ranjani's khattey meethey choley, paani puri and dahi batata puri.
I had bought some peaches but wasn't sure what to make with them..My cousin promptly suggested a peach cobbler - I had never made or even tasted one before, so looked up and found this recipe on Food Network
It was really simple and tasted great.
I followed the recipe except for these few changes...
I didnt have brown sugar so used regular sugar mixed with some vanilla essence and cinnamon. I had two pears, so sliced them and added it up too..Also sprinkled some icing sugar on top...
A spoonful of peachy yumminess...
If you dont have peaches, I think apples and pears should work just fine
Monday, July 20, 2009
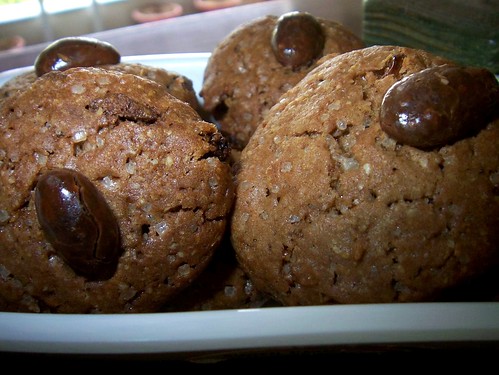
Choco-Nuttie Cookies
This was my third attempt at making chocolate cookies...It always failed at step 0, because the chocolate I buy to add into this is always polished off, either by my son, when it is at a level for him to reach, or by the sugar-starved husband, who claims that his hand actually shakes because the sugar content in his body is low !!
This was one of those days when I just had to bake something. It was a wierd hour of the night, but the baking itch didnt go away. It was the day before TH's birthday, so thought I would give him his quota of chocolate...
No chocolate in the house, no shops open at the wierd hour when the baking bug bit, so I borrowed chocos from my son's quota of afternoon snack and found one small packet of almond nutties that someone had gifted my son. It was stuck behind a big jar of jam in the fridge and so survived the attack from these two men in my house...
Really simple to make, I claim its healthy because its got oats in it and the son and husband are super thrilled that I am offering them something chocolatey...
These were crisp, not chewy and I think we enjoyed this much more than the chewy ones..
What you need -
1 1/2 cups oats (powdered in a blender)
1 1/2 cups plain flour / maida
1/2 tsp baking powder
1/2 tsp baking soda
1/3 cup butter
2 tsps cocoa powder (unsweetened)
1/2 cup chocos
nutties (optional, use as many as you have as a topping to the cookies)
1 egg
1 cup sugar (powdered preferably, i didnt so you can see the crystals in my cookies)
1 tsp vanilla essence
You can leave out the chocos and nutties..The chocos were to add to the crunch and the nutties, because they were around..
What you do with it -
Beat the butter and sugar in a deep bowl till its smooth
Beat the egg and add to the butter and sugar mixing it lightly till combined well
Sieve the flour with the baking powder, baking soda and cocoa powder
Spoon the flour into the egg mixture
Add the vanilla essence and combine with a wooden spatula / spoon
Cover this and refrigerate for about half an hour, so its easier to handle
Pre heat the oven to 180C / 350F
Cut butter paper to size and spread on a baking tray
Shape the cookie dough into balls, flatten slightly and place on the baking tray atleast 2 inches apart, they tend to spread and flatten as they bake
Crush the chocos with a spoon or your hand
Add the crushed chocos on each cookie and then top it with the nuttie
Bake for 15-20 mins. Remove the butter paper with the cookies on it and set aside to cool. Do not pull them off before they cool completely
Bake the remaining dough similarly till the dough is all used up
Friday, July 17, 2009
Paan pole (Neer Dosa)
One more Mangalorean special coming your way...Ever since I saw this RCI on Udupi and Mangalorean cuisine, (hosted by Sia this month, an event started by Lakshmi), I cannot stop myself from blogging about all the Mangalorean cooking, especially the regular home food that you may not get in a restaurant.
This particular one though, is quite popular in most Mangalorean cuisine restaurants, and served with Mangalorean style chicken curries
Like I've mentioned in my earlier posts, coconuts are used a whole lot in Mangalorean cooking, here the dosa and the accompaniment has coconut in it !
This neerdosa (neer = water in Kannada) / paanpole (In Konkani...paan means leaf and polo/pole means dosa), is really thin and soft, that why the name
I remember I once hosted this Dosa brunch at my place on a Sunday, where I made masala dosa with sambaar and chutney, pesarattu with tomato chutney and these paanpole with 'choon' (pronounce the 'ch' like the 'cz' as in 'czar', its more like a 'czoon')
My granduncle was also there and he said that it reminded him of the breakfast his mother made for him when he was a child. I was so touched, this was perhaps the best compliment I had recieved. This 'choon' is a no-cook accompaniment and goes great with paanpole(recipe below)
Paanpole can be served with any chutney, but this one is my favourite. A closer look at the choon...
Paan pole
What you need -
3 cups raw rice (use regular rice, its easier to grind than the boiled / idli rice)
2/3 cup grated coconut
salt
oil
What you do with it -
Soak the rice in water for 4-5 hours
Grind the rice with the grated coconut, adding water, to a very smooth and thin paste
Add salt and mix well
The batter should be really thin
On a hot tava, apply a little oil and take a ladle of batter and spread it, starting from the side and then towards the centre
Since its really thin, you will not be able to flatten and spread it like a regular dosa, you can instead lift the tava and swirl it around, so that the batter fills up the empty spaces (Reading this sounds more complicated that it actually is !!)
Cover the tava. This is meant to be a soft dosa, not crisp
This will not turn brown, so once it starts leaving the edges, flip it over and cook for a minute. Fold into a quarter and serve hot
Choon
What you need -
1/2 cup grated coconut
1/2 cup grated jaggery
1/4 tsp powdered cardamom
What you do with it -
Mix all the ingredients
Serve as an accompaniment with the paanpole
Wednesday, July 15, 2009
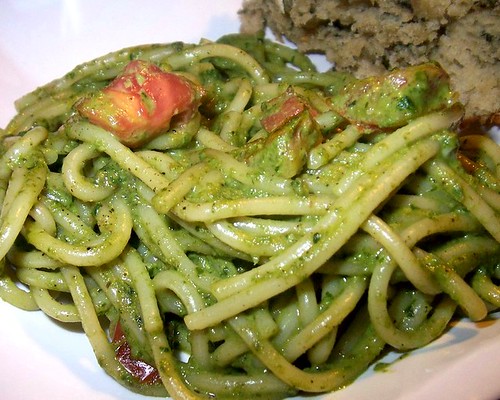
Spinach bread and Pesto Pasta
Last week, Ahmedabad finally saw some rains...Its almost like a desert here, hot, real hot dry summers and the winters are short, but quite cold.
Monsoon is not an official season here, it cant be, because it lasts for about 2-3 days..Last year, it rained for a day, the entire day, but that was it...complete dry spell after that
The hot weather here is great for baking, only because the yeast comes up beautifully, otherwise, the entire house feels like an oven. Temperatures are around 41 C - 44 C, for at least 4 months in a year and it just doesnt seem to be the right time to bake anything
This particular day, it was sunny, but there was a lovely breeze, I decided to put my yeast to test again, made this spinach and cheese bread. By evening, the winds were really strong and in the apartment I live in, you could hear eerie sounds of the wind go thru the columns...It started pouring and went on for about 3 hours
Made this pesto pasta to go with the bread, sat out in our balcony and enjoyed the lovely weather, while muching on the bread and pasta. S was back home early and the change in weather was really welcome. I think this was the first day that I enjoyed being here.
For the Pesto Pasta
What you need -
2 medium sized tomatoes
3 cloves garlic
2 cups of pasta / spaghetti
1/2 tsp salt
1 tsp red chilli flakes (optional)
2-3 tbsp milk
Pesto
1 1/2 cup packed, cleaned and chopped coriander
1/2 cup walnuts
4 cloves garlic
1/4 cup cheese
1 tsp olive oil
1/2 tsp salt
1/2 tsp pepper corns
What you do with it -
Grind together all the ingredients under Pesto to a smooth paste, without adding any water. Add more olive oil if required.
Add salt to water and bring to boil. Cook pasta in it as per instructions on the packet
Chop the garlic and tomatoes
Add a little olive oil in a pan and add then the garlic
Add in the pesto and stir, adding spoonfuls of milk
Add the pasta, salt and chilli flakes
Add tomatoes and turn off the heat
Add grated cheese over the pasta if you like
(You could substitute the coriander with spinach / basil)
Spinach Bread
This one is adapted from this wonderful book 'Baking' by Martha Day, which has well-explained simple steps to baking and great for a beginner like me
Skipped the bacon and use wheat flour instead of the AP flour
Sending this to Yeastspotting, hosted by Nick of imafoodblog this week
What you need -
4 cups wheat flour
1 1/2 cups water
1 onion
2 tsp active dry yeast
1 tsp sugar
2 cups chopped spinach
1 tbsp olive oil
1 1/2 tsp salt
1/4 cup grated cheese
What you do with it -
Put water in a bowl, sprinkle yeast and add sugar
Mix and allow to proof for 10-15 mins
Heat oil in a pan and fry the onion
Add the chopped spinach to this and stir till the spinach is cooked and dry
In a large bowl, add the flour and salt
Make a well in the centre and pour the yeast mixture
Add the onions and spinach and knead to make a soft dough, using a little more olive oil if required
Cover and keep aside for about an hour or till the dough has doubled
Grease a pan / loaf tin
Punch the dough down and knead lightly and transfer to the greased tin and allow to rise again for about 30 mins
Sprinkle the grated cheese over it
Preheat the oven to 200 C / 400 F
Bake the loaf for 25-30 mins. Transfer to a wire rack to cool
Sunday, July 12, 2009
Tomato Saar
Konaki cuisine uses a lot of coconuts - its the base for most side dishes, like bendhi, sukke, bhutti and for almost all the curries had with rice, like ambat, ghashi, saar, sambaren...
If its not used in the masala, then its part of the garnish at least. You will see very few dishes in Konkani cooking that do not use coconut.
Everytime there is a hint of an arguement of coconuts not being healthy, most pachchis (means mother's sister, but used for all 'aunties') are up in arms defending the poor coconut. They will give you lectures on how coconut and coconut oil is actually good for you.
Traditional Mangalorean cooking uses coconut oil for the seasoning. Specific types of Happol (papads) are fried only in coconut oil, because they taste best only that way !
This is a very simple and super tasty saar (something like a rasam, but thicker) with tomatoes and coconut. It has the spice from the green chillies, tangy tart flavour from the tomatoes and sweetness from the jaggery...
Simple to make and goes very well with rice and simple side dish like an upkari
I am thrilled that Sia is hosting the RCI event this month featuring Mangalorean and Udupi cuisine, orginally started by Lakshmi of Veggie Cuisine
To read my other posts on Mangalorean cuisine, see Dudhya Koddel, Pathrode, Tendle Bibbe Upkari, Tendle Bhutti, Khatkhaten and Solkadi
What you need -
4 tomatoes
3-4 green chillies
1 cup dessicated coconut
a few curry leaves
1 red chilli
1/2 tsp mustard seeds
a pinch of asafoetida
1 1/2 tsp salt
2 tbsp grated jaggery
What you do with it -
Blanch the tomatoes in hot water. Peel the skin off and keep aside to cool
Keep this water to use later. This is where the nutrients are
Grind the chillies, coconut and tomatoes in a blender till smooth
Add the water reserved earlier and a little more water if required, to the tomato-coconut paste
Add salt and jaggery and bring to a boil
Heat oil in a small pan and add mustard seeds, broken red chilli, curry leaves and asafoetida
Pour the seasoning over the saar and serve with hot rice
Thursday, July 9, 2009
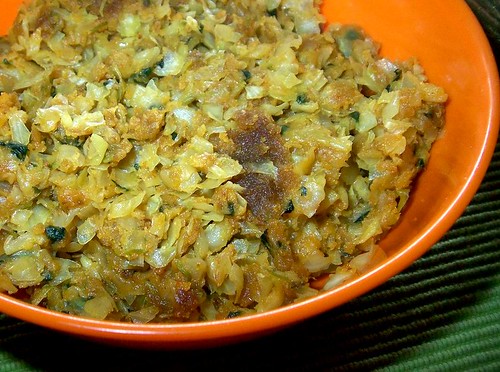
Cabbage and Methi Zunka
My mom's lived in Bombay all of her pre-marital life...She has a lot of Maharashtrian friends and speaks excellent Marathi. Our language and food habits have a lot of Marathi influence though we were brought up in Bangalore.
I realised this when I visited a grand aunt in Mangalore and didnt understand quite a few of the pure Konkani words she used. At home, though we did speak Konkani, Ma would add in a lot of Marathi words and we assumed it was Konkani !
Luckily for us, Ma is really an excellent cook and has tried her hands at all cuisines, so we were exposed to food from different regions since we were really young, Maharashtrian cookign being one of the favourites.
Ma made it with either cabbage or methi leaves.
I bought this really lovely looking bunch of tender baby methi...
I started off to make a methi zunka, but cleaning this up took half a day and I was left with realy little, so added in cabbage too. It tasted awesome with dal and rice.
What you need -
1 cup methi leaves
2 cup chopped cabbage
1 onion
1/2 tsp jeera / cumin seeds
1/2 tsp mustard seeds
3 tbsp besan / chickpea flour
a pinch of asafoetida
1 tsp sugar
1/4 tsp turmeric powder
1/2 tsp red chilli powder
half a lemon
What you do with it -
Chop the onion. Clean the methi leaves. Clean and chop the cabbage
Heat oil in a pan and mustard and cumin seeds
Add onions and fry till they turn a little pink
Add the turmeric powder, asafoetida and chilli powder
Fry a bit and add the chopped cabbage and methi
Add the sugar and tsp of salt
Cover the pan and allow it to cook
When its almost done, add the besan and stir well till done
(I love it when the besan turns brown and almost crisp-those are the brown bits you see in the pic)
Squeeze the juice of half a lemon over it
Tuesday, July 7, 2009
Manglorean style fish curry - Surmai Amshe Tikshe
I have these phases where I give up eating chicken for a few years and then, one fine day, I am back with a vengeance...I don't really miss eating chicken at all, but fish is one thing my true Mangalorean heart(or stomach, perhaps) cannot seem to give up !
There is this really modest looking eatery in Bangalore called Fish Land and the name says it all...They dish up the most amazing fish curries, fried fish and fish biryani. There is also this chilli chicken they make there which is so spicy that you have a runny nose, watery eyes and some fumes coming out of you ears when you bite into it !
Its a clean, no-fuss, no-frills place which serves up excellent Mangalorean fish thalis, chicken thalis and a variety of fried fish...
The taste of the fish curry there is so perfect and it hasn't changed in the last 18 years !
Yes, we've been going there for that many years, and the people at the restaurant know exactly what each one of us will order.
A cousin of mine who frequented this place with us, moved back to Bombay after a few years and the the person taking the order once asked us, where the 'chilli chicken' person was...
She always ordered that there and he didnt know any other way of identifying her...
On this visit to bangalore, Ma made this lovely amshe tikshe which was as good, if not better than the FishLand fish curry...
In Konkani, 'amshe' is sour and 'tikshe' is spicy. Thats exactly how this curry tastes.
There is a variation of the amshe tikshe, where you can omit the coconut, and bake the fish in the masala. Tried this after i learnt it from my aunt, back in Bangalore. I used a different variety of chillies, so the colour is distinctly different.
To read my other posts on Mangalorean cuisine, see Dudhya Koddel, Pathrode, Tendle Bibbe Upkari, Tendle Bhutti, Khatkhaten and Solkadi
Sending this to Sia's RCI event this month , which was started by Lakshmi of Veggie Cuisine
What you need -
6-7 slices of fish (preferably seer)
20-25 red chillies (byadgi chillies give the perfect colour)
1 handful of tamarind
6-7 cloves of garlic
5-6 teppal / sichuan pepper
2 tbsp grated coconut
salt to taste
a pinch of salt and turmeric powder
What you do with it -
Clean the fish and apply the salt and turmeric powder and keep aside
Fry the red chillies in a spoon of oil till they turn deep red
Grind together the tamarind, fried chillies, garlic and coconut to a paste
Add only as much water as required
Apply this on the fish and marinate for about 20 mins
Heat oil (coconut oil, if you want the true taste) an add the teppal in it
It will fluff up a bit and tends to splutter, so be careful with this
Add 1/2 cup water and salt to the fish and bring to a boil
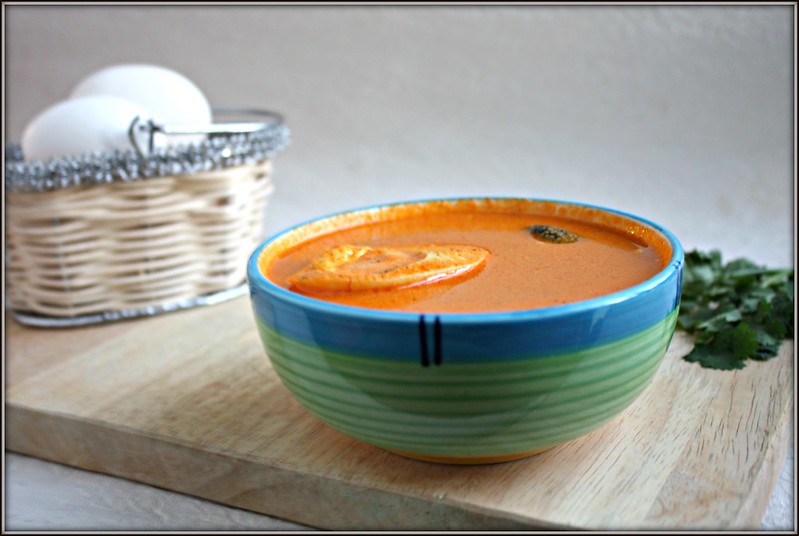
Add the oil with the teppal in it
You can use the same recipe to make hugga, another Konkani dish with the same masala.
Omit the step where you add water and bring to a boil
In this, you bake the fish
Apply coconut oil to the baking dish, place the fish with the masala in it
Add the teppal and salt
Bake in a pre-heated oven for about 25 mins at 180 C
There is this really modest looking eatery in Bangalore called Fish Land and the name says it all...They dish up the most amazing fish curries, fried fish and fish biryani. There is also this chilli chicken they make there which is so spicy that you have a runny nose, watery eyes and some fumes coming out of you ears when you bite into it !
Its a clean, no-fuss, no-frills place which serves up excellent Mangalorean fish thalis, chicken thalis and a variety of fried fish...
The taste of the fish curry there is so perfect and it hasn't changed in the last 18 years !
Yes, we've been going there for that many years, and the people at the restaurant know exactly what each one of us will order.
A cousin of mine who frequented this place with us, moved back to Bombay after a few years and the the person taking the order once asked us, where the 'chilli chicken' person was...
She always ordered that there and he didnt know any other way of identifying her...
On this visit to bangalore, Ma made this lovely amshe tikshe which was as good, if not better than the FishLand fish curry...
In Konkani, 'amshe' is sour and 'tikshe' is spicy. Thats exactly how this curry tastes.
There is a variation of the amshe tikshe, where you can omit the coconut, and bake the fish in the masala. Tried this after i learnt it from my aunt, back in Bangalore. I used a different variety of chillies, so the colour is distinctly different.
To read my other posts on Mangalorean cuisine, see Dudhya Koddel, Pathrode, Tendle Bibbe Upkari, Tendle Bhutti, Khatkhaten and Solkadi
Sending this to Sia's RCI event this month , which was started by Lakshmi of Veggie Cuisine
What you need -
6-7 slices of fish (preferably seer)
20-25 red chillies (byadgi chillies give the perfect colour)
1 handful of tamarind
6-7 cloves of garlic
5-6 teppal / sichuan pepper
2 tbsp grated coconut
salt to taste
a pinch of salt and turmeric powder
What you do with it -
Clean the fish and apply the salt and turmeric powder and keep aside
Fry the red chillies in a spoon of oil till they turn deep red
Grind together the tamarind, fried chillies, garlic and coconut to a paste
Add only as much water as required
Apply this on the fish and marinate for about 20 mins
Heat oil (coconut oil, if you want the true taste) an add the teppal in it
It will fluff up a bit and tends to splutter, so be careful with this
Add 1/2 cup water and salt to the fish and bring to a boil
Add the oil with the teppal in it
You can use the same recipe to make hugga, another Konkani dish with the same masala.
Omit the step where you add water and bring to a boil
In this, you bake the fish
Apply coconut oil to the baking dish, place the fish with the masala in it
Add the teppal and salt
Bake in a pre-heated oven for about 25 mins at 180 C
Thursday, July 2, 2009
Plum Jam
There are loads of plums in the market here and my son had never tasted any, so bought a few to see if he'd like it..Till he was about 3, he never liked anything with a citric flavour, but now oranges and lemons have finally made an entry in his diet...
Surprisingly, he loved the plums, so I went and bought a whole load more and then he decided he didnt want to eat them any more...Now I was stuck with about 25 plums and a husband who does not believe in eating any fruit, unless they are juiced and a son who just didnt want to eat plums again...
I kept popping in plums everytime I walked by the kitchen till I got sick of it.
I had never tried making jam at home - I always thought it was too complicated and messy...I didnt want these plums going waste, so finally looked up recipes for jam and I did it - made my first jam at home !!!
I kept tasting it as it was getting done and found it a bit sour. I didnt want to add any more sugar, so grated some ginger and squeezed the juice of it on the plums.
Then I added a few cloves too and it did add a lot to the flavour..
It was super simple after all and turned out just great...The husband and son had it for breakfast today !!
What you need -
20 plums
1.5 cup sugar
1 cup water
1 tsp grated ginger
5 cloves
What you do with it -
Wash the plums well and wipe. Remove the stems if any
In a thick bottomed pan, add the plums, sugar and water
Keep it on a low flame. After about 10 mins, when the plums are all wilted and mushy, add the cloves and the juice of the grated ginger
Keep stirring every now and then
Check the consistency by dropping a bit on a plate. It shouldnt be runny and should look set
Remove the seeds once its almost done. The skin of the plums was soft and just melted into the flesh of the plums
Once done, allow to cool and store in jars
The jars need to be cleaned and dried completely in the sun or in a microwave
Tuesday, June 30, 2009
Phaggila Phodyo (Fritters)
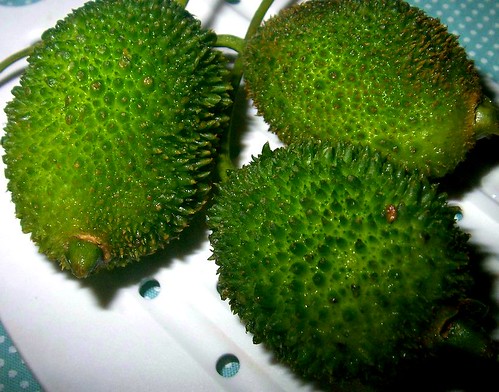
I had never seen this vegetable, may have eaten in as fritters and never knew what it really looked like, but when I did see this in the market in Bangalore, my cousin insisted I pick it up...These are called Kantola in Hindi and Phaggil in Konkani, no idea what its called as in other languages..
Easy, simple and crisp, not too oily, not too much batter, just perfect snacky fritters...
I wasnt sure I would like them with the jagged edges, but once they are done, it really didnt matter...And if you think its like bitter gourd, don't !! Its not bitter at all...
Shallow fried phaggil phodyos ready to be eaten...
What you need -
10-12 kantola / phaggil
2 tsp chilli powder
salt to taste
a pinch of asafoetida
2 heaped tbsp rava / semolina
What you do with it -
Wash the kantolas and slice
Mix the salt, chilli powder and asafoetida and apply to the slices
Keep aside till the water from the pieces absorbs the masala
Dip the pieces in the rava and then shallow fry
Easy, simple and crisp, not too oily, not too much batter, just perfect snacky fritters...
I wasnt sure I would like them with the jagged edges, but once they are done, it really didnt matter...And if you think its like bitter gourd, don't !! Its not bitter at all...
Shallow fried phaggil phodyos ready to be eaten...
What you need -
10-12 kantola / phaggil
2 tsp chilli powder
salt to taste
a pinch of asafoetida
2 heaped tbsp rava / semolina
What you do with it -
Wash the kantolas and slice
Mix the salt, chilli powder and asafoetida and apply to the slices
Keep aside till the water from the pieces absorbs the masala
Dip the pieces in the rava and then shallow fry