The first Mediterannean food I ever tasted was hummus and pita bread. Maybe I hadn't acquired the taste then and I found the hummus too pasty and strange. Pita bread felt more like a naan / kulcha, and I wondered what all the fuss was about.
A few years later when I tasted it again, the texture of hummus felt surprisingly nice and the warm pita went so well with it. Not sure the cook did a great job or I just developed better taste buds !
I started making it at home much later and my eight year old seems to really enjoy this now. I have made hummus only with chickpeas, though I have heard of sweet potato hummus and basil hummus, which I will get around to making soon enough
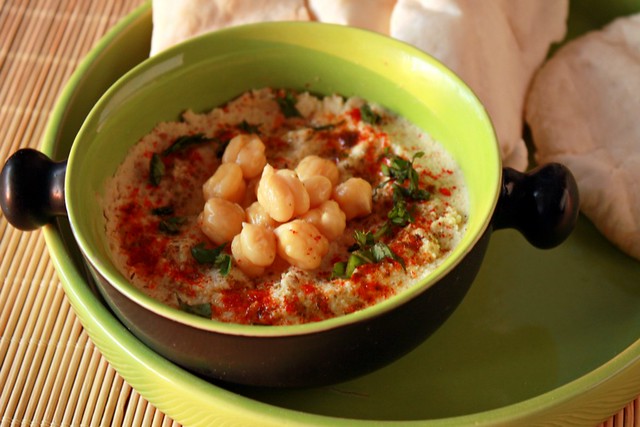
I am usually tempted to buy all these exotic ingredients when I see them, but now I stop myself. There are enough number of spices that I have picked up and trashed after a couple of years because of the expiry date and I would have used it just a couple of times, or perhaps just once when I felt inspired enough. I was very keen on picking up tahini, but thankfully better sense prevailed and I used my own substitution which turned out pretty good. I did however pick up bottle of za'atar spice, a mix of sumac, sesame seeds and some dried herbs.
Warm pita and hummus drizzled with olive oil can make for a really nice starter. Here's the recipe for the hummus I made.
Hummus
What you need -
1 cup dried chickpeas (soaked in water for 6-8 hours)
2-3 cloves garlic
1-2 tbsp olive oil
1 tbsp sesame oil
1/2 tbsp toasted sesame seeds
1/2 tsp red chilli powder
1/2 tsp roasted cumin seeds
a pinch of za'atar spice (optional)
juice of a medium sized lemon
salt to taste
What you do with it -
Drain the soaked chickpeas, add 2.5 cups water and cook till its soft but not mushy
Allow it to cool
In a small grinder, powder the cumin seeds and sesame seeds
Blend the chickpeas, garlic, sesame seed powder, cumin seed powder, olive oil and 1/2 the lemon juice
Add the sesame oil and salt and blend till its smooth
Sprinkle some red chilli powder, za'atar spice powder, lemon juice and olive oil and serve with warm pitas
Friday, February 28, 2014
Tuesday, February 25, 2014
Pita bread
Bread baking was something I never imagined myself doing. It seemed like such a big task, with the proofing, kneading, rising, baking, browning...But after I baked my first ever bread, a pretty fail-proof focaccia, I was hooked to it. The most satisfying part is that the wonderful aroma of fresh bread that spreads all over the house. I've heard that kneading the dough can be therapeutic, but with the daily roti-dough kneading which is more a chore that I'd happily have someone else to do for me, this bit did seem a bit over-rated !
I've always wanted to bake my own pita bread and it seemed like the simplest of things to bake, considering it was very much like an Indian flat bread / roti that I am used to making on a daily basis. The first time I made it, it didn't fluff up at all and it was really disappointing. I guess I had missed out on the temperature settings, which are really crucial here since the bake time is not more than 5 minutes. So I gave this a try this time around, baking it for Aparna's We Knead to Bake #14, where we could choose to bake anything we liked.
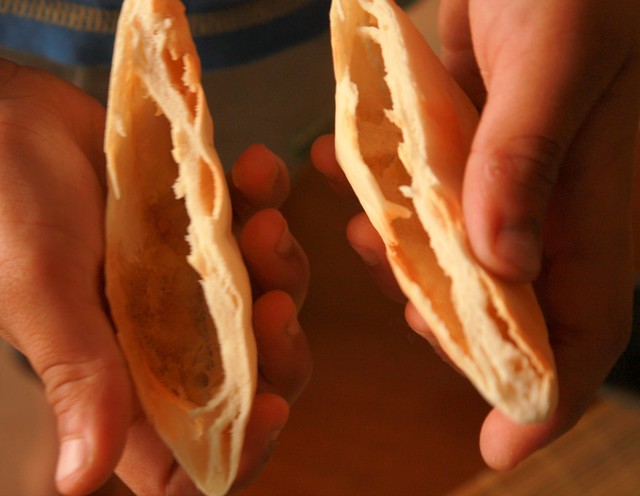
My son is over eager when the camera is out and insists on clicking pictures himself or arranging the setting. He was rushing around acting really busy with the camera dangling on his neck and looking for 'props'. I didn't want to spoil the fun for him, but I really had my heart in mouth, wondering just when that camera would crash into something. the only way I could get the camera back was by telling him that I needed to take a picture of him with the pita bread. Phew ! So here's a pic with him (and his big hands) holding the pita pockets
Serve the warm pitas with hummus or fill the pita pockets with falafels and some salad. Recipe for hummus coming up next
This is being YeastSpotted
Pita Bread
Recipe Source - The Kitchn
Makes 6-8 small pitas
What You Need
1/2 cup warm water (not too hot to the touch)
1 tsp instant yeast
1/2 tsp sugar
1.5 cups maida / APF
1/2 tsp salt
1-2 teaspoons olive oil
What you do with it-
In a bowl, add the flour, sugar and yeast. Slowly pour in the warm water into this and stir
Add the salt and oil and start kneading it. I prefer working with the dough on a clean counter-top
Add a little flour if it gets too sticky and knead till it forms a smooth dough
Place this in a well-oiled large bowl and allow it to rise for an hour or so, till it doubles in size
Once its rise, punch it down and then divide into 8 small balls
(At this point, the dough can be refrigerated in a cling wrap if its not going to be used rightaway)
Using a rolling pin and a little flour, flatten the ball to form a small round (about 3" dia and 1/2" thick)
Pre heat the oven along with the baking tray to 220 C or 450 F
Place the rolled-out pitas directly on the baking tray / baking sheet and bake for about 3 minutes
The pita will start to puff up after a minute or two
You can also bake them on the stove top using a skillet. You will need to flip over the pita and cook on both sides if using the stove-top method
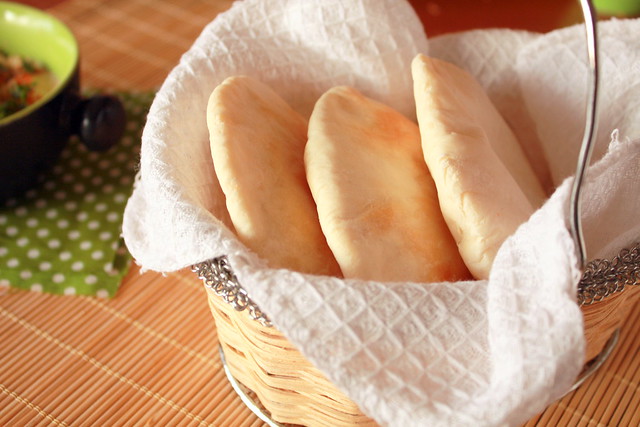
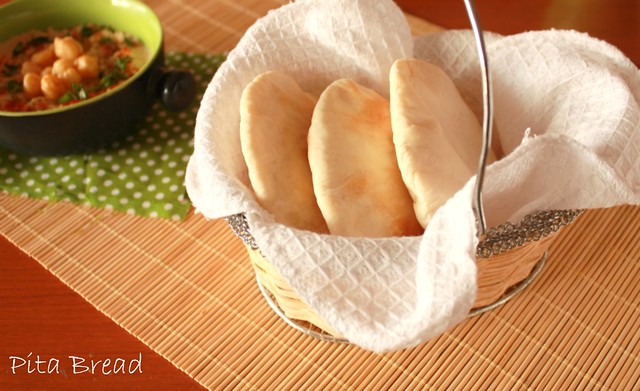
Keep the baked pita covered in a clean cloth
Serve immediately to really enjoy the fresh and fluffy pita
Serve with some hummus or use the pita pockets and stuff with falafels and some salad
Saturday, February 15, 2014
Rice and Lentil Pilaf
There are days when I love to cook up a storm and then there are many days when I just want to get done with a quick-fix meal. A one-pot meal is what works best on such days. I like having a pulav / pilaf with veggies and a raita to accompany it. The last couple of days we have some plumbing work on in the house and I haven't been able to step out. There were hardly and vegetables at home and with a dusty kitchen, my options for lunch were limited. I decided on this one-pot rice and lentil dish my Ma had made when I visited her last summer
It's a simple recipe for a one-pot nutritious dish with rice and lentils. The lentils used here are whole masoor. The masoor should ideally be soaked for 8 hours or so, but if you are in a rush, soak in warm water for half an hour and use
Lentils are high in fiber and good for a healthy heart. With rice and the spices, this pulav with raita and some papad made for a nice lunch.
Rice and Lentil Pilaf
Serves 2-3 people
What you need -
1/2 cup masoor
1 cup rice
2 onions chopped
3 cloves garlic
1/2" piece ginger
2 green chillies
2 tbsp coriander leaves chopped
1 tsp coriander / dhania powder
1 tsp cumin / jeera powder
1/2 tsp garam masala powder
salt to taste
2-3 tsp oil
a few cashewnuts (optional)
What you do with it -
Soak the masoor for 6-8 hours. Rinse and set aside
Wash and rinse the rice
Grind / Pound the ginger, garlic and green chilli
Add 2.5 cups of water to the rice and masoor and cook till its done, without the rice getting mushy
I put it in a cooker, without the pressure / weight on and cook for 20 mins
Meanwhile heat oil in a large pan and add the ginger-garlic-green chilli paste and fry for 2 mins
Add the onions and fry till its golden brown
Add the coriander powder and cumin powder
Fry for 2-3 mins, adding a spoon of oil, if required
Once the rice is done and cooled slightly, add the rice-masoor to the fried onions
Stir lightly and allow it to cook in the pan for 3-4 mins
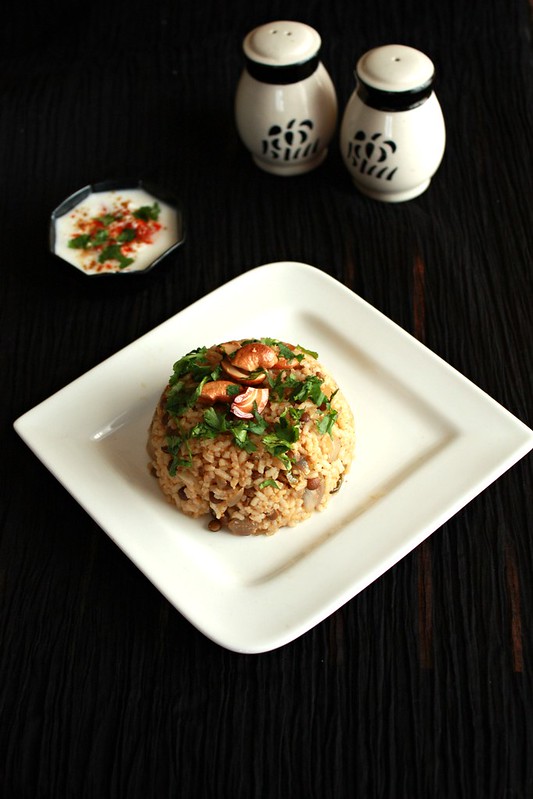
Garnish with coriander leaves and fried cashewnuts
Serve with a raita