I have posted a similar recipe of pancakes with a strawberry syrup. That was when my son disliked strawberries and it was just TH who relished the pancakes with the strawberry syrup. This year has brought about a change in the little one's taste buds. He has finally started enjoying strawberries and for his long and lazy Sunday breakfast, I made these strawberry pancakes. I used wheat flour this time and the pancakes tasted just as good.
He was thrilled with these strawberry pancakes and we have something with strawberry almost everyday now. He still hasn't started enjoying the strawberries as is. I don't blame him for that though, the strawberries, as pretty as they look, rarely taste that sweet. Maybe I will make these strawberry muffins again this time and I hope he enjoys it without pulling out the strawberry pieces !
Wholewheat Strawberry Pancakes
What you need -
1 cup whole wheat flour
1 egg
1 cup milk
a pinch of salt
1 tbsp sugar
1 tsp baking powder
1/2 cup cleaned strawberries
1/2 tsp baking soda
2 tbsp melted unsalted butter
butter for greasing
1/2 tsp vanilla extract / essence
What you do with it -
Add the flour along with the salt, baking powder and baking soda in a large bowl
Beat the egg and whisk it with the sugar and milk in another bowl
Add the vanilla essence to the egg and milk mixture
Add the flour to the egg mixture and mix well
Stir in the melted butter and mix again
Heat a non-stick pan and add some butter to grease the pan
Drop in 2 tbsp of batter into the centre of the pan
Keep it on a low-medium flame and add 4-5 pieces of chopped strawberries over the batter
Once you see bubbles on the surface of the batter, flip it around
Allow it to cook on the other side till its golden brown
Serve with honey or any other syrup if you like
Tuesday, December 10, 2013
Friday, November 29, 2013
Bread and egg muffins (Breakfast muffins)
Hello ! Anybody still visiting this neglected space ? Its been in hibernation for a while, though it was totally unintentional. I just got terribly lazy and though I was cooking a lot, taking pictures and writing about it seemed like too much work. I really missed blogging though I was checking the blogs I follow regularly.
To restart after this long break, here are some breakfast muffins that I made last Sunday. If you like your toast and omlette, this is a slight spin off on that. Our Sundays are usually reserved for bread and eggs, masala omlette for TH, scrambled for me and usually its pancakes for my little boy.
I've seen a lot of these breakfast muffins on pinterest and last Sunday I finally made my version of breakfast muffins - bread and Indian style masala omlette in a muffin. And for my son, it was French toast muffins drizzled with honey.
What you need -
8 slices of bread (for 8 muffins)
6 eggs
1 large onion
1 tomato
1 bell pepper / capsicum
1 green chilli
1 tbsp coriander leaves
a pinch of turmeric powder
1/4 tsp chilli powder
salt and pepper to taste
1 tbsp sugar
1/4 tsp vanilla essence
1/2 tsp cinnamon powder
2 tbsps butter
What you do with it -
Cut the egdes of the bread and spread a little butter on each bread slice
Finely chop the onion, tomato, green chilli, coriander and capsicum
Break 5 eggs in a large bowl. Add turmeric powder, salt and pepper and beat well
Add the onion, tomato, chilli, capsicum and coriander and mix well
To make the sweet ones, beat the remaining egg in a bowl. Add sugar, vanilla essence and cinnamon powder
Pre heat the oven to 180 C
Grease a muffin pan with some butter and press down a bread slice in each cavity
Spoon in the egg mixture into each bread slice, ensuring that it does not overflow
Place the muffin tray in the oven and bake at 180 C for about 15-18 mins
We had the masala egg ones with ketchup and the sweet ones drizzled with some honey
Friday, September 6, 2013
Soy chunks and corn burger | Veggie Burger recipes
It's time for the monthly recipe for the Groovy Gourmets again. This time we were asked to make veggies burgers, but it had to be something different from the usual potato and peas patty. Veggie burgers are almost always limited in most menus, if there are even available, then its got to be with potatoes.
Soya chunks are something that TH likes and I manage to make it once in a few months, because I find the texture a little weird and it seems to have a slight smell which I don't particularly care for. I recently found this packet of mini soya chunks which is quite nice and maybe after all the rinsing and dousing it with some spices, it actually tastes good.
Soya is really high protein and is a great addition in a vegetarian menu, so I do try to make it once in a while and it is getting more frequent now. I decided to give these a chance again and used it to make the patty. To bind the soya and corn, I used a couple of slices of bread, potato and a handful of leftover rice ! Left over rice mashed up always works well as a binder.
A few spices and a little cooking later, they turned into these really tasty patties
Topped with mayo and mustard, cheese, onions and tomatoes, you'd never realize all that's been hidden inside this burger !
If you never liked the soya chunks, give this a shot. You won't regret it
Check my previous entries to the Groovy Gourmets here.
Soya chunks and corn burger
What you need -
1 cup mini soya chunks / regular soya chunks
1/2 cup corn kernels (fresh or canned or steamed)
1 potato, boiled, peeled and mashed
2 bread slices
a handful of cooked rice
2-3 pods of garlic
2 green chillies
roasted cumin seed powder
dry mango / amchur powder
1 tsp salt
a few coriander and mint leaves
4 burger buns
sliced tomatoes and onions
mayo and mustard sauce
cheese slices
What you do with it -
Boil the soya chunks in water for about 5-7 mins and then rinse 2-3 times and drain the water completely
Clean and chop the coriander and mint leaves
Grind together the soya chunks, cooked rice, bread slices, garlic and green chillies
In a bowl, add the mashed potato, amchur powder, cumin seed powder, salt and the chopped coriander and mint leaves
Add the ground soya to the potatoes and mix well to make it pliable
Add the fresh / steamed corn kernels to this
Take a big chunk of this mix and roll well between your palms
Then flatten it slightly to make a palm sized patty
Dip it in the bread crumbs and shallow fry in a pan with a tsp or so of oil
Use up all the mix to make the patties. I got about 4 large ones
Slice open the burger bun horizontally and apply a little butter
Heat both sides slightly on a pan
Add a little mayo on one side. Place the patty on top and then top it with some mustard, a slice of onion, tomato and cheese
Top it with the other half of the bun
Thursday, August 22, 2013
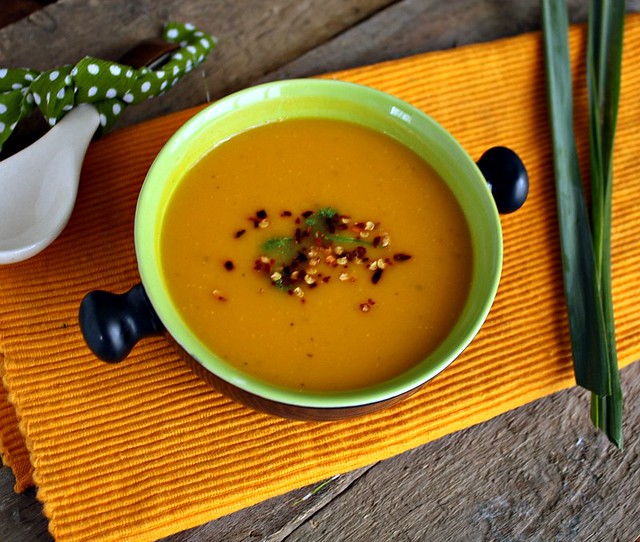
Pumpkin and Carrot Soup
I've been lazy, very very lazy with posting on the blog. We've had people over for dinner almost every alternate day for the past two weeks, I did really cook a lot, but the prepping, cooking, hosting and cleaning after has been tiring and really got to me after a point. And what's suffered most is my blog - I just didn't have the energy to click pictures and post.
Here, the long spell of rains finally seem to be slowing down and its started getting pretty warm again, as we gear up for the second summer, like one wasn't enough !
The drastic change in temperatures has taken a toll on most kids and they are sniffling and coughing thru it all. Made this for a rare guest-free dinner last week. A warm comforting soup with lemon grass to really soothe the cold and cough.
I've always wanted to try a rost pumpkin soup, but always remembered too late and there was never any time for the roasting. So I've just pureed the steamed pumpkins and carrots and added some spices and lemon grass to make this really quick and simple soup
Pumpkin and Carrot Soup
What you need -
3 cups peeled and chopped pumpkin
1 cup peeled and chopped carrot
1/2" piece ginger, julienned
3-4 cloves of garlic
4 stalks lemon grass
1/2 tsp oil
1 tsp salt
1 tsp crushed pepper
1 tsp red chilli flakes
1 tsp chopped celery or coriander leaves
What you do with it -
Steam the chopped pumpkin and carrots in a steamer or just cook till its just done in a microwave or stove top
Heat the oil in a small pan and add the garlic pods
Add the steamed vegetables to this
Heat for 2-3 mins and allow it to cool
Blend to a smooth paste and add the lemon grass stalks and ginger juliennes
Bring to a slow boil, adding salt and pepper
Sprinkle chilli flakes and chopped celery / coriander leaves and serve hot
Great way to calm the sore throat and rid yourself of the cold
Saturday, August 3, 2013
Beet and Chocolate Brownies
Remember the Groovy Gourmets I told you about a couple of months back ? Every month, we make something based on the selected theme. Made the grape focaccia, vegan coffee panna cotta for this earlier. Well, I missed out the last two months of posting, but am back now. This week's theme was brownies, with a twist, not just the regular chocolate ones.
I've read a lot about beet and chocolate cakes and though I was a bit apprehensive, I wanted to try brownies with beet puree. We love beets at home and cook quite a bit with it, but beets in something sweet was really something new.
The colour was a pretty dark pink and the taste was really good. I added a bit of butterscotch chips and some almond flour and this gave it a really nice texture.
If you like the idea of sneaking in some veggies in your brownies, give this a try. It isn't easy to figure out the beet in this, lesser calories than a regular brownie and tastes yum !
Beet and Chocolate Brownies
What you need -
3/4 cup APF / maida
2 tsps ground almond flour
1/2 tsp baking powder
2 cooked beets
1/2 cup grated dark chocolate
2 tbsp butter (at room temperature)
1/3 cup sugar
1/4 cup butterscotch chips
a pinch of salt
What you do with it -
Line an 8" square pan with baking sheet / butter paper. Allow the sides of the paper to fall over the edges, makes it easier to remove the brownies later
Grease the baking sheet / butter paper
Pre heat the oven at 180 C
Sift the flour, salt and baking powder. Add the almond flour to this and keep aside
Heat the grated chocolate in microwave safe bowl, in 15 second intervals
Peel the cooked beets and make a puree
To this puree, add the butter, melted chocolate and sugar and whisk till the sugar is dissolved completely
Add the butterscotch chips to the flour and then add the flour to the beet puree
Add the batter to the pan and bake for about 35 mins
Cool, pull the paper up from the edges
Cut into 1.5" squares
Sprinkle with icing sugar if you like
Thursday, August 1, 2013
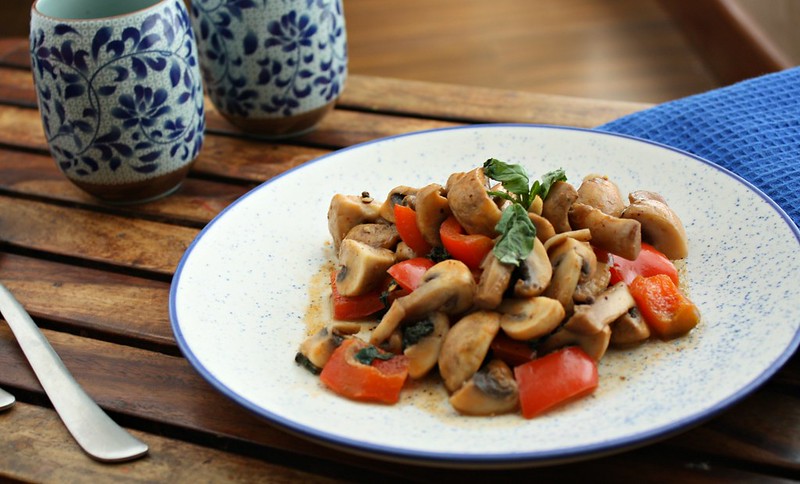
Thai-style mushrooms
The last week has been really bad for me. I was down with a really bad stomach infection and before I could recover completely, I was down with a bad cough and cold. Its been raining almost everyday and thats made it more gloomy all around.
I was living off khichdi and bland food and all that good and cooling for the stomach.
Like you can imagine, I have been craving for something more interesting on my plate.
I had a little Thai red curry paste remaining from a batch that I made for a red Thai curry a while back. It was too little for a curry but the flavour of this paste is so good, I couldn't let it go waste, so I decided to use it with mushrooms
This dish comes about really fast if you have the Thai curry paste ready. Steamed rice, green curry and these mushrooms and my taste buds were alive and kicking again !
What you need -
15-20 button mushrooms
1 red capsicum
a few basil leaves
1 tbsp Thai red curry paste
1 tbsp coconut milk
1/2 tsp sugar
1 tbsp oil
2-3 pods garlic
1 tsp freshly ground pepper
salt to taste
What you do with it -
Clean and quarter the mushrooms
Chop the red capsicum into pieces
Tear up the basil leaves with your hand
Heat oil in a pan. Add the chopped garlic and red curry paste
Fry for a minute or two
Add the capsicum pieces and fry for another minute
Add the mushrooms and allow it to cook a bit
Add in the coconut milk, basil leaves, salt, pepper and sugar and stir 2-3 times over high heat
Don't over cook the mushrooms. It should be done in less than 5 mins
Garnish with basil leaves. Serve hot
Wednesday, July 17, 2013
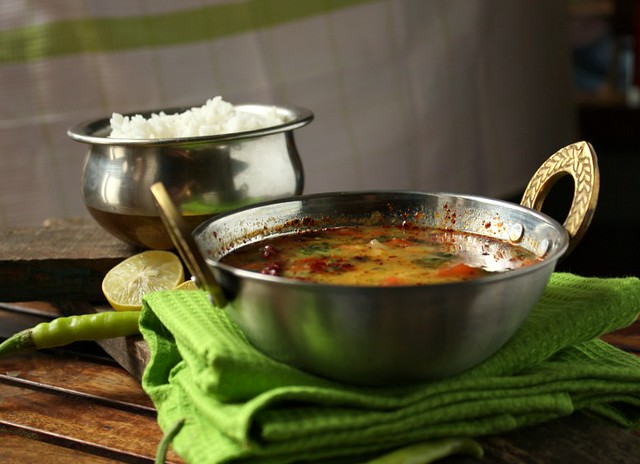
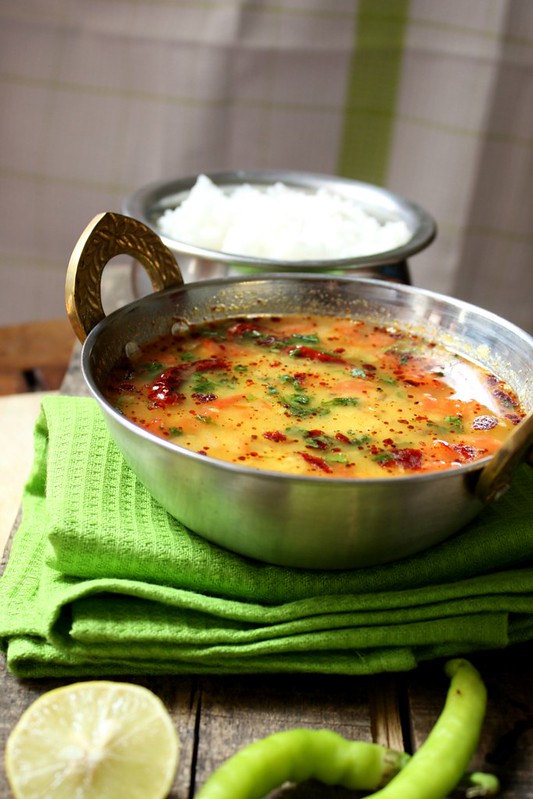
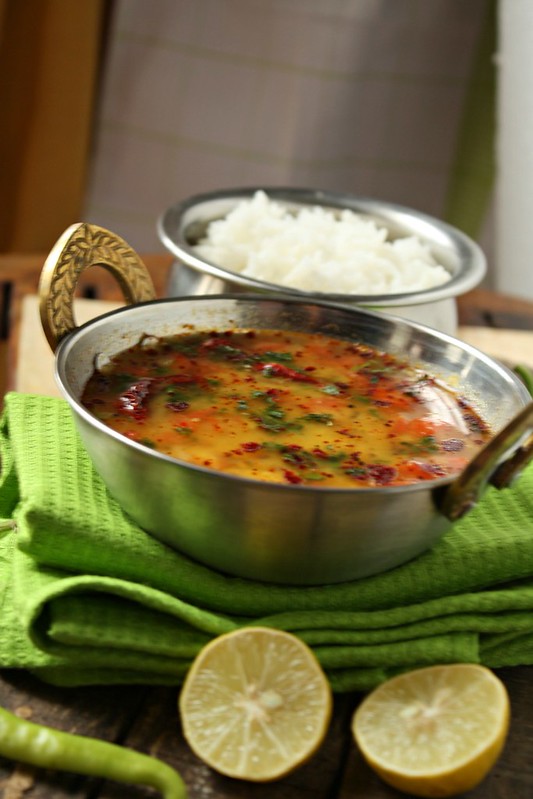
Yellow Dal Fry / Dal Tadka
Almost 20 years back, when Bangalore was not hit by the tech wave and hadn't grown beyond its boundaries, there were these dhabas or highway restaurants where truckers stopped over for a simple, reasonably priced meal and headed towards their destination. They dhabas are still there I assume, but much further away, since the city has stretched way beyond its limits.
As many old time Bangaloreans would remember, there were many dhabas near Jakkur airport, one of the more famous ones being Sanjay Dhaba. The khatiyas (cots with jute ropes criss-crossing across it, to make a bed) would be kept out for the truckers to have a small nap after their meal. It was a favourite Sunday event to go riding to Jakkur and then eat at one of those dhabas. We were a gang of 4, which sometimes grew to about 8 or ten, but for us four, these dhaba visits were great fun. The food was good, of course, but the ride to the dhabas was something I enjoyed even more.
There was a standard order of rotis, sabji, egg burji and dal fry, and depending on the company, a few more dishes would be added on. Simple fare but it tasted so good out there, sitting on the rather uncomfortable khatiyas and watching the Air Force training planes take off from Jakkur. The egg burji and the dal were always amazing with the freshly made Tandoori rotis.
I make dal everyday, sometimes with tur dal, mung dal, masoor dal, chana dal, but there is a dal on the table everyday since my son totally loves it and doesn't think a meal is complete unless he has had his rice and dal.
I never really followed any particular recipe, but the other day a friend called up and asked me how to make yellow dal fry. I actually rattled away a few ingredients to her and then tried it out myself.
Its a simple, basic recipe and you can use whatever you have in your kitchen to make this, but making this 'yellow dal fry' brought back many dhaba memories, which I guess made the dal so much tastier.
Yellow Dal Tadka
What you need -
1 cup Tur dal / Arhar dal / Yellow split peas
1 onion
1 tomato
2 green chillies / red chillies
1" piece ginger
3-4 cloves of garlic
1 tsp cumin seeds
a pinch of asafoetida
1/2 tsp red chilli powder
1/2 tsp turmeric powder
3 tsp oil
salt to taste
What you do with it -
Wash and rinse the tur dal and add 2.5 cups of water, turmeric and a litle calt
Pressure cook the dal for about 10-15 mins
Chop the onions, garlic, ginger and tomatoes
Heat a small pan and add 2 tsp oil to it. Add the asafoetida, cumin seeds and the slit green chillies or broken red chillies
Once the cumin seeds splutter, add the ginger, garlic and onions
Once the onions brown a bit, add the tomatoes and turn up the heat for 2-3 mins
Then add the cooked dal. You can churn the dal a bit before you add it to get a smoother consistency. Add water if the dal is too thick
Adjust the salt
In a small pan, heat 1 tsp oil and when the oil is hot, add the chilli powder. Let is sizzle in for a minute and then turn off the heat. Pour this over the dal
Sprinkle some coriander leaves and add a dash of lemon juice
Serve hot with rotis or rice
Wednesday, July 10, 2013
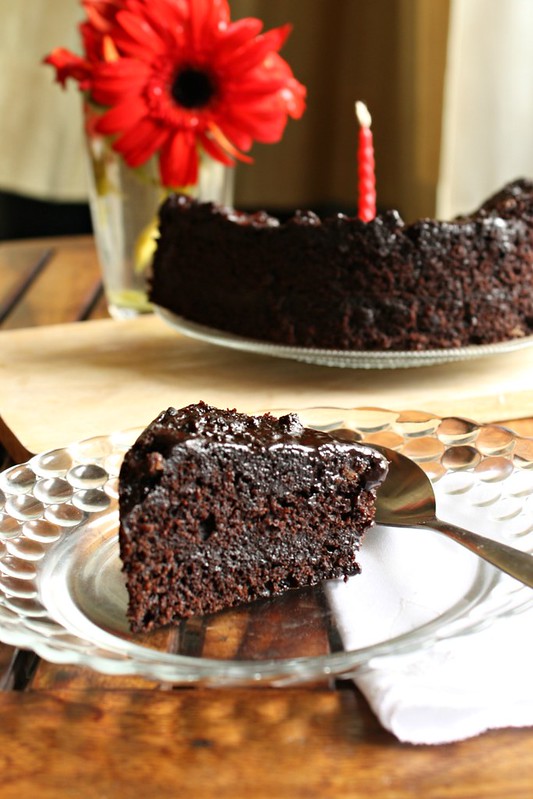
Devil's food cake
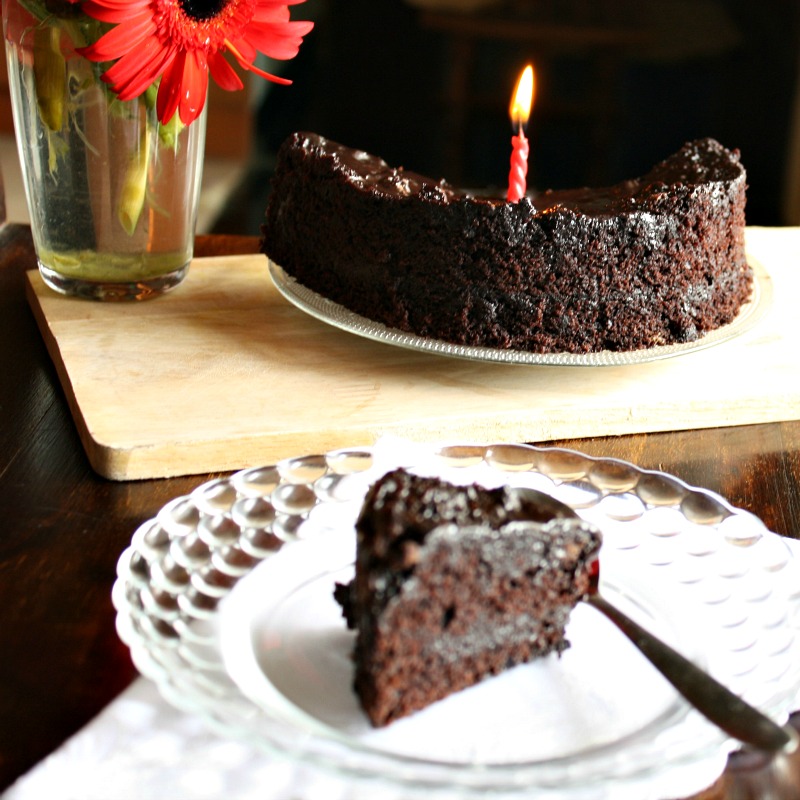
I've been neglecting this space for a while now and I'm not too happy about that. Let me make up for that by sharing this absolutely sinful Devil's food cake that I baked last weekend for TH's birthday
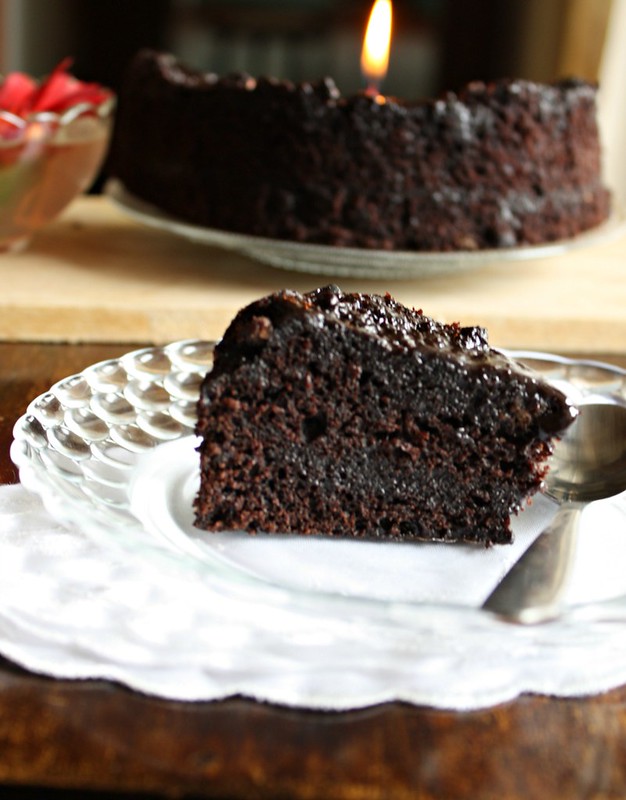
I am not a chocolate person, nowhere close to it. I never liked the taste of cocoa as a kid, but I've slowly grown out of it now. TH can eat anything sweet and since it was his birthday I decided on this Devil's cake that looked and sounded absolutely chocolate-y. Made this from a fantastic book called the 'Baking Bible' that my aunt from UK gifted me on my birthday earlier this year. I did make some changes since I was short on a few ingredients and the conversion from gms to cups was getting a bit messy, since I was rushing thru it all. There was a the big dinner happening on the side and I didn't wait long enough for the cake to cool down. The icing was delicious but it didn't have enough time to set, so it didn't have a smooth finish
I don't like anything thats cloyingly sweet. This cake was perfect, dark chocolate, not too sweet, but really moist and rich. Even for a non-chocolate loving person, this was chocolate nirvana. I guess the devil is really in the pounds you can put on by just staring at this absolute delight of a cake !
The recipe calls for baking it in two pans, so you land up with three layers, but I stuck to a single pan and made just two layers. I find it so difficult to just follow a recipe as is. I always need to go make my own changes, though they are rarely for the better, but *sigh* thats me !
I have been baking a lot over the past two weeks and its been real fun. A few friends ordered for cakes and brownies and the response was extremely encouraging. Its been great experimenting with cake pops, brownies, cookies and a whole lot more, and all these were egg-free, so yes, lots of experimenting !
Devil's food cake
Adapted from Annie Bell's 'Baking Bible', with a few changes
What you need -
For the cake
1/3 cup cocoa powder
3/4 tsp baking soda
3 eggs
1.25 cups sugar
3/4 cup APF / maida
1/4 tsp baking powder
For the icing
250 gm chocolate, broken into pieces
2 tbsp unsalted butter
3 tbsp cocoa powder
1/2 cup milk
2 tbsp honey
What you do with it -
Whisk the cocoa with 200ml of boiling water. Whisk in the baking soda and allow to cool
Pre-heat the oven to 180 C. Grease an 8" round pan and line with baking paper
Whisk the eggs, sugar and oil until smooth. Add in the flour and then the cocoa solution
Pour into the prepared tin and bake for 40-50 mins
For the icing, melt the butter and chocolate using the double boiler method, stirring till its smooth
In another little bowl, add the cocoa, milk and honey and whisk it over heat
Pass it through a sieve and add it to the chocolate
Allow the cake to cool and then cut into two (or three) horizontally
Divide the icing accordingly and spread over each layer
Allow it to set for a couple of hours. This cake can be stored for a couple of days
Thursday, June 13, 2013
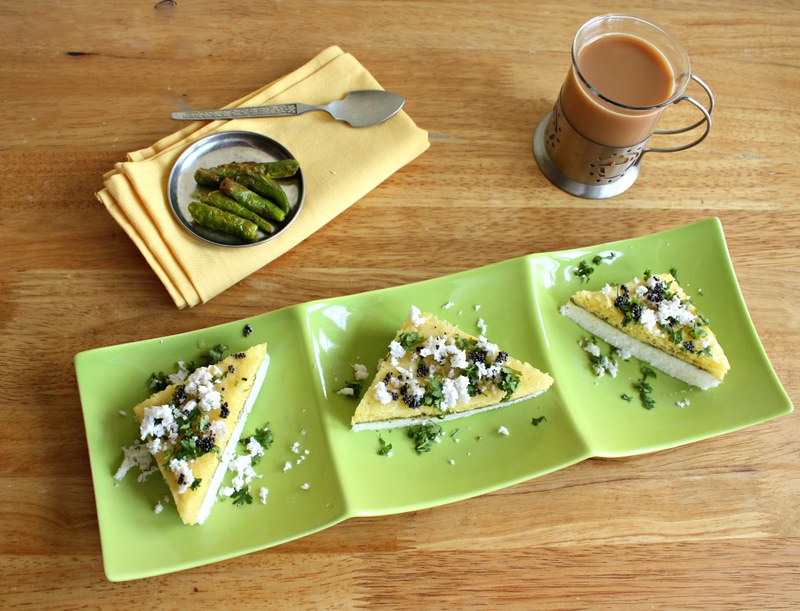
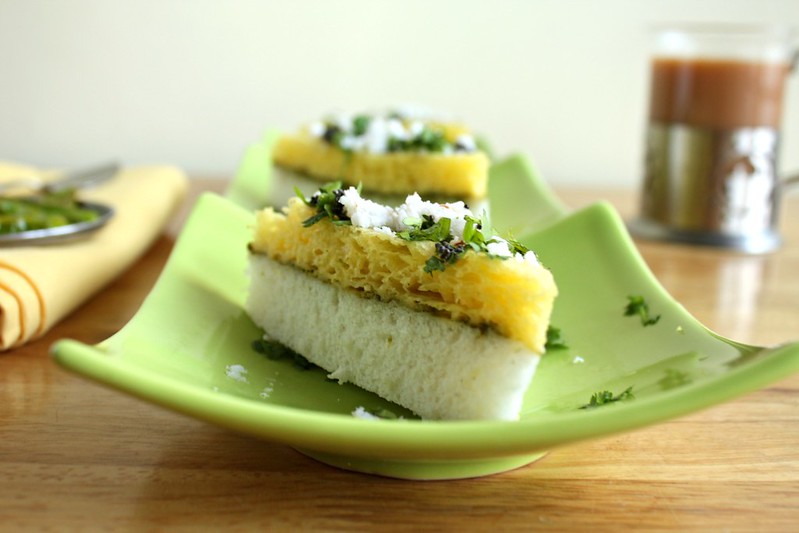
Sandwich Dhokla
I'm back in Ahmedabad after the pampered, relaxed month-long holiday in Bangalore. Its always difficult to get back to the routine after a holiday and the weather here was just not helping. And then getting my son ready to get back to school, back to the early morning alarms and the daily grind left me with no inclination to cook and no time to blog
So, here's one of what Ma made before I left Bangalore. Surprisingly, it is a popular dish of Gujarat. Pretty looking, super simple and a real crowd pleaser.
This is the simplest recipe here on this blog, and perhaps the laziest one, because it just involves assembling some ready idli batter and packed food. But it works like a charm.
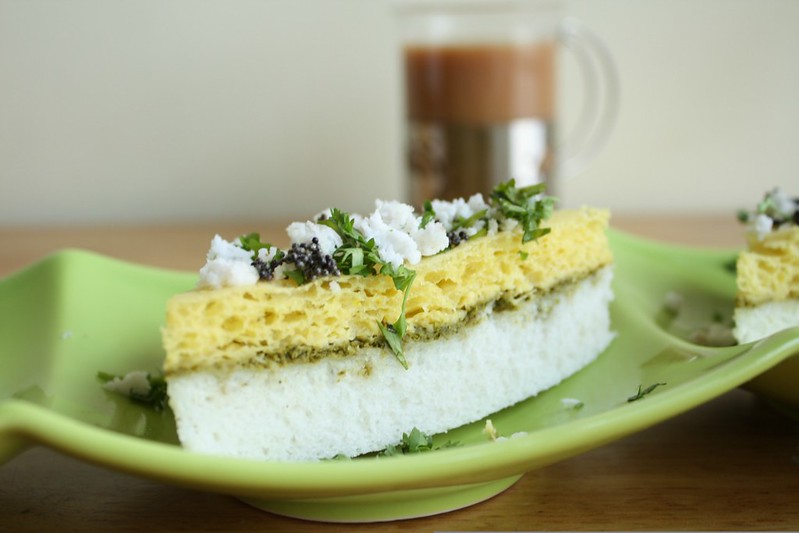
Idli batter, a packet of instant dhokla mix and some chutney, which is the only place you need to put in some effort, and you're good to go! Instant dhokla packets are available at most stores, but if you can't find one, then use idli batter for both layers - works equally well.
I never bothered making dhokla at home, especially the super spongy khaman dhokla because I live in 'dhokla land'. Thats one thing available all through the day and every other store dealing with food and every third store here deals with food !
But I will make one, someday...
Have it with some roasted green chillies and a cup of tea.
What you need -
1.5 cup idli batter
1 packet instant dhokla
For the chutney -
3 green chillies
1 cup packed cleaned coriander leaves
1 tbsp peanuts
juice of half lemon
1/4 tsp salt
1/4 tsp sugar
For the tempering -
1/2 tsp mustard seeds
1/2 tsp cumin seeds
1 tsp oil
a pinch of hing
2 tsp grated coconut
2 tsp chopped coriander leaves
1 tsp sugar
3 tbsp water
What you do with it -
Grind all the ingredients listed under 'For the chutney' and set aside
Add a little salt to the idli batter and then pour it into a dhokla plate or shallow round vessel, to fill half the height of the vessel / plate
Steam for 10 mins till the batter is set
Take it off the heat and then spreads the green chutney over the steamed idli batter
Prepare the dhokla batter as per the instructions and then pour the batter over the chutney
Steam for another 10-15 mins
Allow it to cool
In a small pan, heat a little oil, add mustard seeds, cumin seeds, a pinch of asafoetida and small pieces of green chillies
Dissolve sugar in 3 tbsp of water and add it to the tempering
Pour this over the pieces of sandwich dhokla
Sprinkle chopped coriander leaves and grated coconut over it
Serve with roasted chillies and some hot tea
Saturday, May 25, 2013
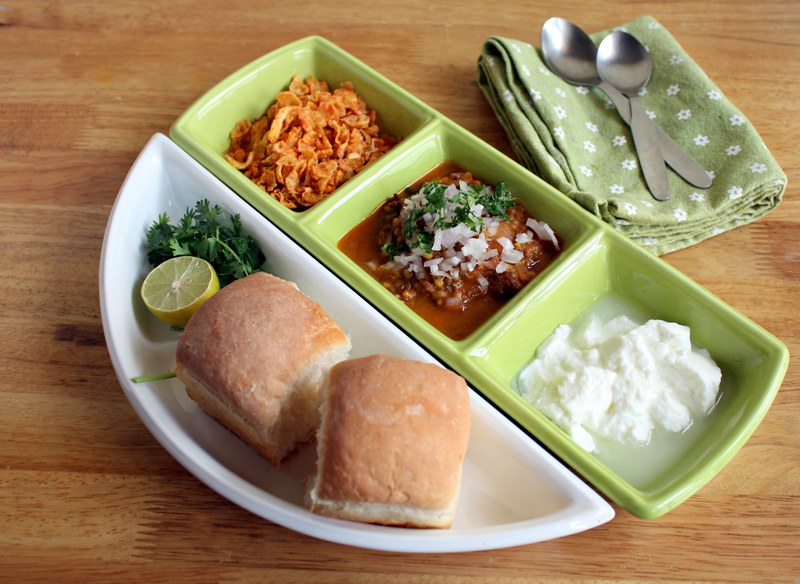
Misal Pav
From the first time that Ma converted a sabji that we had for lunch into a quick-fix, healthy and delicious evening snack, I was hooked onto misal pav. A very Maharastrian dish that can easily convert itself into a full meal and is quite popular as an evening snack and street food.
Sprouts are low on calories and high on proteins and vitamins. Usually misal is made with sprouted matki / moth beans or dried peas and potatoes. We didn't use the potatoes this time, but if you like, you can add cooked potatoes along with the sprouts.
Ma used Malvani masala that is known for it fiery taste and so the the curd / yoghurt helped bring the spice down a few notches. The misal is topped with some chivda, chopped onions, coriander leaves and lemon to get a crunchy tangy taste. You can make it more gravy if you like to dip the pav in it and slurp along.
My other favourite is left over choley topped over bread and a sprinkle of sev over it. Simply Yum.
What are your favourite combination with leftover sabjis ?
Misal Pav
What you need -
2 cloves
1 piece cinnamon
1 bay leaf
1 spoon coriander seeds
4 red chillies
1.5 cups cooked sprouts (moth beans / dried peas / mixed sprouts)
3 medium sized onions chopped into small pieces
2 tbsp grated dry coconut / kopra
1 tsp tamarind paste / pulp
1/2 tsp kolhapuri / malvani / garam masala
1 tbsp oil
salt to taste
Garnishing
1 onion finely chopped
3-4 tbsp coriander leaves finely chopped
1/2 lemon
Add ons
Curd
Chivda / Mixture / Sev
Pav
What you do with it -
In a pan, heat a tbsp of oil and add cloves, cinnamon, bay leaf, coriander seeds and red chillies
Add 2 chopped onions and fry for 3-4 mins
Add grated dry coconut and fry for a few mins
Allow it to cool and grind along with the tamarind paste / pulp
Fry the remaining chopped onion and add the masala
Fry until you see oil leaving the sides of the pan
Add turmeric powder, salt and the cooked matki
Add half cup water and allow it to cook up a bit
If you like it a little spicy, sprinkle 1/2 tsp garam masala / kolhapuri masala / malvani masala and stir well
Take it off the heat
Garnish with chopped onions and coriander leaves
Squeeze a lemon over it and serve with pav / bread, chivda / mixture and curd
Wednesday, May 22, 2013
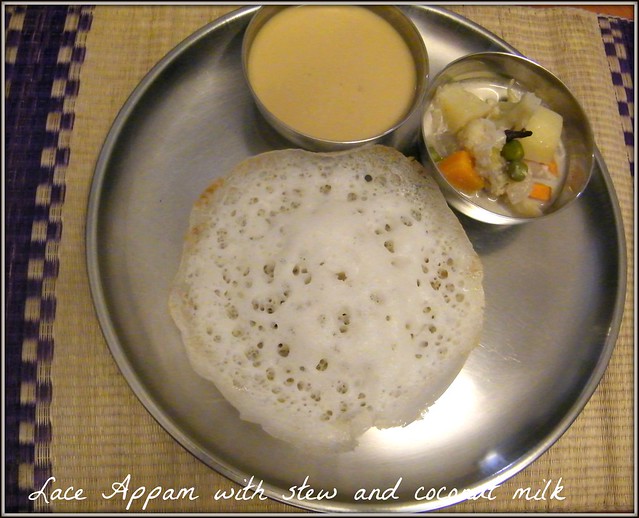
Lace Appams - Fluffy Rice Pancakes (no yeast)
This post is exactly a year old, so say Happy Birthday to my post that's finally seeing the light of day. I can't remember why I didn't post it for this long when it was sitting all ready in my drafts. This big lunch happened last year at my aunt's place before I left for Ahmedabad.
The weekend before I left, the entire family was invited to my aunt's place. She is an amazing cook and a perfectionist at everything. There was a huge spread including appams, vegetable stew, jumping potatoes, bhindi sasam, moog saar and bhapa dahi for desert. I was trying to bend over her shoulder to click these pictures, and I managed to get step-by-step pictures of the soft, fluffy lace appams.
Thank you K'maami for a fabulous lunch and all the recipes !
Appams go perfectly with the vegetable stew and as usual, my son with his sweet tooth, relished it with the narlya doodh or sweetened coconut milk
My aunt used a cast iron pan for this. There are non-stick pans available, that work well enough
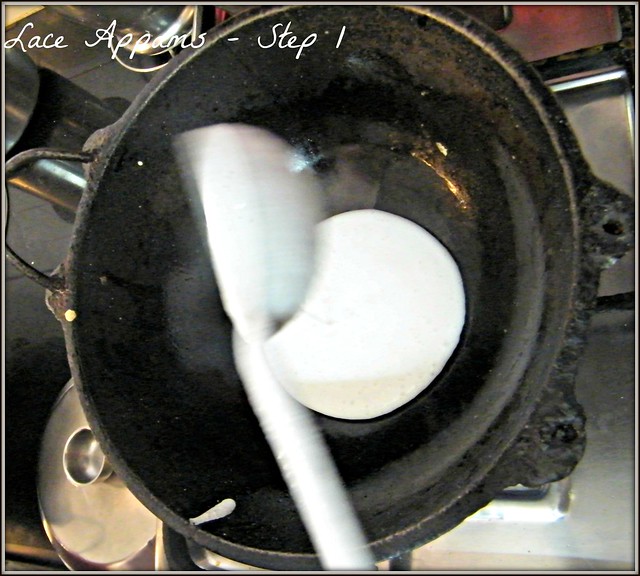
Allow the pan to heat up and then drop in a spoon of oil, twirl it so it coats the pan well
Pour in a ladleful of batter in the centre of the pan...
Twirl the pan around, so that the batter moves evenly across and then settles down in the centre. If you pan does not have heat-proof handles, make sure you have something to protect your hands from the heat
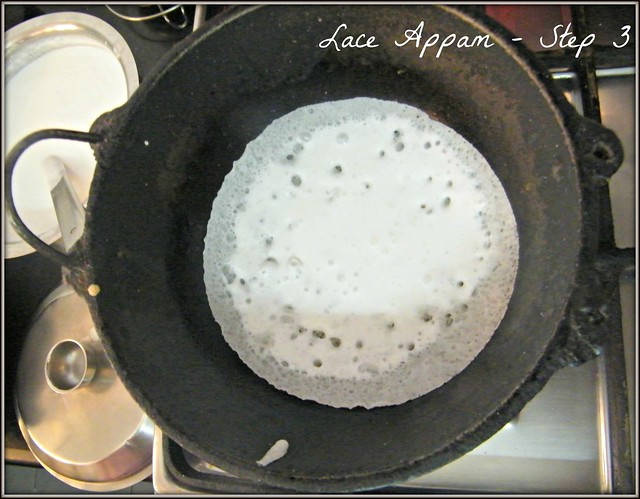
Cover and allow it to cook for a minute and then take the lid off the pan
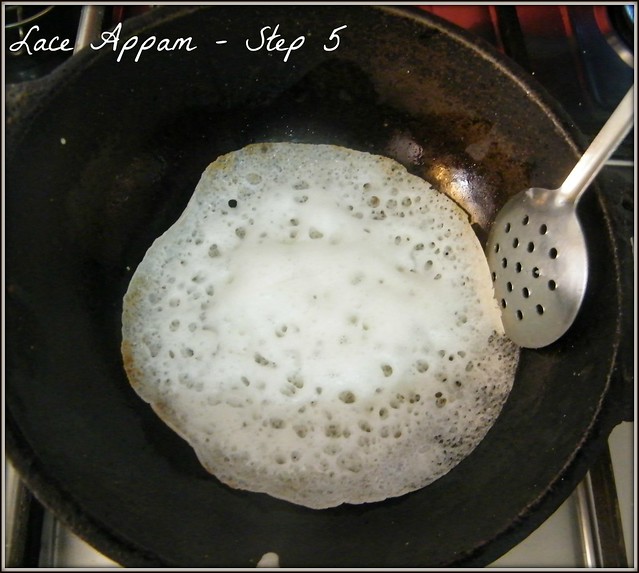
You should see the sides of the appam begin to turn slightly brown
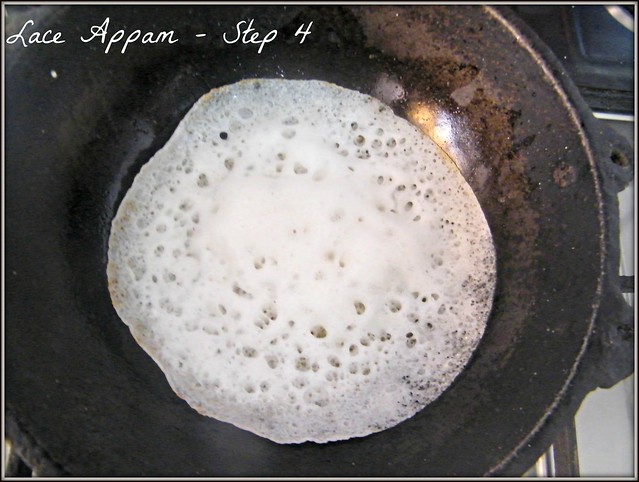
Once the centre is cooked, gently ease the sides of the appam away from the pan using the appropriate ladle. Here its a cast iron pan, so you can use steel. For a non-stick pan, it usually comes with a thin wooden spoon
Serve this with some vegetable stew and sweetened coconut milk and you have a very satisfying Sunday brunch.
What you need -
3 cups raw rice
1 cup boiled rice / 1 cup cooked rice
1/2 tsp soda bicarbonate
1 coconut milk (third extract) / 1/2 can thick coconut milk thinned down with 1/2 cup water
1 tsp salt
What you do with it -
Soak the raw rice and boiled rice (if using) for 3-4 hours
Drain the water from the rice. If using cooked rice, add it to the drained rice and then grind it well, to a smooth consistency, adding little water, as required
Transfer the batter to a large container and ferment overnight
The batter should have risen by morning. Add coconut milk, salt and soda bicarbonate and mix well
The consistency of the batter should be like the dosa batter, not too thick, but thin enough to pour
Heat the appachatti / pan for the appams and when it is hot enough, lower the heat
Add a tsp of oil and twirl the pan so that the oil coats it completely
Pour a ladle of batter into the pan and twirl the pan again. Ensure that you use a cloth or oven mitts while holding the pan
The remaining batter will settle in the centre
Cover the pan for a minute or two and then take off the lid
Once the edges start to turn slightly brown, use an appropriate ladle to ease the appam out of the pan
Serve hot with stew / sweetened coconut milk
Tuesday, May 21, 2013
Akki Roti / Rice flour pancakes
Its always a luxury for me to have someone take care of my son and though I enjoy cooking, its nice to have someone else cook for me and make me that cup of tea when I wake up ! These simple pleasures are something I really cherish when I am in Ma's place.
A couple of weeks left before I head back to the daily grind and heat back in Ahmedabad, so I am really enjoying all the pampering and the good weather here. Its been raining almost every evening and it has cooled down a lot.
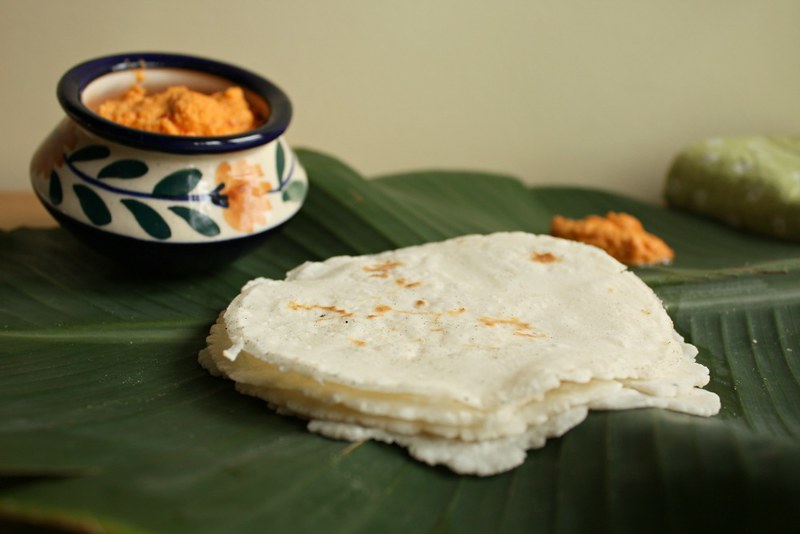
This morning, we had akki roti with garlic chutney for breakfast. Akki roti is made either plain like this one, which resembles the wheat flour phulkas, or with some spices, onions and herbs. My sister-in-law makes some amazing akki rotis in a deep curved pan, which is something I have never managed. the dough almost always sticks to the pan, remains undercoked or gets burnt. That one I still have to crack.
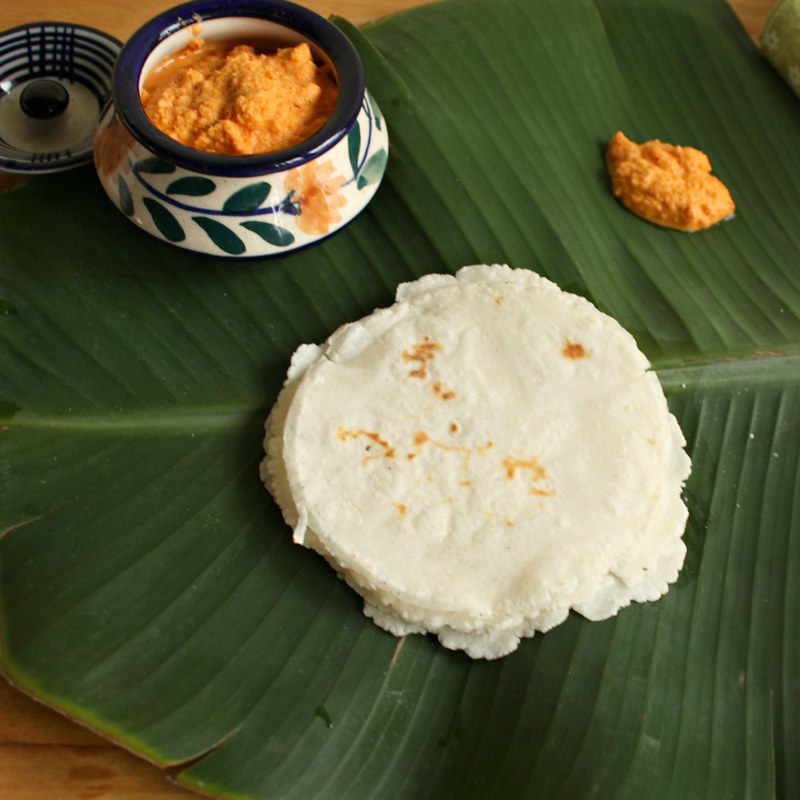
Ma's version is simpler, like little rotis and something that I can roll out. Rice flour is essentially gluten free and a good substitute to wheat flour if you are on a gluten-free diet. These rotis are popular in Karnataka and Maharashtra. Ma made this with a roasted garlic and coconut chutney that is a nice spicy accompaniment to these humble rotis.
Akki Roti / Rice flour pancakes
What you need -
1 cup rice flour
1 cup water
1/2 tsp salt
1 tsp oil
What you do with it -
Add the oil and salt to the pot of water and bring it to a boil
Once the water starts boiling, add the rice flour to the water
Mix the flour into the water using a wooden ladle
The colour will turn into a transparent white
Turn off the heat and cover it with a lid
When it is still hot (as hot as you can handle), knead it using your hands to make a smooth dough
Line the kitchen table / platform with a sheet of baking paper or plastic, like a milk cover
Take a small ball of dough and roll it over the plastic / baking sheet
Don't use any oil to roll it or roast it
Heat a tava / griddle and place the rolled dough over it
Allow it to brown slightly and flip it over
Allow to brown slightly on the other side and take it off the heat
The dough can't be kept for too long, but you can roll it out and store it for a couple of hours and then roast it
Monday, May 13, 2013
Mocha Brownies
I am so glad to be in Bangalore at this time of the year. The showers have started now and its cooled down so much.
Blogging has helped me gain more confidence with my baking and since that's something I started after I moved to Ahmedabad, most friends and family here have seen and read about it more than they got to actually taste it
I was meeting up with my best friend from college and decided to bake some brownies for her
Working in my own kitchen with familiar equipments and ingredients is always much easier. Getting familiar with the new oven here and then not finding the right pan size were a little bit of a challenge, considering I had lined up a lot of things to do, including baking these brownies before I met her for lunch.
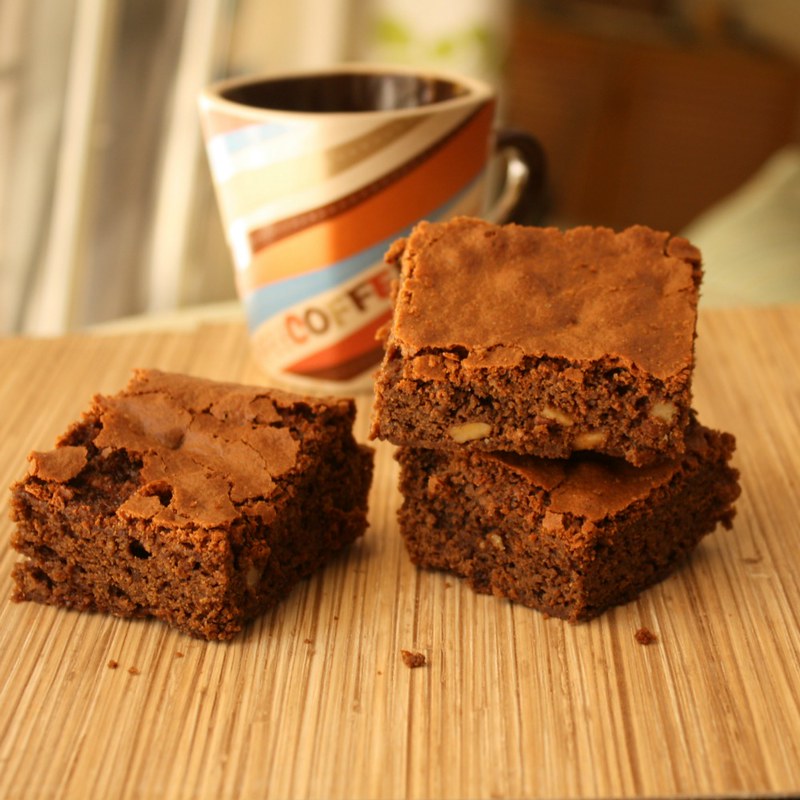
I decided on this recipe for mocha brownies by Michael Smith from Foodnetwork. I normally have cocoa powder, chocolate bars, butter stocked almost always at home. Here, I realised we had run out of cocoa and the only bar of chocolate was this bar of Bournville. It all came together finally and the feedback was good, so it was all worth it!
A hot mug of coffee and some mocha brownies is perfect for this weather. I baked another batch of egg free, low fat brownies from Madhuram's blog again the next day. That's coming up soon..
Mocha Brownies
Adapted from Foodnetwork.ca
What you need -
1 cup flour / maida
2 tbsp instant coffee powder
1/2 tsp baking powder
1/4 tsp salt
3/4 cup unsalted butter
1 bar of Cadburys Bournville dark chocolate
2 cups brown sugar
1/2 cup chopped walnuts
3 eggs
1 tsp vanilla extract
What you do with it -
Line a baking tin (8x8) with parchment paper and grease it lightly
In a bowl, add the flour, instant coffee powder, baking powder and salt
Break the chocolate bar into small piece and place it in a bowl
Add the butter to the chocolate pieces
Pre-heat the oven to 180 C
Place a large pan of water over the heat and allow the water to boil
Place the small bowl with the chocolate and butter above the large one, so the base is just touching the water
Stir the chocolate and butter till it become a smooth mixture
Take it off the heat and add the brown sugar. It may get a little thick and that's really alright
Whisk in the eggs and vanilla extract
Add the flour mixture and stir into a smooth batter
Add in the walnut pieces and stir it once or twice
Pour out the batter to the greased pan and bake at 180 for about 40 mins
Allow to cool completely and then cut into 2" squares
Monday, May 6, 2013
Pan fried masala prawns
Our everyday food is easy to make, fuss free vegetarian food, with some special and elaborate dishes thrown in for the weekend meals. I gave up eating meat many years back and do prefer vegetarian, but there are occasions when I give in to my cravings for sea food.
This is something Ma made for me last week. A really simple recipe that tastes absolutely delicious, with the ingredients that are used in our everyday cooking. In Mangalorean Konkani cuisine, this masala is a pretty standard one. It is a nice balance of heat, tanginess and the flavour of garlic.
This makes for a lip-smacking appetizer. Serve it with a sprinkle of lemon juice and some onion slices.
Pan fried masala prawns
What you need -
25-30 prawns (shelled, deveined and cleaned)
8-10 red chillies (ideally byadgi for its colour)
6-8 cloves of peeled garlic
small ball of tamarind / 1 tsp tamarind paste
1/2 tsp turmeric
1/2 - 1 tsp salt
What you do with it -
Clean the prawns well once it has been shelled and deveined
Apply turmeric powder and salt on the prawns and set aside for at least 10 mins
Grind the tamarind, red chillies and garlic to a smooth paste, adding a tsp or two of water (keep the water to a minimum)
Mix this with the prawns well and allow to marinate in a sealed box in the refrigerator for at least an hour
Heat a shallow pan and add about 3 tbsp of oil
Pour out the semolina and rice flour in a flat plate and combine
Dip each of the prawns in this semolina-flour mix, so that its coated well
Once the oil is hot, place the 3-4 prawns in it, and fry on a low flame for 2 mins
Turn over and allow it to crisp on the other side as well
Take it off the heat and drain on an absorbent paper
Sprinkle some lemon juice over it and serve hot with onions slices
Friday, May 3, 2013
Vegan Coffee Panna Cotta
Its vacation time for my son and we are in Bangalore. No early morning alarms that shake you out of your sleep, no cooking for the lunch box, no crazy Ahmedabad heat...just plain lazing around, meeting friends and cousins and checking out the new restaurants in Bangalore over the next few weeks.
Remember this post on Grape and raisin focaccia that I had posted last month as part of the Groovy Gourmets ? This time around, we had to make panna cotta. I had tried making panna cotta maybe a couple of years back. It was the first time and a huge hit. The next few times the gelatin really let me down.
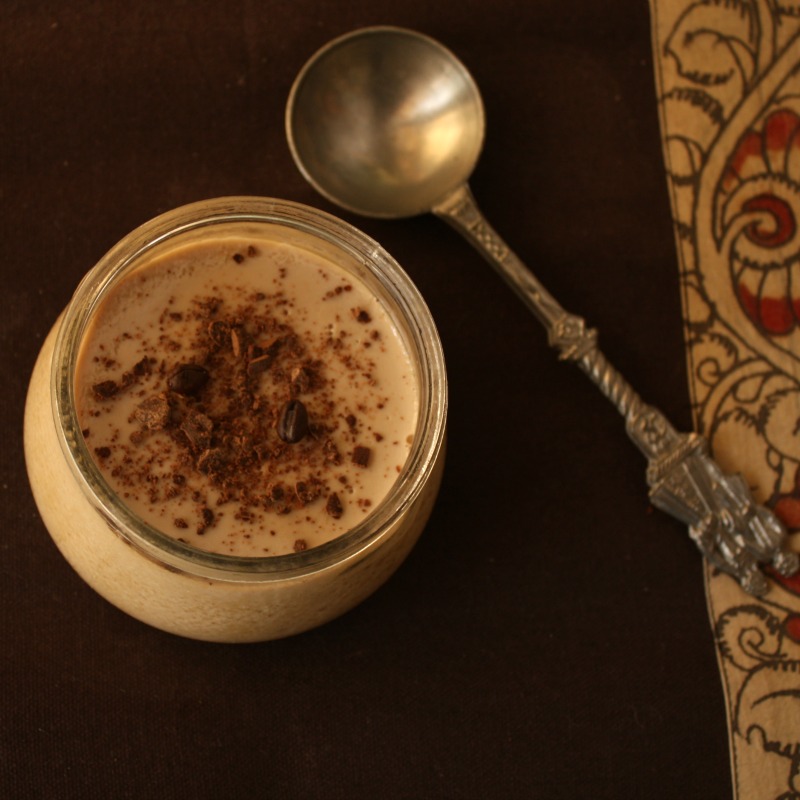
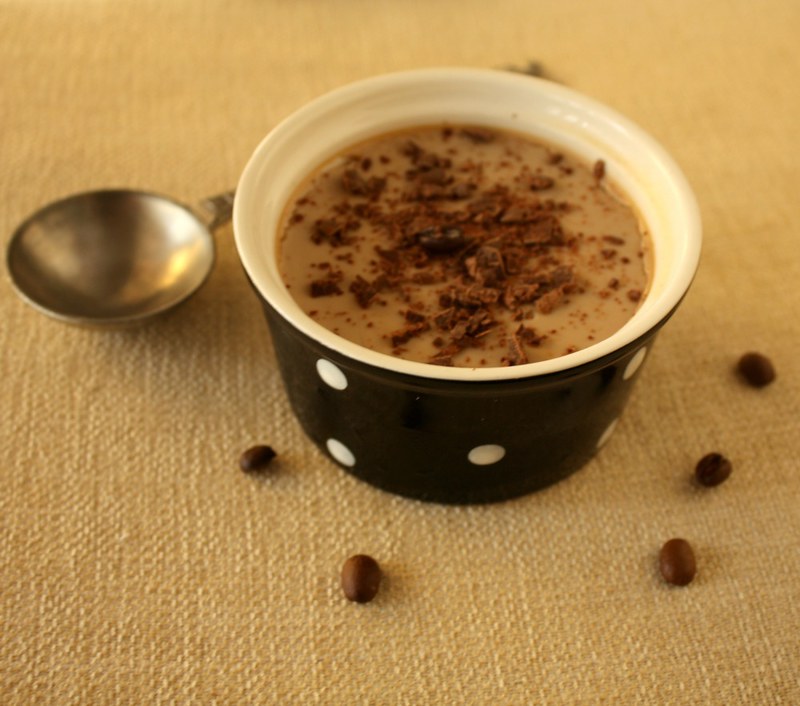
I've always been fascinated with desserts set in a jar and I found this one, which is actually a candle holder in Ma's collection, so I used that as a mould for the panna cotta. I set the rest in some ramekins. Its always nice to serve this as individual servings, in little ramekins.
Panna cotta is an Italian dessert with milk, cream, sugar and some flavours set with gelatin.
My mother is lactose intolerant and anything with milk and cream is a big no-no. She loves coffee and so I decided on a coffee flavoured dairy-free panna cotta. I was very apprehensive how this would turn out since it was my first time with a no cream panna cotta. I used soy milk and coconut milk and also substituted the gelatin with its vegetarian counter part agar agar. The agar agar set it beautifully and my panna cotta turned vegan !
The coffee flavour was mild and with no real cream, it made for a light dessert. I garnished it with some grated dark chocolate.
Vegan Coffee Panna cotta
What you need -
500 ml unflavoured soy milk
200 ml thick coconut milk
8 gm agar agar
1.5 tbsp instant coffee powder
3 tbsp sugar
What you do with it -
Pour out the soy milk and coconut milk in a pan and simmer it on a low flame
Add the sugar and stir it in well
Dissolve the coffee powder in two tbsp of the soy milk and then pout it into the pan
Soak the agar agar in water for at least 10 mins. This packet of agar agar was more like a little mat, which turned into strands when soaked
Rinse the water three times and strain the agar agar
Add this to the pan and mix well on a low flame till it dissolves completely
Turn off the heat
Strain and pour into moulds
Allow it to set in the refrigerator for at least 2-3 hours
Serve cold, garnished with some chocolate
Monday, April 22, 2013
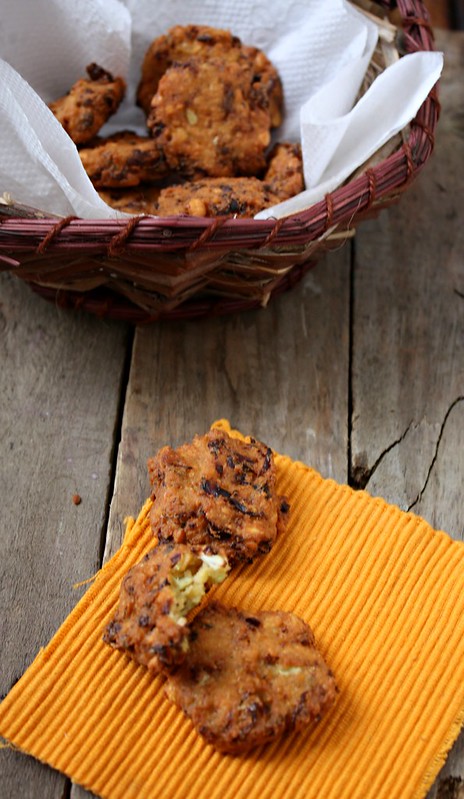
Dal Vadas / Crisp vadas with cabbage and lentils
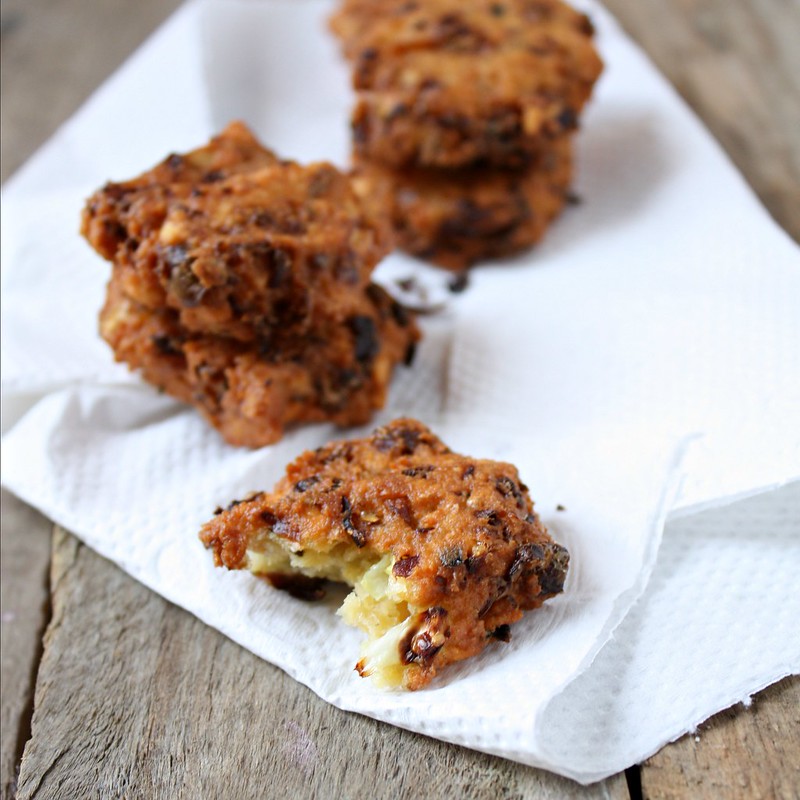
This is a favourite recipe that I got from my aunt. Crispy Dal vadas with cabbage which is quite a hit every time I have made it. This is a fail proof recipe and since the soaking is just for an hour or so, you can easily add it as a starter in your menu, when you have guests over.
I made this for Ugadi and Tamil New year a couple of weeks back. That time I did not use onions and garlic, since we normally don't have it during any religious occasions. Tastes as good either way. The cabbage is really crispy in these vadas and you will not miss the onions, if you choose not to use it.
Cabbage and Chana dal Vadas
What you need -
2 cups Chana dal / Bengal gram dal
1 cup finely chopped cabbage
1 medium onion chopped fine
1/2 cup cleaned and chopped coriander leaves
2 green chillies
1/2" piece ginger
3-4 cloves of garlic
salt to taste
oil for deep frying
What you do with it -
Soak the chana dal in water for about 1-2 hours
Rinse and drain out the water
Grind the chana dal along with the ginger, garlic and green chillies to a coarse paste
Do not add any water while grinding
Take this batter out in a large bowl
Add the onions and cabbage, chopped coriander leaves and salt
In a deep pan, heat the oil
Take a small amount of the batter and press it down slightly with your fingers to form a round patty
Slide it into the oil and allow to turn golden brown
Flip over and allow to brown on the other side
Remove and place on a absorbent paper
Serve with green chutney
Thursday, April 18, 2013
Corn stuffed bread rolls
Ever since I saw this stuffed bread roll on Sara's Bake tales, I was itching to bake it. The recipe looked simple enough and I decided that a simple filling of corn, tomatoes and capsicum would work really well with this
Since it was really hot in Ahmedabad, it hardly took any time for the dough to rise. I had left it by the light that streaked into through the glass windows of my balcony. When I went back to check on this, there were ants all over the bowl. Summer is a difficult time, dealing with the heat and these ants. They had gone right through the dough. Its just so frustrating when you are waiting to try something out and then something as silly as this happens !
I just had to bake this and eat it that day, so I dumped the entire dough in the bin and started all over again. Since it was close to 5 in the evening, I was a little worried about the dough rising again, but it all worked out fine. I made two 8" size rolls with this dough and really enjoyed it
Sending this to Susan's Yeastspotting
Corn stuffed bread rolls
Adapted from Sara's Baketales
What you need -
For the dough
1 cup (250gm) flour / maida
1.5 tsp instant yeast
1/2 tsp salt
1 tsp sugar
2 teaspoons sugar
2 tbsp olive oil
1/2 -3/4 cup lukewarm water
1 tbsp butter for brushing over the loaf
For the filling
1 cup corn kernels
1/2 cup chopped capsicum
1 medium sized tomato
1 small onion
3 tbsp grated cheese
1/2 tsp crushed pepper
1/4 tsp salt
1 tsp oregano / Italian seasoning
1/4 tsp chilli flakes
2 tbsp olive oil
What you do with it -
Take the flour in a large bowl
In a bowl of water water (1/2 cup), sprinkle the yeast, salt, sugar and a spoon of olive oil
If using dry yeast granules, wait for it to froth up a little and then pour over the flour
With instant yeast, you can add it to the flour immediately
Knead the dough, adding little more water, only if required
Make the dough in a large ball and add the remaining olive oil
Place in a greased bowl and cover with cling film or a thin cloth
Keep aside for about 456 to 2 hours depending on how warm it is
Get the filling ready while the dough is rising
Heat a tsp of olive oil in a pan
Add the onions and capsicum pieces
Stir on high heat for 2-3 mins and then add the corn kernels
Once the corn is slightly cooked, add the tomatoes and all the seasoning, salt and pepper
Keep aside and allow it to cool
Once the dough has doubled in size, punch it down and knead for 2-3 mions on a floor dusted area
Roll into a 10"x 8" rectangle, sprinkle a little olive oil over it
Sprinkle the filling evenly over the top, about an inch away from the sides and then roll it up gently, using both your hands
Fold in the edges under the roll and roll it on the surface to smoothen out the edges, as evenly as possible
Make a few narrow gashes on the roll with a sharp knife
Place it on a greased baking sheet and allow it to rise for another 15-20 mins
Pre heat the oven at 180 C for about 10 mins
Bake at 180 C for 15-20 mins
Once its done, brush with a little butter and wait for it to cool slightly before you cut it
Friday, April 12, 2013
Erissery / Kerala style pumpkin and black-eyed beans
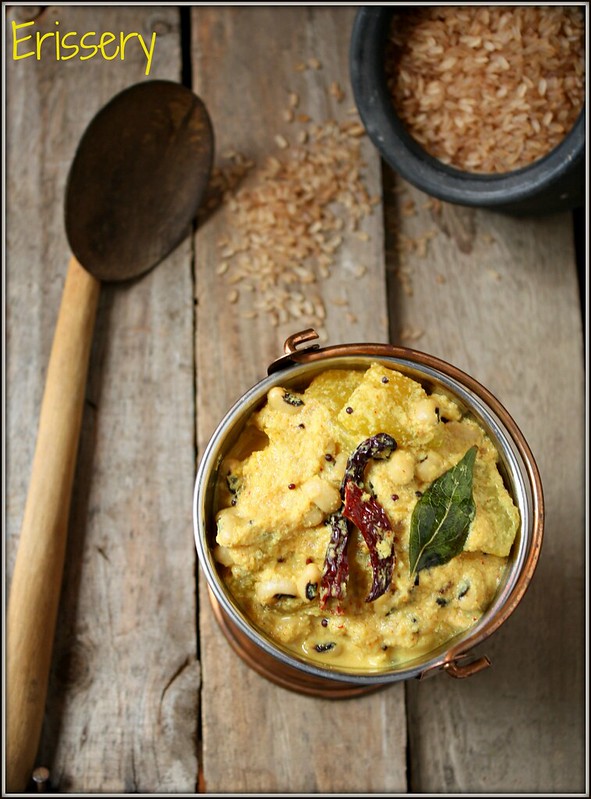
Erissery - Another of those dishes that features on the Onam Sadya - a traditional festive spread in Kerala. This is a homely comforting dish with red pumpkin and black eyed beans in a coconut curry with a slight hint of spice.
Red pumpkin is used in almost all states in India, with so many variations. Anything with coconut spells homely food to me and my son likes the mildly sweet taste of this dish. Its a healthy option with the black-eyed beans and goes well with rice and rasam.
This recipe is from 'Flavours of the Spice Coast' by Mrs K M Mathew, which I got as a giveaway from Sig, who seems to be missing from the blog world for some time now. I really miss reading her posts. You may also want to try this theeyal, another great recipe from this book.
Erissery
Recipe adapted from Flavours of the Spice Coast by Mrs K M Mathew
What you need -
1/4 cup black eyed beans (soaked in water for at least 2-3 hours)
2 cups water
2 cups chopped pumpkin
1/2 cup grated coconut
1/2 tsp turmeric powder
1/2 tsp chilli powder
2-3 cloves of garlic
salt to taste
For seasoning -
1 tsp oil (Use coconut oil for a more authentic taste)
1 tsp mustard seeds
1 tsp chopped onion
a few curry leaves
2 red chillies, broken in half
1 tsp grated coconut
What you do with it -
Pressure cook the black eyed beans. Should get done in two whistles.
Steam cook the pumpkin pieces alng with a little turmeric
Combine the pumpkin and black eyed beans in a pan
Coarsely grind the grated coconut, turmeric powder, garlic cloves and chilli powder
Add this to the pumpkin and beans, along with a little salt
Bring to a slow boil, so the spice paste blends well and turn off the heat
Heat oil in a small pan and splutter the mustard seeds
Add the chopped onions, red chillies and curry leaves
Add grated coconut and sauté till the coconut turns slightly brown
Pour this seasoning into the pan
Serve hot with rice and sambar or rasam
Thursday, April 11, 2013
Paanak / Aam ka panna / Raw mango cooler
Ugadi (Yug-aadi) is celebrated as the New year by people from Karnataka and Andhra. It is also celebrated as Gudi Padwa by Maharashtrians. Since this almost always heralds the summer, raw mangoes are always in season during this time and used in many dishes, like this raw mango rice, raw mango pachchdi and this really cooling drink of paanak / aam ka panna.
I had called my friends over for a Ugadi lunch today. Made raw mango rice, Mysore rasam, black chana ghashi, kosambari with moong dal and seviyan kheer.
This drink made with raw mangoes is popular in many states of India, though there are some variations in the way its made. We usually make it by adding jaggery and cardamoms to the raw mangoes
Its really hot here and has touched 40 C already and this isn't even the real summer here as yet. May is really the worst, with the sun just scorching away.
Aerated drinks just don't seem to quench your thirst and this paanak comes in real handy. Its quite simple to make and store in the freezer. The jaggery balances the sour taste of the raw mangoes and the salt replenishes the body. Add water to this, top it with ice and mint for a refreshing drink in the hot hot summer.
Wish you all a very happy and prosperous Ugadi !
What you need -
2 raw mangoes
1/2 cup grated jaggery
3 cardamoms
1/2 tsp black salt
mint leaves to garnish
What you do with it -
Chop the mangoes close to the edge of the mango seed to get large pieces
Place in a shallow vessel along with the pods of the cardamom and the grated jaggery
Steam or pressure cook for one whistle
Allow it to cool. Remove the skin and seed, after you remove all the pulp around it
Add the salt and put it thru the blender, along with the jaggery and cardamom
Add some water and ice and stir in well
Garnish with mint leaves
Wednesday, April 3, 2013
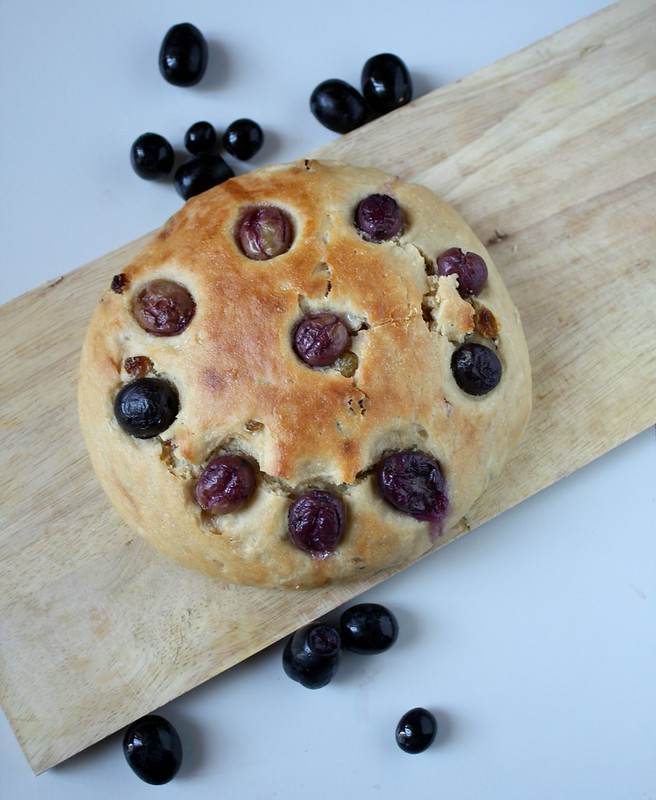
Grape and raisin flatbread (Vegan)
Food blogging is so much more than just blogging about food. It connects you to this whole new universe of people who are so passionate about cooking, baking and sharing it with the rest of the world. It has helped me learn so much about cooking, photography and nicest part has been getting to know like-minded people, even if they lived on the other side of the globe.
Thanks to the various interesting groups on facebook, I got to know Anusha of Tomato Blues and I was thrilled to know of a food blogger who is just a few hours drive from here. She asked me if I am interested in joining a group called Groovy Gourmets on facebook. They select a blog, book or recipe every month and you can choose what you'd like to make from it. Everyone then posts it on the 3rd of the following month.
This month's theme was something vegan from Roxana's home baking.
There are plenty of black grapes in the markets now. Beautiful colour, seedless and delicious. I was contemplating making a grape focaccia for the longest time and then saw this on Roxana's blog.
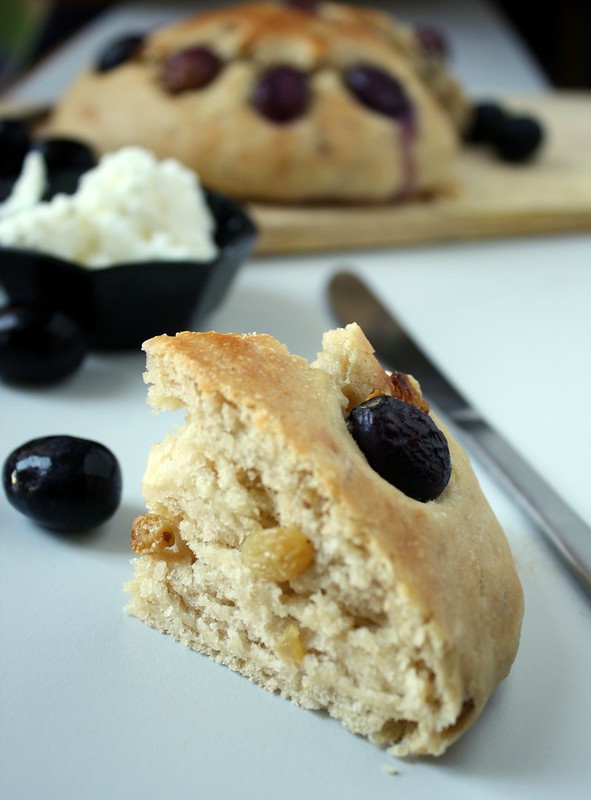
Sticking to deadlines is something I manage to do, though most of the times, it happens a few minutes before the deadline. I finally baked it for breakfast this morning. Had it with cheese slices and the fig preserve that I made a couple of weeks back. The smell of freshly baked bread in the morning is something I would love waking up to, just that in my case I am the one who has to wake up and bake it...
Working with a starter looked very daunting, and I had very little time on hand, so I made a few changes and thankfully, it all worked out in the end. Here's the link to Roxana's recipe and here's my version
This yeast beauty is off to Susan's Yeastspotting
Vegan grape and raisin flatbread
What you need -
1/2 cup whole wheat flour
3/4 cup maida / APF
1 tsp instant yeast
1 cup lukewarm water
1/4 cup olive oil
pinch of salt
1 tsp sugar
1/3 cup raisins
a few fresh black grapes
What you do with it -
In a large mixing bowl add the flours and the yeast along with the salt and sugar.
Pour the warm water over it and stir it in with a wooden spoon
Add 1/2 the olive oil and grease your fingers and gently mix in the flours to form a sticky dough
Add in the raisins and mix once more
Preheat the oven to 180 C
Transfer to a greased bowl and allow it to rise in a warm place till it doubles in size
Once the dough has risen, punch it down and shape it into a little circle
Dimple the dough with a few fresh black grapes and allow to rise for another 15-20 mins
Bake at 180 C for 15-20 mins or till the top turns golden brown
Let it cool for a couple of minutes and then enjoy it with butter, cheese or a preserve
Wednesday, March 27, 2013
Vanilla flavoured Thandai
Holi - the festival of colours is here ! After all the crazy fun with colours, its time to cool off with some Thandai - a flavoured milk, with almonds, saffron and spices. This is a popular drink in the northern states of India and this was my first time with thandai. This is a Holi special drink and a little bhang mixed into it can take this thandai to another level !
Holi is not something I grew up celebrating. It is not such a popular festival in the South Indian culture, but people have adapted to it now. It was, in fact, quite a menace when we were younger and studying. Strangers would just throw balloons with coloured water or splash coloured paints and I didn't quite understand how that was considered celebration.
I enjoy it when its with family and close friends but definitely not with some arbit strangers
For those of you who do celebrate it, wish you a very Happy Holi. For those of you who dont, this drink is great for summers, Holi or otherwise
I did not have cardamom and khuskhus at home, so substituted it with some vanilla pods for a little twist to the traditional thandai
Thandai
What you need -
1 litre milk, preferably full fat
4 tbsp sugar
8 peppercorns
a few strands of saffron / kesar
20 almonds
2 tsp fennel seeds / saunf
1 vanilla pod
What you do with it -
Soak the almonds in hot water and keep aside for 15 mins
Pour out the milk into a thick bottomed vessel / pan
Allow the milk to boil and then reduce the heat
Slit the vanilla in half and add it to the pan of milk
Add the sugar and mix well till the sugar is dissolved
Powder the peppercorns and fennel seeds
Peel the skin off the almonds and grind along with the powdered peppercorns and fennel
Take the milk off the heat and allow it to cool
Add the almond paste to it and stir in well
Refrigerate this for 3-4 hours or overnight
Take a tbsp of warm milk and add the saffron strands to it
Strain the cooled milk using a sieve and discard the residue
Add the saffron and mix well
Serve cold with gujiyas, kachoris, kanji vada and other Holi delicacies
Monday, March 25, 2013
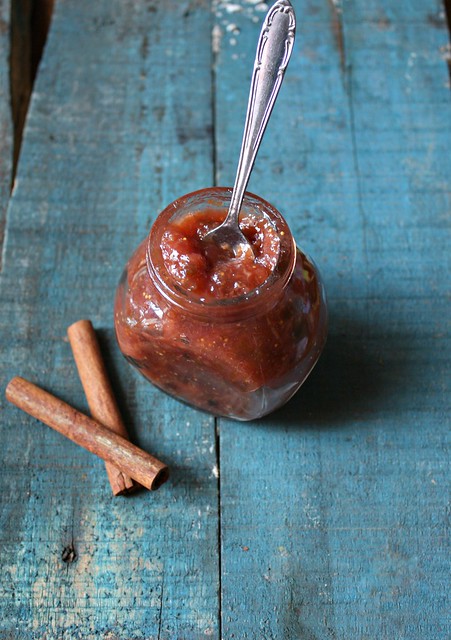
Fig preserve
Ever since I bought these beautiful figs, I have been scouring my recipe books and the blogosphere for something interesting that i could make with it. I can eat them fresh, love them that way, but wanted to make something with it. By the time I short-listed a few ideas, these delicate figs were already starting to shrivel up a bit.
Baking something with it was a great idea, but again I can sure do without the flour, butter and sugar, so I decided on a simple fig preserve, that way I get to taste them even when they aren't in season any more.
Fig preserve
I didn't realise how simple making a preserve would be. It just took like 5 mins of my time and about 30 mins on the stove, where I really need to do much other than peep in once in a way to check how it was all going.
Fresh figs
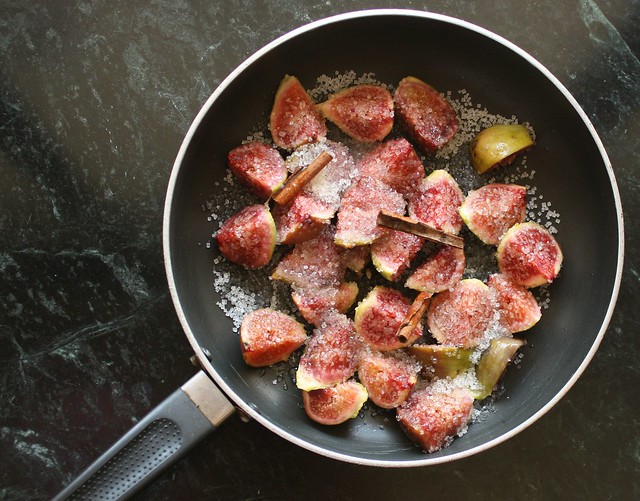
Preserves usually use whole fruits and is more chunky and gives you the real flavour of the fruit. This has no pectin and the only added flavour was the cinnamon, which seemed to pair up beautifully with the figs
Figs ready to get 'preserved'
We have had this fig preserve with some parathas, spread it over bread, used it as a topping on vanilla ice-cream and it works fantastically any way you'd like to use it.
Fig preserve
I like the chunky bits that come in the preserve and when I was storing this in the jar, I stuck in the piece of cinnamon that I used to cook with the figs. The cinnamon continues to give its wonderful flavour into the preserve. Simple, pectin-free and pretty low on the sugar. This one really worked well for me
Fresh fig preserve
What you need -
10 figs
3 tbsp granulated sugar
1-2 long sticks of cinnamon broken into two
juice of one lemon
What you do with it -
Wash the figs and then cut them in quaters
Place them in a thick bottomed pan
Sprinkle the sugar and lemon juice over it
Throw in the two pieces of cinnamon
Keep it on a low flame for about 25-30 mins
Cover it for the first 10-15 mins, but keep checking on how fast it cooks
There is no need to add water. The lemon juice and sugar work well enough for this
Once the figs start to break up, stir them a bit
If there are very large chunks of figs, break it down gently with a fork and continue cooking it till it all done and there is not much liquid remaining
Sterilise the jar that you will be storing this in
I just put the jar in a large pot of hot water and allow the water to boil for 10 mins
Take the jar out and allow it to dry it in the sun. Ensure that there is no moisture in the jar
Once the fig preserve has cooled down, transfer it to the jar
Store it in the refrigerator
Thursday, March 21, 2013
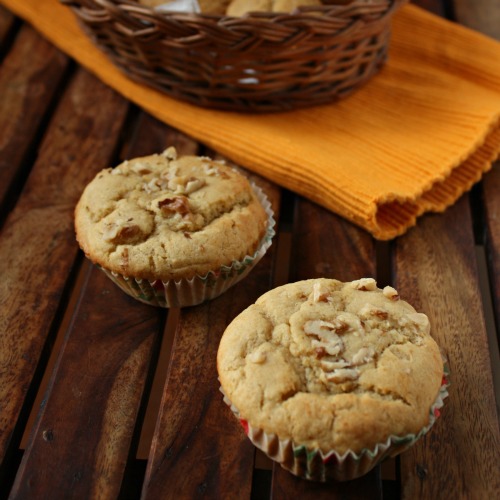
Orange and Banana muffins (no eggs)
Generally when I am cooking our daily meals, I don't really think too much and almost work on auto-pilot. The vegetables from the fridge, the onions and potatoes from the baskets, the masala powders and the indispensable set of spices. Thanks to my son's early morning school, I can now make rotis at 5.30am, when I am barely even awake.
But when it comes to baking, I am a little more careful, after the few disasters I've had. I prefer to follow a recipe, at least for the measurements, though I still don't have kitchen scales.
This time around, I decided to make these muffins with the oranges and the lone banana lying around in the fruit bowl. I like the idea of adding fruit purées and juices in cakes and muffins. They add a lot to the flavour and softness and its fun to try these with different seasonal fruits. Puréed banana with a little baking soda works as a perfect substitute for eggs in muffins
My friend and her kids were to come over and I had half an hour on hand, so I just grabbed the ingredients and made these real quick, without really referring to any recipe this time. Was really happy with the way they turned out. I guess I have finally the hang of baking without reading thru each line of the recipe every time !
Co-incidentally my friend brought along orange muffins too, hers had some ginger and chocolate grated into it, which was a delicious combination
Egg-free Orange and Banana muffins
What you need-
3/4 cup wheat flour
3/4 cup APF / maida
1/2 cup freshly squeezed orange juice
1 banana
1 tsp baking powder
1 tsp baking soda
1/2 cup sugar (I used powdered sugar this time)
5-6 almonds cut into pieces
1/2 cup butter (Can use oil instead)
1/4 cup milk
What you do with it -
Pre-heat the oven to about 180 C (convection microwave) or 160 C (OTG)
Mix the flours, baking powder and baking soda in a bowl
The butter should be soft enough. Add this to the sugar and beat till the sugar has completely mixed in
Run the banana and about 2 tbsp of milk thru a blender / mixie
Add the orange juice and the pureed banana to the butter
Beat well and combine the dry ingredients into the this, mixing it in gently(a wooden or silicone spatula works best)
Add more milk if the batter is too dry
Line the muffin tray with paper holders
Spoon in the batter upto 3/4th level of the holder
Top it with some chopped almonds
Bake for 10-12 mins (May take upto 15 mins in the microwave convection mode)
Allow it to cool and then remove the muffins from the tray
Thursday, March 14, 2013
Kashmiri Rajma
I have a Kashmiri friend here and was invited for a lovely meal at her place some time back. This was perhaps the first time I was tasting authentic Kashmiri food.
My introduction to anything Kashmiri was some restaurant's version of Kashmiri pulao which was sweet, had raisins and cashew nuts and sugar with rice, which was a big no-no for me, at least at that point in time. Now I have slowly taken to having something sweet as part of a main course.
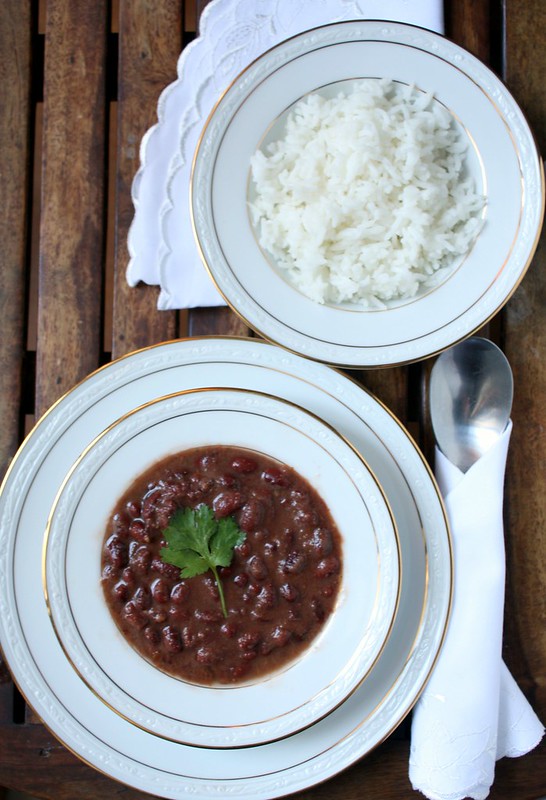
She had invited some of us for lunch and made rajma, baingan, aloo dum, paneer in a white gravy and basmati rice. It was a delicious meal that wasn't spicy but had a wonderful flavour and everything was so aromatic without being overpowering
I absolutely loved her version of pressure cooker baingan sabji, which I intend making soon, but the simplest and tastiest dish that day was the Rajma, teamed with the very fragrant basmati rice
This, unlike the usual restaurant / Punjabi style rajma. It has some very different spices and the regular chole masala / rajma masala / garam masala can be easily avoided, and won't be missed at all
I called her for the recipe last week and made this. The kitchen was so fragrant with the whole spices added in the rajma and the basmati rice cooking away in my rice cooker. Add a little salt to the basmati rice while cooking it. When its done, allow it to cool slightly and then fluff it up with a fork, so you don't break any of the rice
Give this a try, chances are you may never go back to the other ways of making this
Kashmiri Rajma
What you need -
2 cups kashmiri rajma beans
1 heaped tsp saunf powder (about 1 tbsp of saunf powdered as fine as possible)
dry ginger powder (saunth)
1 stick cinnamon
1 black cardamom / badi elaichi (peeled opened slightly at the top)
2 green cardamom pods / choti elaichi powdered
star anise (optional)
1/2" piece ginger
3-4 garlic cloves
1 large onion
2 tomatoes
1 tsp chilli powder
a pinch of hing
1/2 tsp rajma masala / chole masala / garam masala (optional)
salt to taste
What you do with it -
Soak rajma in about 4 cups water and keep overnight
Drain the water, rinse in fresh water and then add 4 cups of water to the rajma
Add saunf powder, badi elaichi, choti elaichi powder, cinnamon stick and the star anise and pressure cook for 3-4 whistles
Chop the ginger, garlic, onions and tomatoes
Grind the ginger, garlic and onions to a smooth paste
Grind the tomatoes to a smooth paste (You can peel the skin and then grind the tomatoes)
In a pan, heat oil and add hing and red chilli powder in the oil
Add the ginger-garlic-onion paste and saute till the raw smell goes away
Add the tomato puree and stir well
Grind / mash about 2-3 tbsp cooked rajma and add it along with one cup of the water that the rajma was cooked in
Add the cooked rajma
Depending on the quality of the rajma beans, it may take longer to cook
Adjust the salt and add garam masala / rajma masala, if necessary
In case the rajma hasn't cooked, transfer everything to a pressure cooker and cook for 1-2 more whistles
If the rajma is cooked, add it to the pan and cover and allow the masala to thicken up
Serve hot with basmati rice

My introduction to anything Kashmiri was some restaurant's version of Kashmiri pulao which was sweet, had raisins and cashew nuts and sugar with rice, which was a big no-no for me, at least at that point in time. Now I have slowly taken to having something sweet as part of a main course.
She had invited some of us for lunch and made rajma, baingan, aloo dum, paneer in a white gravy and basmati rice. It was a delicious meal that wasn't spicy but had a wonderful flavour and everything was so aromatic without being overpowering
I absolutely loved her version of pressure cooker baingan sabji, which I intend making soon, but the simplest and tastiest dish that day was the Rajma, teamed with the very fragrant basmati rice
This, unlike the usual restaurant / Punjabi style rajma. It has some very different spices and the regular chole masala / rajma masala / garam masala can be easily avoided, and won't be missed at all
I called her for the recipe last week and made this. The kitchen was so fragrant with the whole spices added in the rajma and the basmati rice cooking away in my rice cooker. Add a little salt to the basmati rice while cooking it. When its done, allow it to cool slightly and then fluff it up with a fork, so you don't break any of the rice
Give this a try, chances are you may never go back to the other ways of making this
Kashmiri Rajma
What you need -
2 cups kashmiri rajma beans
1 heaped tsp saunf powder (about 1 tbsp of saunf powdered as fine as possible)
dry ginger powder (saunth)
1 stick cinnamon
1 black cardamom / badi elaichi (peeled opened slightly at the top)
2 green cardamom pods / choti elaichi powdered
star anise (optional)
1/2" piece ginger
3-4 garlic cloves
1 large onion
2 tomatoes
1 tsp chilli powder
a pinch of hing
1/2 tsp rajma masala / chole masala / garam masala (optional)
salt to taste
What you do with it -
Soak rajma in about 4 cups water and keep overnight
Drain the water, rinse in fresh water and then add 4 cups of water to the rajma
Add saunf powder, badi elaichi, choti elaichi powder, cinnamon stick and the star anise and pressure cook for 3-4 whistles
Chop the ginger, garlic, onions and tomatoes
Grind the ginger, garlic and onions to a smooth paste
Grind the tomatoes to a smooth paste (You can peel the skin and then grind the tomatoes)
In a pan, heat oil and add hing and red chilli powder in the oil
Add the ginger-garlic-onion paste and saute till the raw smell goes away
Add the tomato puree and stir well
Grind / mash about 2-3 tbsp cooked rajma and add it along with one cup of the water that the rajma was cooked in
Add the cooked rajma
Depending on the quality of the rajma beans, it may take longer to cook
Adjust the salt and add garam masala / rajma masala, if necessary
In case the rajma hasn't cooked, transfer everything to a pressure cooker and cook for 1-2 more whistles
If the rajma is cooked, add it to the pan and cover and allow the masala to thicken up
Serve hot with basmati rice