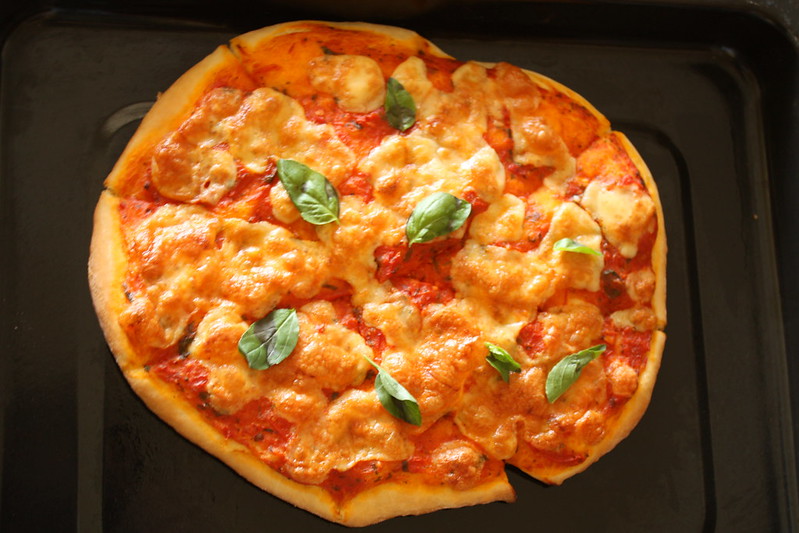
I have been intending to bake a pizza in my not-so-new-now OTG. I have baked it in the convection mode of my microwave and its been fine, but the result from the OTG was way way better.
I had promised my friend Vinny that I'd make this and post it and then it just took forever to get it done
On Saturday, I was all enthused to cook / bake, make something really nice for a nice relaxed lunch. My son had school for about 2 hours for the flag hoisting on Republic day. TH had a few meetings to get done with.
Music blasting from my little radio in the kitchen, nice cold breeze with the sun shining thru it and a whole lot of ingredients at home - my favourite way to get started in the kitchen...
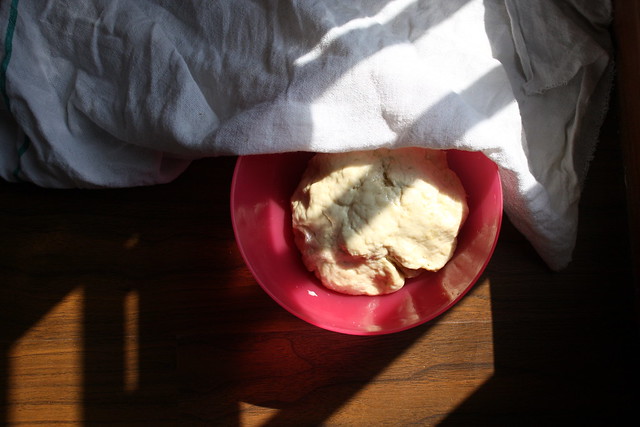
Pizza dough set out to rise
I started with the pizza dough and then set it out in my balcony that had the sun streaking in. I had one whole hour on hand now. So dug out my fridge and found this pack of feta cheese, a bunch of basil leave and some ripe red tomatoes.
Feta is one expensive cheese here and so I keep planning what I'll make with it and try to find an occasion worthy of it, today just seemed like the day for it. Made a tomato and feta cheese salad with a basil vinaigrette.
In the pantry I found some sweet potatoes waiting to be used. Added some rosemary and garlic seasoning that my cousin had brought for me. Baked that - low on fat, high on taste.
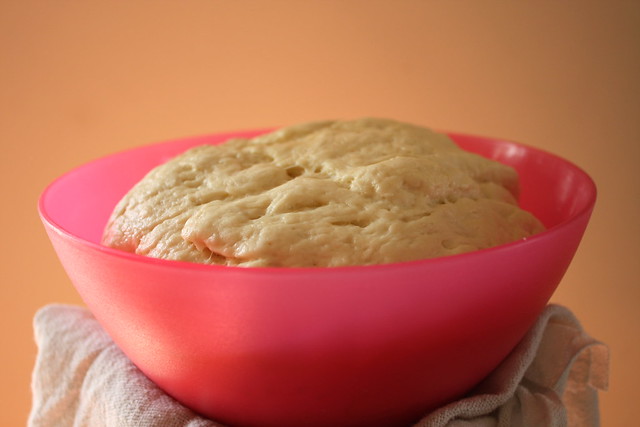
Pizza dough after the rise (1 hour)
By this time my dough had double in size. Punched it down, spread this tomato basil sauce on it, sprinkled some cheese and it was all set to get baked...
I had once tried this roasted eggplant pizza in a lovely little place in the Harvard Square. My cousins from Boston took me there and I was really sceptical about eggplant on a pizza, but the taste was mind-blowing.
Thought of re-creating that for TH and me. A simple tomato sauce and cheese pizza was perfect for my son.
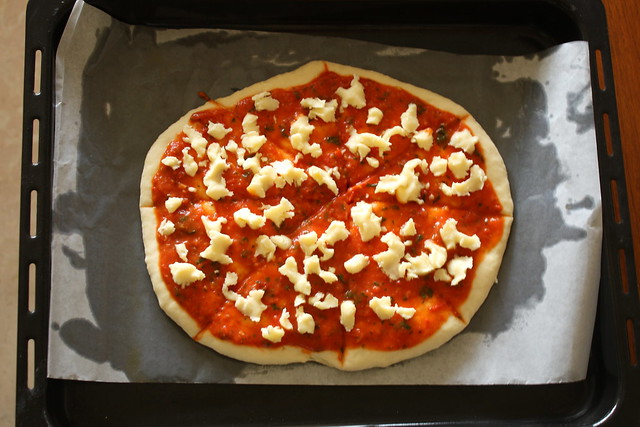
With the toppings and ready to bake
20 mins later, my son was gobbling it down - he said it was better than Dominos and Pizza Hut. And he left just two slices from his whole pizza ! Yaaay !

Made the eggplant pizzas with some crumbled feta cheese and basil, which turned out really really good. Topped it with piri piri sauce for that extra zing. Perfect weekend.
Making pizza at home is really simple, you can choose your toppings and have it as fresh as it gets. Just get yourself the right yeast and get started. Go.
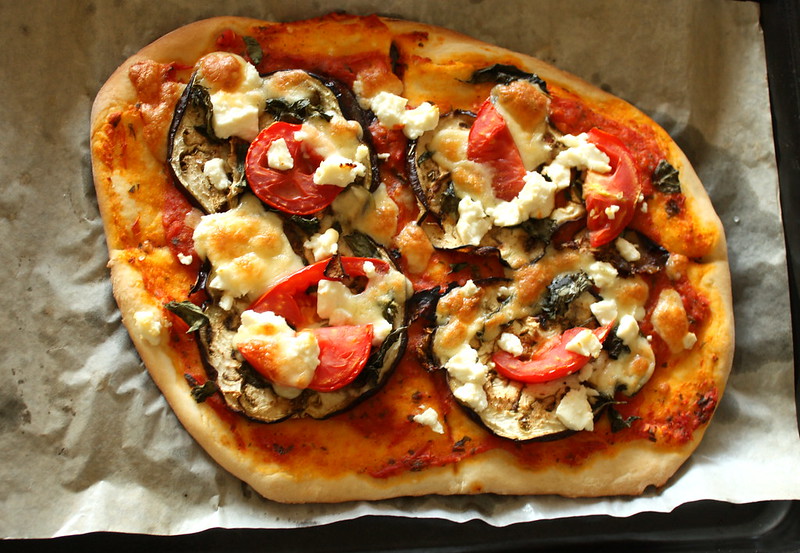
Roasted eggplant, tomato and feta on my pizza
Homemade pizza dough / Tomato and cheese pizza / Roasted eggplant and feta pizza
What you need
Basic pizza dough
(Makes 3 pizzas)
3 cups maida / flour
1 1/4 tsp instant yeast or 1 1/2 tsp active dry yeast (I use gloripan or eagle instant yeast)
1 cup water + 2 tbsps
1 tsp sugar
1/4 tsp salt
2 tbsp olive oil + 1 tsp more for greasing
Topping
Tomato basil sauce
mozzarella
1 large eggplant
2 large tomatoes
a few basil leaves
1/4 cup crumbled feta cheese
What you do with it -
Warm the water, it should not be too hot or lukewarm.
Pour the water in a large bowl and sprinkle the yeast over it, along with the sugar. If using the active dried yeast, the water should froth up within 5 mins or so
Add the flour to it, along with the salt and knead it well
It will be slightly sticky, add the olive oil to the dough and a little on your fingers and knead well. (Its ok if its still a little sticky)
Grease a bowl with some olive oil and then place this ball of dough in it
Cover with a moist thin cloth or cling wrap and keep it in a warm place
It should take about 1 hour to rise and double in size. It might take longer if its not too warm
Once its risen, punch it down and then divide into three balls
Line a baking tray with greased baking paper or cornmeal
Pre heat the oven at about 200 C
On a floured surface, roll out the dough using a rolling pin or simply stretch it with your hands to get the shape you want. (It doesn't have to be round)
Sprinkle a little olive oil over the dough and then add the tomato-basil sauce
Top it with cheese (mozzarella) and bake it for about 15 mins till the crust turns slightly brown and the cheese is all melted
For the roasted eggplant pizza,
Cut the eggplant into slices that are not too thick or thin
Pan fry or roast in an oven with a little olive oil
Cut the tomato into thick slices
Crumble the feta cheese
Roll out the dough slightly thin and then smear some olive oil over it
Add the tomato-basil sauce and then place the roasted eggplant slices, top it with the tomato slice and sprinkle the crumbled feta cheese some basil leaves over it
Sprinkle a little mozzarella also and bake at 200 C (or slightly lower, depending on your oven) for 12 - 15 mins
To spice it up a bit, I added a dash of piri-piri sauce over it
Tuesday, January 29, 2013
Saturday, January 26, 2013
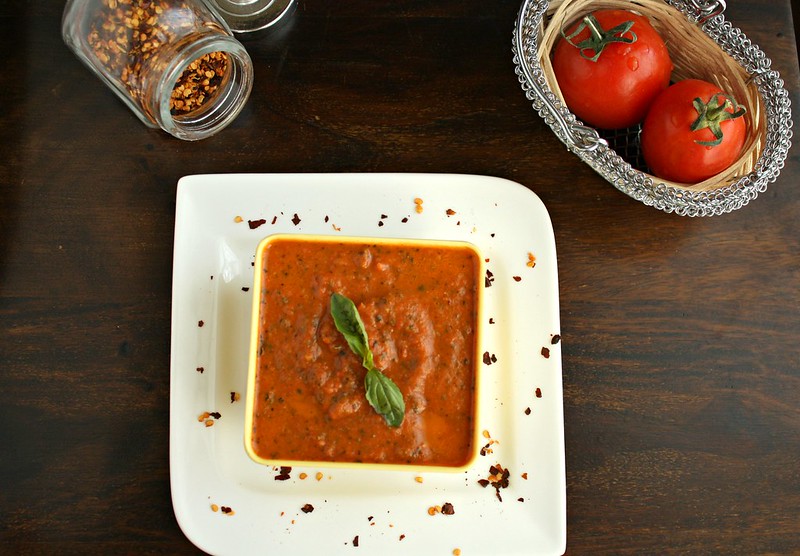
Basic tomato and basil sauce for pasta
I have this book called Italian Khana Pasta by Ritu Dalmia, owner of the famous restaurant Diva in Delhi. Its a neat little book with some nice recipes for different sauces and lots of options in pasta, from baked macaroni and spaghetti to timbale and gnocchi. It even has Hindi translations of all recipes.
She calls this sauce the backbone of an Italian kitchen, there is this basic one that can be used with pasta or lasagne and the other sauce, which she calls the deluxe sauce that has carrots, onions and celery along with the tomatoes and works better as a sauce on its own
My son is usually very happy with our standard menu of roti, sabji, rice and dal. This is usually the standard for weekday lunches. Last week he requested for pasta for lunch. There were plenty of tomatoes stocked up at home, so I made this really simple tomato and basil sauce that can be used with pasta or pizza.
I have always had this standard pasta sauce recipe that has onions, garlic, tomatoes and some herbs. I usually blanch the tomatoes and use them and so the process does get slightly longer. I found this recipe much faster.
Once you have this sauce ready, you can freeze this for a couple of weeks.
Cook the pasta al dente, as per the instructions and drain. Add the sauce and some olive oil and mix well. Top with grated cheese, serve with warm bread and you have a nice warm meal ready.
My dear friend Miri gifted me this book around this time last year, and she passed away in a couple of weeks after that. I was really shaken and couldn't get myself to even open this book after that, for a very long time.
I can't believe its almost a year now. I miss her so very much.
Tomato and Basil sauce for pasta
Adapted from Italian Khana - Pasta by Ritu Dalmia
What you need -
1kg large ripe tomatoes
1/4 cup extra virgin olive oil
3 cloves garlic chopped
1 handful of fresh basil leaves
a pinch of red chilli flakes
1/4 cup water (if required)
salt to taste
1/2 tsp crushed pepper (my addition)
1/4 - 1/2 tsp sugar (to balance the tartness)
What you do with it -
Cut the tomatoes in half and using your fingers, scoop out the seeds. Then cut them in quarters
Heat the oilve oil in a large pan and add garlic and chilli flakes. Once the garlic turns opaque, add the tomatoes.
Cook over high heat till the tomatoes start thickening. Use a wooden spoon to stir and break the tomato pulp.
Add the water if its too dry. I added about 1/4 cup of water.
Tear the basil leaves with your hand and add it along with the salt, sugar and pepper
I added the pepper since the tomatoes were slightly sour. You can skip this if you like
Take it off the heat and put it thru a food processor and pulse it for a minute or so to get a chunky sauce.
I ran it a bit longer and made it slightly smooth since my son doesn't really like chunky pieces too much
Friday, January 25, 2013
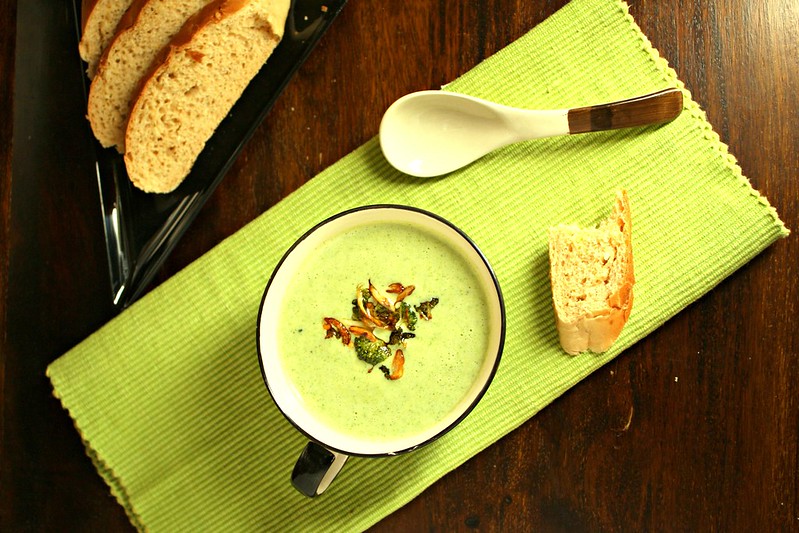
Broccoli soup with fried garlic
The cold and wintry evenings are the perfect time for a bowl of hot soup with some warm bread to dunk into it. TH is not very fond of soups, but broccoli is a favourite and luckily my son loves broccoli too
My vegetable vendor always asks me if I want broccoli, baby corn, and mushrooms every time he gets them real fresh from the market. I seem to to be one of his regular customers for these 'English vegetables' as they are called here
Broccoli has become really popular in India over the last few years, with all the publicity of its anti-cancer properties. Its really rich in Vitamin C and dietary fibres. Apart from being high on the health quotient, it tastes really good too, especially in stir fry or in soups.
We had broccoli soup, pasta in simple tomato basil sauce and some garlic bread for dinner last night. Light, warm and really comforting. Doesn't take too much effort, give this one a try.
Ma makes mushroom soup with this recipe, I tried it with broccoli
Sayantani of A Homemaker's Diary has a giveaway at here blog sponsored by Cuponation - India’s largest coupon portal offering discounts on various products.
All you need to do to enter is send in a winter warmer recipe that needs to be either a soup or a hot beverage. Check her blog for more details. I'm sending across this hot soup !
Broccoli soup with fried garlic
(Serves 2)
What you need
1 large onion
1 medium sized broccoli
6 cloves of garlic
a pinch of red chilli flakes
2 tbsp olive oil
1/2 - 3/4 cup milk
salt to taste
1/2 tsp crushed pepper
What you do with it
Chop the onion into large pieces
Cut the broccoli into florets. Keep 1-2 small florets aside and steam the rest for 3-4 mins. It should get cooked slightly, but must remain firm and not turn to mush
Chop 3 garlic cloves lengthwise and keep aside and the other three into smaller pieces
In a pan, heat 1 tbsp of olive oil and add the finely chopped garlic and the onion
After 2-3 mins, add the steamed broccoli, salt and pepper and saute on high heat for another 2-3 mins
Allow it to cool and then put it through a blender. Grind it to a smooth paste, adding the milk, till you get the thickness you want
Bring to a slow boil again and divide the soup into 2 bowls
In a small pan, add 1 tbsp olive oil and add the garlic chopped lengthwise, tiny florets of broccoli and the chilli flakes
Add this over the soup in both the bowls
Serve hot with some warm garlic bread
Thursday, January 17, 2013
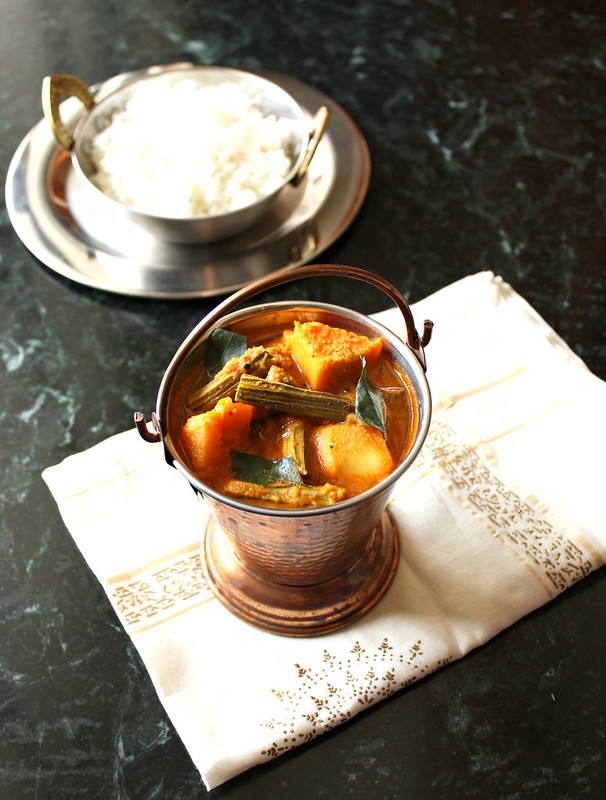
Mixed vegetable Sambar with ground masala / Arachivittu sambar
Rice is a staple in South Indian food and usually had as every course of the meal, with different accompaniments each course. In a daily meal, the rice is had first with sambar, then rasam and then curds. Some variations may be a flavoured rice like raw mango rice, tamarind rice, lemon rice, etc...
There are many other accompaniments, like mor kulambu, vatral kolambu or kootu but these form the basic ones. A dry vegetable is served with this, along with fried papad.
People who are not used to eating a typical South Indian meal could find the rice a bit too much, but for a South Indian, it is the perfect homely comfort food.
Sambar is usually made with ready sambar powder, which could either be store bought or home-made. A variation of this is arachivittu sambar which is made with a fresh masala, made of spices and coconut. The vegetables that go into this mixed vegetable sambar are usually brinjal, drumsticks and sweet pumpkin. You can make this using sambar powder instead of the ground masala, but the flavour and texture would be different
Since Pongal is a celebration of the harvest season, the locally grown vegetables are used in the sambar. I made this sambar with potatoes, brinjals, drumstick and sweet pumpkin. Have this with steaming hot rice and a dollop of ghee to begin the hearty South Indian meal
Arachivittu sambar
Adapted from 'Classic lunch recipes' By Mallika Badrinath
What you need -
2 cups of mixed vegetables (3 drumsticks, 2-3 long brinjals, 1/2 cup of pumpkin pieces, 2 potatoes)
1/2 cup tur dal / split pigeon peas
1 tsp tamarind paste / small ball of tamarind
2 tsp oil
1 tsp mustard seeds
a pinch of asafoetida
a few curry leaves
To grind to a paste
1 tbsp coriander seeds
4 red chillies
1 tbsp bengal gram dal / chana dal
1/4 tsp fenugreek seeds / methi
1/4 cup grated coconut
What you do with it -
Pressure cook the tur dal with a little turmeric till its all soft. Mash and allow it to cool
Fry the coriander seeds, red chillies, chana dal, methi and grind along with the coconut to a smooth paste
If using the tamarind paste, add it to a few tablespoons of water to extract the tamarind pulp
In a deep pan, cook the vegetables in the tamarind water / pulp
Allow the vegetables to cook and then add the salt and ground masala
Add the dal and cook till its thick
Pop the mustard seeds and asafoetida in a little oil
Add curry leaves and then pour over the sambar
Serve with hot rice and some ghee
Tuesday, January 15, 2013
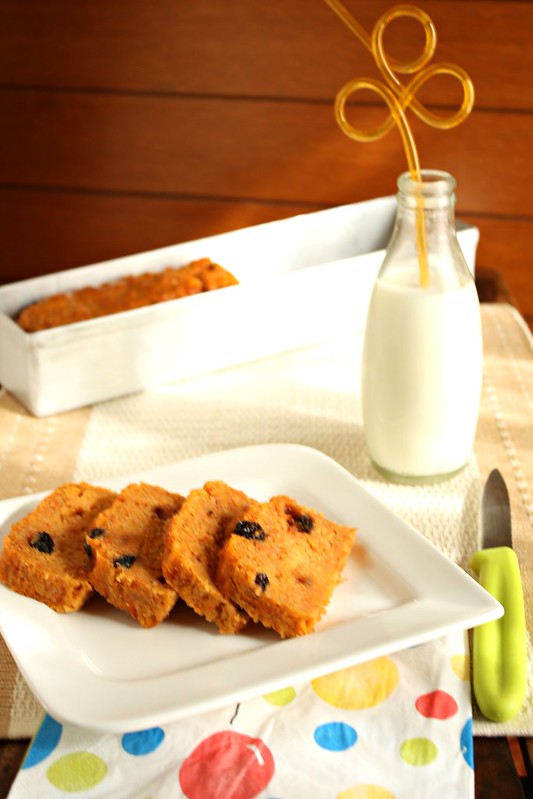
Carrot and almond cake (whole wheat, no eggs)
Its been two weeks now and I have managed to keep up to my resolutions so far, which is no mean achievement. Writing about it here makes feel more accountable in a way !
For Uttarayan / Pongal / Sankranti yesterday, we had a complete South Indian meal at home and then were out for kite flying in the afternoon. The older areas of Ahmedabad are absolute fun during this time. The people are on their terraces the entire afternoon and evening. After all the kite flying and eating, its time for tukkals. The tukkals or paper lanterns with lights are sent up once it starts getting dark and its really a beautiful sight. Then there are the fireworks and of course the garba which I think the locals can't resist after a point, whatever the festival may be !
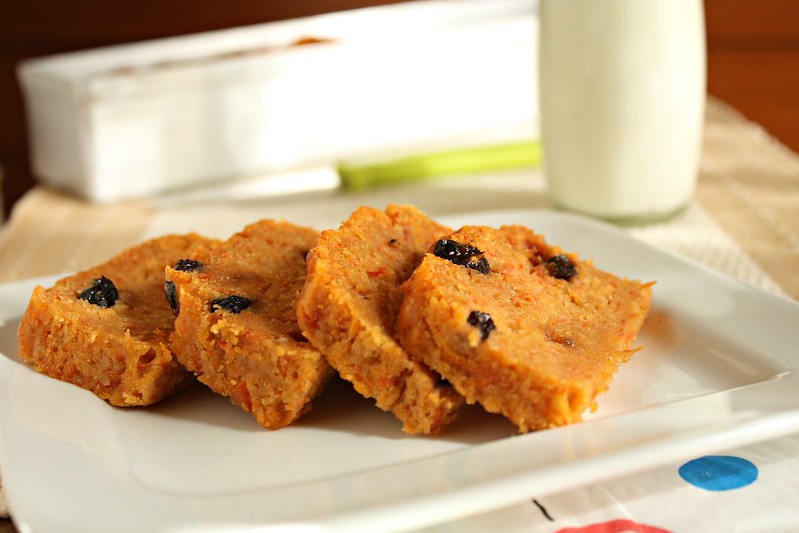
I have no pictures of the mega meal yesterday, was too famished to take pictures before lunch and then we went out soon after that. Here's a healthy whole wheat eggless carrot cake, that is really soft and almost like a gajar ka halwa in a cake !
My hyper little kid has started learning football now, which is a great way to get all that energy out. It really helps that the football ground is opposite our apartment and I can watch him play from the balcony. Its amazing that my little one is 7 already. Time seems to move really fast and from the tiny little baby that he was, he has suddenly grown so much, so fast. The last couple of years is when he has really grown and I realise it only when his pyjamas are suddenly way above the ankles !
I prefer giving him something healthy and filling when he is back from football and decided on a wheat cake. Now is the season for the sweetish, red carrots, which are a little too sweet to make sabjis with, so I added it in this cake, with a little almond meal and some chopped almonds and raisins.
My cousin who has the most adorable twins who are about a year and half now, was on the lookout for some healthy filling snack for her little ones. I think these would work well even for the little ones.
I was worried the wheat would make it really dense and there's no butter in this either, but the cake turned out really soft. You could even add a banana along with the carrots.
Carrot and almond wheat cake
What you need -
1 cup whole wheat flour
1/4 cup almond flour (use ground almonds instead)
(If you don't want to use almonds, just add another 1/4 cup whole wheat flour)
1 1/4 cups grated carrot
3-4 tbsp sugar (the carrots were sweet enough, you can add more if required)
6-7 almonds (blanched and chopped)
1/4 cup raisins
1/2 cup milk
1/4 cup oil
1 tsp baking powder
1 tsp baking soda
a pinch of salt
What you do with it -
Pre-heat the oven to 180 C
Grease a 8" baking dish (I used a long narrow loaf pan)
Mix the wheat flour, almond meal, baking powder, salt and baking soda and mix well
Mix the sugar into the milk till it dissolves completely
Add the grated carrots to the milk and the add the flour mixture to it
Add the raisins and almond pieces and mix well
Bake at 180 C for about 35-40 mins till it is browned well. Push a toothpick in the centre and it should come out clean if your cake is done
Allow it to cool and then cut into pieces. It should store well in the refrigerator for at least 4-5 days
Wednesday, January 9, 2013
Thalipeeth / Multigrain pancake
Thalipeeth is something I discovered fairly recently, maybe in the last couple of years. Its a Maharashtrian breakfast dish, extremely nutritious with all the different flours that go into it.
I have always bought out my bhajani thalipeeth mix from Bombay or I have my cousins bring it when they visit. When I ran out of it once, I tried using different flours, like bajra, jowar, ragi and wheat flour to make this instantly. If you'd like to make it from scratch, there is a recipe for that here, tried and tested by my cousin.
A friend of mine always brings back a whole lot of goodies every time she visits her parents in Pune, so I am well stocked with thecha - a super spicy red chilli and garlic paste and shengdana chutney - peanut and garlic dry chutney
The best way we enjoy thalipeeth is with thecha and some home made white butter - makes your taste buds come alive !
The blog now has a new page for Festive cooking - if there's something you'd like me to add in there, do let me know. Would be more than happy to learn something new and put it up here.
Thalipeeth -
What you need -
To make the mix from scratch
1/2 kg jowar
1/2 kg bajra
1/2 kg rice
1/2 kg wheat
1/2 kg whole mung
2 cups chana dal
2 cups urad dal
2 cups ragi / nachni
2 cups dhania / coriander seeds
1 cup jeera / cumin seeds
To make a flour mix instantly
1/2 cup each of wheat flour, rice flour, ragi / millet flour, besan / chickpea flour, jowar / sorghum flour
1 tbsp coriander powder
1 tsp cumin powder
Other ingredients
1 onion chopped fine
2-3 green chillies
1 tsp red chilli powder
1/4 cup chopped coriander leaves
salt to taste
oil
What you do with it -
For making the flour mix from scratch -
Roast each separately on medium flame.
Cool, mix together and grind. Store in an air tight container
Take about 2 cups of this to make thalipeeth for 2 people
Add the onion, chopped green chillies, red chilli powder, salt and coriander leaves to the two cups of flour mix and make a dough using water. Cover and keep aside.
Heat a tava / griddle pan
This dough is not very glutinous, so you cannot roll it out with a rolling pin.
Grease a plastic cover with oil and then take a ball of dough. Flatten it with your fingers and then ease it off the plastic and put it on the tava
Make a few holes and drop in some oil into these holes, to make it crisp
To make palm-sized ones, grease your hand with some oil, take a small ball of dough and pat it down on your palm. Make a hole in the centre and then transfer to the pan
Allow it to cook on one side, adding a little oil
Turn it over and allow to cook on the other side
Serve hot with thecha / chutney and butter / yoghurt
Saturday, January 5, 2013
New year, new resolutions...and my blog is 4 !
Alright, its that time of the year again. Lots of resolutions, most that barely manage to make it through the first ten days. As always, the top one on my list is to lose weight, exercise and eat healthy. The dangerous part of having a food blog is that I get to see so many other food blogs coming up with awesome recipes all the time and I can't resist trying them out. And it all shows up, on me, when I can really do without it.
I read about Fifty 2 weeks of 2013 on Vani's blog and thought it was a good idea to join in. Aparna and SRA have come up with this idea of a theme for each week that you can write about or represent through a photograph. I think its great because it gives us something new to think about each week.
As I'm growing older and hopefully wiser, I have realised that I can't really change people or circumstances, but what I can do is to try and change myself and my reactions, to make it better for me. Here's what I'm hoping to do this year...
Learn to say NO - Even in the littlest things, I have always found it difficult to say no to people. I am always so worried how they would feel about it, rather that how it would make me feel if I agreed. So yes, I will learn to say NO when I want to say NO.
Do my bit for society - The noble intentions have always been there and I am doing a little, but not as much as I'd like to. I would really like to get more involved in doing something which will make the lives of people less fortunate, much better
Learn something new - Maybe a new language, music, dance, knitting, whatever. Something different from what my daily routine holds for me.
Dedication to complete what I start - a new course, a new sport, cleaning my cupboards, getting rid of clothes and some junk around the house. I start with a bang and then give up too easily. This year I want to make an effort to see it to completion.
And this one, I just have to put up here...
Exercise and eat healthy - I am hoping to keep up to this one. Exercise at least 4 days a week, to begin with. Resist eating out and over eating. Stick to a healthy diet. Deprivation never works for me, so portion control is my key word for this year !
And my blog just turned 4 ! I am proud of myself that I stuck to something for this long ! Its been like my best friend ever since I moved out of the city that will always be home to me. The blog's helped me explore more in the culinary world and also helped me get out of that terrible loneliness that came with the move. The most important is the feeling of community in this food blogger world. There is always at least one person who inquires what's up if I haven't blogged for over a week and that makes me feel so good. Thank you for all the love.
Thank you all for dropping by. If it wasn't for you guys, I wouldn't be inspired to post at all.
Wish you all the peace, happiness, security, freedom, love and respect in this year and the ones to come. I hope we all work towards building a better society around us...