Tuesday, December 25, 2012

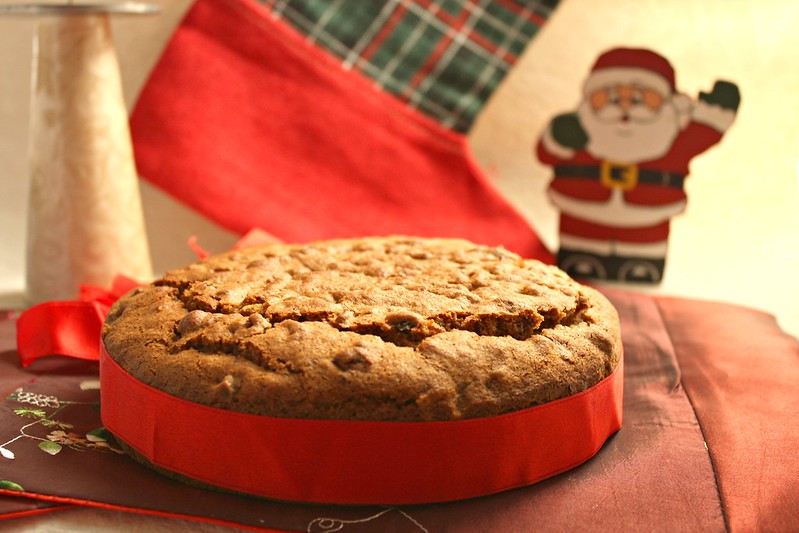
Coffee and almond liqueur fruit cake for Christmas

Having studied in Catholic school and being in Bangalore most of my life, Christmas has been a very special festival for me. When I was younger, it wasn't the food that mattered so much, it was the spirit of Christmas and sharing and caring that went with it, that was celebrated. We had carol singers come to a neighbour's place and and we always invited ourselves over. I also had friends who invited us over during Christmas and it was always that warmth which exuded from the families that made me feel so good about Christmas
I miss all that here in Ahmedabad, where Christmas is at best a reason to party or to have another sale in stores across the city.

almond liqueur fruit cake

Last year, I baked my first ever Christmas cake and had friends over. The kids were super excited about Santa dropping off the gifts in their stockings and we played some Christmas carols at home and had a nice dinner together

This year, we moms are having a party for our kids, helping them decorate the trees and have some fun time together. I plan to bake some cupcakes for the kids now.
These two cakes are for family, at home here and one for my relatives that I am visiting in Bombay tomorrow - yaay !

I absolutely loved the cake I made from Swapna's blog last year, but wanted to try a different recipe this time. I zeroed in on this one from Saffron trail. I kept postponing soaking the fruits and finally got down to it last week. Soaking it longer does make a difference, a huge difference. I upped the coffee in it and added almond liqueur, that my cousin brought from Goa many months back. So maybe this isn't like your traditional Christmas fruit cake, its a rum infused fruit cake with coffee and loads of almonds.

cake slice

Merry Christmas to all of you. I am off for a week. See you in the New Year.

Coffee and almond liqueur fruit cake
Adapted from here with some tweaking

What you need

For soaking -
2 cups mixed dry fruits
1/2 cup rum

For the caramel -
1/2 cup sugar
3/4 cup hot water

3 cups flour
2 tsp baking powder
1/2 tsp baking soda
2.5 tsp instant coffee powder
1 cup oil
1 cup powdered sugar
1 tsp ginger powder
1 tsp clove powder
1 tsp mixed fruit essence
3 eggs
1/4 cup mixed nuts (cashew nuts, walnuts and almonds)
2 tbsp almond liqueur (I had a lovely bottle of this from Goa, gifted by my cousin)
2 cups of soaked fruit

Directions

1 week to 3-6 months ahead
Soak the fruits
2 cups of dried fruits (raisins, dates, cranberries, currants, candied orange peels soaked in 1/2 cup rum)

A little ahead
Heat the sugar in a thick bottom pan. Once it starts to caramelize, slowly pour water over it and stir well to form a smooth caramel liquid

Grease the tins with parchment paper. I used an 8" round tin and a 5" round tin.
Preheat oven at 175 C.
In a large bowl, beat together oil, sugar, cinnamon and ginger powder, vanilla essence and 3 eggs.
Add the cooled caramel and whisk well.
In a large dish, sieve the flour, soda, baking powder and instant coffee powder.
Add the dry ingredients to the wet ingredients, in batches and fold in well
Once its done, add 2 cups of the soaked fruit, nuts and the liquor. Mix well and pour equally into the two greased tins.
Bake for 30 minutes at 175 C and another 15-25 minutes at 150 C covered by foil
Test the centre of the cake if it is done. Cool for 15 minutes in pan. Remove along with paper onto a cooling rack
Poke holes with a skewer or toothpick and pour two tablespoons of rum or any other liquor. Once cooled, cover with parchment paper and keep in a tin. Repeat the rum-soak every other day for a week or so (optional)

Friday, December 21, 2012

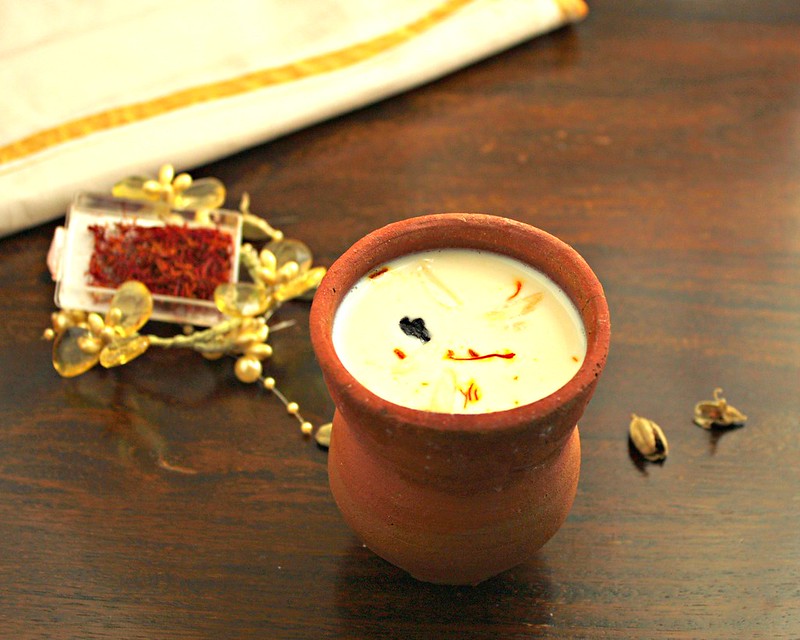
Rice kheer / Chawal ka kheer

In my son's class last year, they were learning about the different festivals in India and each child was given one festival. The kids had to learn about it, wear clothes appropriate to that festival and give a presentation on it. They also had to carry something which is cooked specifically for that festival.

My little one had to give a presentation on Buddha Purnima. Thanks to Google, we did a whole lot of reading and even his dress turned out looking much nicer than I imagined. I dressed him up as a little Buddhist monk. For the food which he needed to take, after a lot of searching, I finally figured that on Buddha Purnima, they make an offering of rice kheer, since Buddha was offered rice and milk when he completed many days of fasting in the forest.

rice kheer

This was my first time with rice kheer. I usually make the simple seviya kheer, or payasam, the South Indian way. Got this recipe from my friend. She asked me to use only milk, but I was really running short on time, so made it with condensed milk.

His presentation went off fantastically and the kheer was a big hit. Some kids requested for it again, so its been made many times now.

Rice kheer / Chawal ka kheer

What you need -

3-4 tbsp Basmati long grained rice
1 litre milk
1/2 can condensed milk
1/2 tsp saffron
1 tbsp warm milk to soak the saffron
5-6 almonds
7-8 raisins
3-4 cardamoms

What you do with it -

Wash the rice and soak it in water for about 10 mins
Soak the saffron threads in the one tbsp of warm milk and keep aside
Crush the cardamom seeds to a fine powder
Blanch the almonds in hot water for 15 mins. Peel the skin off the almonds and cut into slivers
In a non-stick pan, add the milk and bring it to boil
Add the rice and lower the flame. Stir well at regular intervals
You need to do this till the rice is cooked, but not breaking apart
Once the rice is cooked, add the condensed milk. There is no need to add sugar,unless you really want it sweeter
Add the saffron and raisins to this and stir well for another 3-4 mins
Take it off the heat and garnish with slivered almonds and powdered cardamom
Serve hot or allow to chill completely.
The kheer thickens up quite a bit once its chilled. Add a few tbsps of milk and mix well if it gets too thick. Since my son doesn't like it too thick, I add about quarter cup of milk into this. Stir well so the the consistency is not affected

Tuesday, December 18, 2012

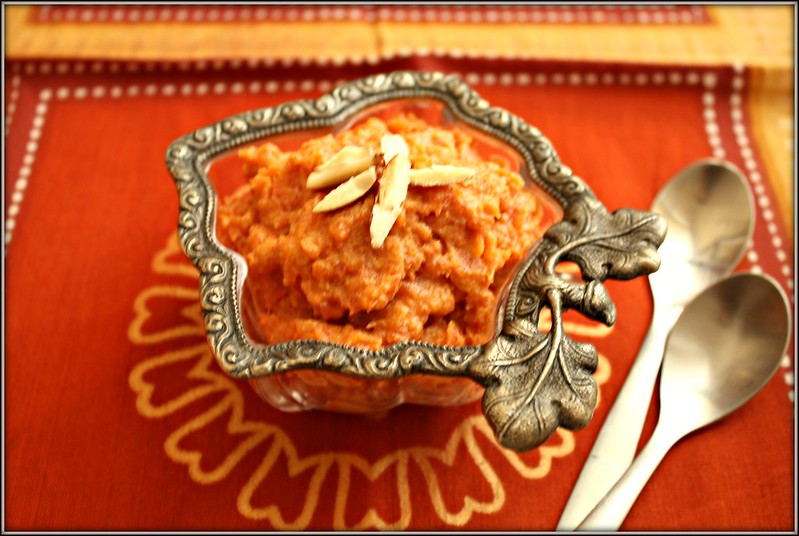
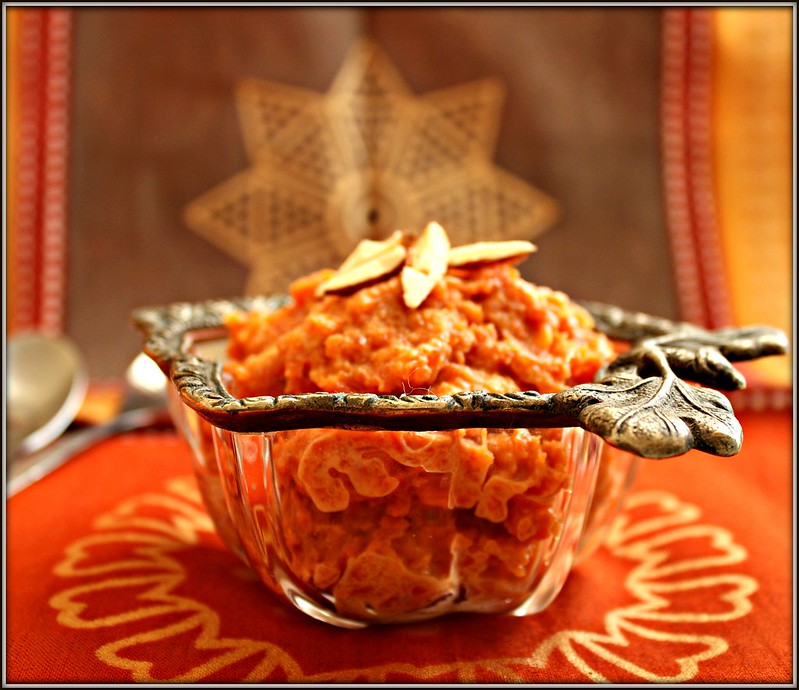
Low fat Gajar ka halwa / Carrot halwa

Winter has officially arrived in Gujarat. Its still warm in the afternoons, but the evenings are pleasant. This is also time for the migratory birds to visit Gujarat and I am looking forward to go see those beautiful flamingoes and pelicans soon.

I really enjoy this season, for the lovely weather of course, the really fresh and colourful vegetables available and the wonderful food cooked specifically during this season.
The local winter specials Undhiyu, til chikki and khichu (steamed rice flour) top the list for me.

gajar ka halwa1

This is the season for the sweet reddish carrots, better know as the 'Delhi carrots' down South, which make an awesome gajar ka halwa. Traditionally, this is made really rich with khoa / mawa (thickened whole milk), lots of ghee and sugar.
I am not too fond of sweet dishes and definitely not when they are so laden with ghee. I have started making this low fat version after I saw the recipe on Tarla Dalal's site. Here the taste of the carrots is not overpowered and the ghee is minimal. I like the idea of using milk powder to thicken it instead of the mawa

gajar ka halwa

Low fat Gajar ka halwa / Carrot halwa

Adapted from Tarla Dalal's recipe

What you need -

7-8 carrots (about 2 cups when grated)
2 cups low fat milk
4-5 tbsp skimmed milk powder / dairy whitener (I used Nestle Everyday dairy whitener)
2-3 tbsp sugar
1-2 tsp ghee / clarified butter

What you do with it -

Add the grated carrots along with the milk in a pan (preferably non-stick) and stir two - three times
Cover and allow to cook on a low flame. You could use the pressure cooker too, works well both ways, though I prefer this method when I have the time
Once the carrots have softened, add the sugar and milk powder and stir continuously, till it begins to thicken
Add the ghee at this point and stir some more till it turns a slightly deeper colour. If you'd rather do with it, skip this ghee
Serve hot. If you want to up the taste and calories, have it with a scoop of vanilla ice-cream

Monday, December 10, 2012

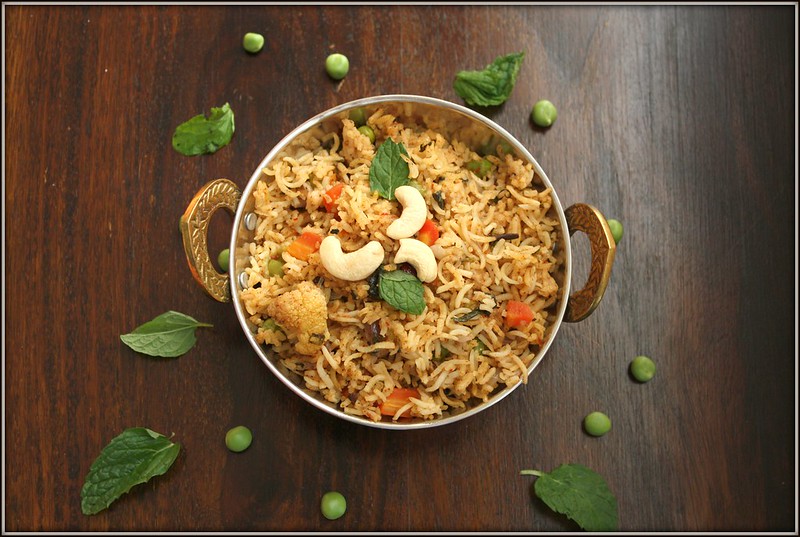
Vegetable biryani in a rice cooker

I really like biryani, for the flavour and the fact that its a one pot meal, or in this case, made easier by layering it in the rice cooker.
I bought my rice cooker right after I got married and its been serving me well for a long long time now.

There is this whole discussion about biryani vs a pulao / pilaf. Pilaf is where the rice and vegetables are cooked together and biryanis where they are cooked separately and then layered and cooked minimally together.

vegetable biryani rice cooker

I very rarely get into these details and make whatever saves more time for me. The rice cooker has been a blessing, a real big help from the days when I couldn't even cook rice the right way.

My version here is with uncooked rice and vegetables layered in the rice cooker. You can call it biryani or pulao. Its tastes great either ways !

I don't believe in buying too many ready masalas, especially when the usage is very limited. My biryanis are usually not as flavourful as I'd like them to be. A friend told me she uses Everest Shahi Biryani masala, which has the actually whole spices. Her biryani tastes really good, so I picked up this masala

It worked very well in this biryani and a raita was enough accompaniment.

Vegetable Biryani

What you need -

2 cups basmati or any long grained rice
3.5 cups water
3 onions
1/2 cup mint leaves
1/4 cup coriander leaves
3-4 cloves
1 stick cinnamon
3-4 cloves garlic
1" piece ginger
2-3 green chillies
2 tomatoes
1.5 cups assorted vegetables (carrots, peas, cauliflower, capsicum)
1-2 tsp biryani masala (If using the Shahi Biryani one, powder it before you use it)
1/2 cup plain yoghurt / curd
3 tsp milk

What you do with it -

Chop the onions lengthwise. Clean and chop the coriander and mint leaves
Chop all the vegetables in bite size pieces.
Finely chop the tomatoes. Clean and soak the rice in water
Grind the ginger, garlic and green chillies to a paste
In a pan, add 2 tbsp oil and put in the cloves and cinnamon. Add the ginger-garlic-green chilli paste. Saute for 2 mins and then add the onions, mint leaves and coriander leaves
Fry this on a low flame till the onions are slightly browned
If using capsicum, add now and fry with the onions for a minute or two
Add the tomatoes and fry on high heat for 3-4 mins Add the yoghurt and then the biryani masala powder
Add the vegetables, 1 cup water and salt and cook 3-4 mins
Drain the rice
In the rice cooker, add a layer of the rice and then a layer of the vegetables in the masala
Repeat until all the rice and vegetables are in the rice cooker. Have the rice layer right on top
Add the remaining 2.5 cups water
Sprinkle 2-3 tsps of milk on top of the rice and then close the lid
Allow it to cook
Once its done, mix once and garnish with browned onions or cashew nuts
Serve hot with a cucumber raita

Thursday, December 6, 2012

Chocolate walnut pudding (No eggs)

TH and my son are more than happy to have something sweet after every meal. And my son asks me what we have for dessert, almost everyday after dinner. A couple of days back, I said I really don't know what to make everyday and he was like "But you watch Masterchef and you see so many recipes on Google" ! For him Google has the solution to every problem in my life ! Now I really had no more excuses, so I rustled up this for dessert on Sunday.
A simple and delicious dessert idea. This has no eggs and is more like a cake.

eggless chocolate pudding

This recipe is not from 'Google' though, its from Ma's friend. If Ma likes something that she's eaten some place, she either asks for the recipe or tries making it from what she thinks has gone into it and then promptly mails me the recipe. I have a folder full of recipes from her. She also tries recipes from my blog, though she will not read the recipe here and will call up to ask. I definitely get my love for cooking from her.

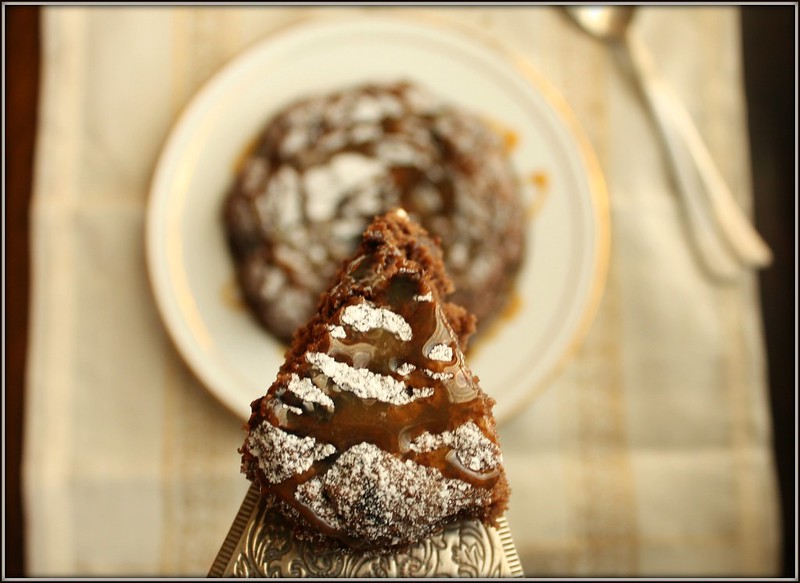
chocolate pudding slice

Chocolate Walnut Pudding

What you need -

For the base -

1 cup maida / APF
2 tsp baking powder
1/4 tsp salt
1 tsp vanilla extract
2/3 cup sugar
2 tbsp cocoa powder
1/2 cup chopped walnuts
1/2 cup milk
2 tbsp unsalted butter

For the topping

3 tbsp sugar (add more if you like it sweet)
1/4 cup cocoa
1.5 cups boiling hot water

What you do with it -

Pre-heat the oven to 180 C
Sieve together the maida, baking powder, salt and cocoa powder 3 times
In a bowl, add melted butter. Mix in the sugar, milk, vanilla and chopped walnuts
Add the sifted dry ingredients and mix well
Pour the batter into a greased baking dish
Over this spread sugar and cocoa from the 'topping'
Add the boiling water carefully so as not to disturb the base. Do Not Mix
Bake for 30 mins. The base will have a chocolatey sauce like texture that tastes absolutely delicious
I sprinkled some icing sugar and drizzled some caramel sauce over it
Serve hot or cold with ice cream or cream

Monday, December 3, 2012

Checkered cake with fondant angry birds

Last week, I had a party for my son's birthday and invited some of his friends over. After the craziness of handling a bunch of hyper active 7 year olds (especially the boys), I think the next birthday party will be when he is 18 and old enough to handle it all himself.

After the lovely holiday we had, it was back to the routine - getting loads of laundry done and getting the house back in action. Cooking and baking was not something I was very kicked about. I decided to order out the cake, but then this sudden inspiration struck a day before the party I decided to make some angry birds with fondant. He is currently in this 'angry birds' phase and seems to love that game. We also get so much merchandise that it just makes it even more popular, especially with kids. Water bottles, pencils, erasers, bags, shoes, t-shirts...the works ! I have never made or worked with fondant before and I figured I could take a chance. If it didn't turn out well, I could still just go ahead and order out that cake.

fondant angry birds
Pics taken after the party, so its all a bit messy

I was very unsure about how the fondant would turn out. First I needed to figure where I'd get the marshmallows, colours and how I would really go about something like this. A friend offered me her set of liquid food colours. Getting gel based ones was not even an option, so I jumped at this offer. She came over and we made the marshmallow fondant from Sayantani's lovely blog, which was way simpler than I imagined.
Sat up later that evening making the birds and pigs with the fondant. Mixing the colours into it really made it a little too difficult to mould. I then used more sugar and tried to get them pliable.
The birds are a bit shapeless, the eyebrows too bushy, the beaks crooked, but this was my very first attempt and my little fella was thrilled. He gave me the best compliment ever. He saw the birds and pigs and said "You made this Mamma, you really are a Wow mother". Nothing could make me happier.

I had made this egg less vanilla sponge cake from Sharmi's blog, for a friend, who served it with chocolate sauce for her son's birthday. It was a hit with the kids. So I decided on keeping the cake simple and give it a chocolate butter frosting.
But 'simple' wasn't working, not after my son honoured me with the 'Wow mother' title. I remembered seeing this lovely chequered cake on Sunita's blog and have been wanting to try it out for the longest time. So I decided on making a chocolate sponge too and making a chequered cake.
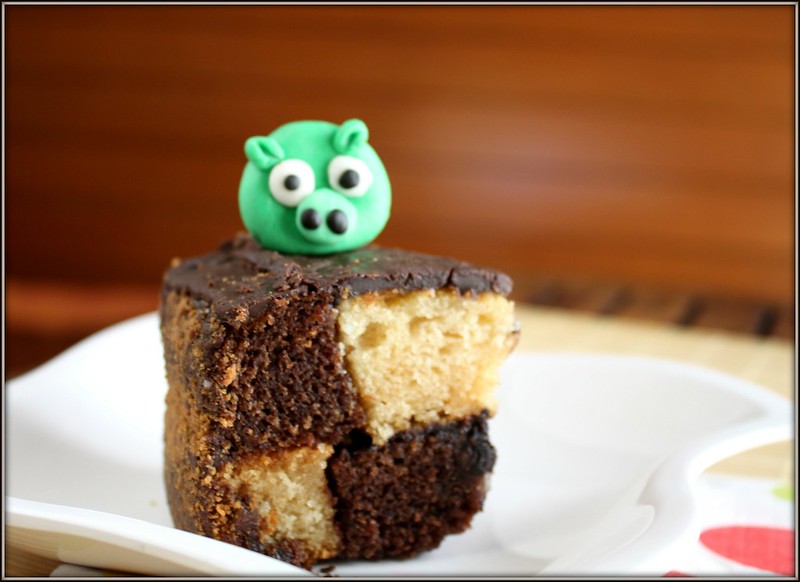
chequered cake with pig

The kids were delighted with the angry birds. I even managed to get candles in the shape of angry birds, so we had 7 candles in a circle in the centre of the cake and the fondant ones around them. I was rushing with the cake and frosting till it was almost time for the party. There was barely any time after I finished frosting the cake, so I couldn't take any pictures. And taking any pictures with the kids all set to pull the angry birds off the cake was impossible.
I had a small piece of cake remaining from the party and of course I brought all my fondant pieces back, and then clicked them, so that explains the messy birds and pigs !

This post is also my tribute to the food blogging world and the wonderful bloggers from whom I have learnt so much and dared to experiment with things that I never ever thought I would make.

Thank you Sharmi, Sunita and special thanks to Sayantani for all the inspiration behind this cake and the fondant.

What you need -

Cakes -
Recipe Source for the sponge cakes - Sharmi
For the chequered pattern - Sunita
1 round vanilla sponge cake
1 round chocolate sponge cake (add 2 tbsp cocoa powder along with the flour to the same recipe as above)

Chocolate sauce for binding
100 gms dark chocolate
3 tbsp cream
3 tbsp icing sugar

Chocolate butter frosting
50 gm baking chocolate
5 tbsp unsalted butter

Fondant (Made and shaped one day earlier)
Recipe source - Sayantani

100 gms white marshmallows
300 gms icing sugar
1/4 cup vegetable oil
1/2 tsp vanilla extract
1 tbsp water
food colours (I used liquid food colours, but gel based would work best)

Crumb for the sides -
8-10 biscuits, preferably chocolate flavoured

What you do with it -

Fondant (Make one day ahead)
In a large glass bowl, take the marshmallows, salt, vanilla extract and water. Microwave for 60 seconds. If not melted fully Micro for another 10 seconds and stir with a well greased spoon. Start adding the sugar, add half of it first and stir continuously. Keep adding till it becomes thick and you can't stir further
Grease you hands really well with the oil and transfer the mixture onto a icing sugar dusted surface. Knead well, adding more icing sugar if it is still sticky. Knead for about 8-10 mins till the dough is soft but dry. Grease the fondant with the oil and wrap it in a cling warp and store it in the fridge
When you are ready to shape it, take the required amount of the food colour and mix it into the dough till you get the desired colour. I needed to add icing sugar when the dough got sticky with the colours. Make the shapes as required. I tried my best to make the fondant look like birds and pigs !

Cakes (Make at least 4 hours ahead)
Recipe Source - Sharmi
Ensure that you bake the cake in the same size pans and allow them to cool completely, for about 3-4 hours. If the top has raised too much, cut to form an even layer.
Use a cookie cutter or place any round plate that is about 1.5"-2" smaller than the cake. Slice the cake carefully, around this shape so you get an inner ring. Place another small plate or bowl to make another circle about 1.5"-2" smaller than the outer one. Cut along the rim. Do this for both the cakes
You will now have 3 rings of each cake. Gently remove the centre rings of both the cakes

Crumb (Make ahead, to save time)
Pulse the biscuits till it form a smooth powder

Chocolate sauce for sandwiching the cakes and layers -
Make the chocolate sauce by heating the chocolate pieces over a double boiler till they melt completely. Take it off the heat and mix in the cream. Stir well till smooth

Chocolate butter frosting (Make this just before you use it)
Melt the chocolate in a small bowl, above a pan of steaming water. Once it melts, place it over a bowl of ice cubes and then add the butter. Beat well over the ice till you get a smooth spreading consistency

Assemble -

Keep the cake rings ready and then use the chocolate sauce like a glue and spread between the rings and then carefully place the rings back together to form alternate rings in both cakes. This way you have one cake with vanilla-chocolate-vanilla and the other with chocolate-vanilla-chocolate
Spread the chocolate sauce above the first cake and then place the second cake above it. Spread the chocolate sauce over the top of the cake and even it out to remove any crumbs. With a large knife spread the sauce over the edges, sealing whatever little gaps that may be there.
Take a large spoonful of the chocolate butter frosting and spread it over the top of the cake. Quickly spread it with the flat side of the knife and make it even.
Take handfuls of the bourbon biscuit powder and cover the sides of the cake all around. You could use any other border design or just leave the chocolate sauce around the sides.
Place the fondant pieces over the cake.