The winter has set in early this year and most parts of India which barely got cold during winters, have seen a real dip in the temperatures. Ahmedabad used to get a little cold towards the end of December, but this year its been pretty cold since end November and I've pulled out my entire stock of woolens...
Remember I had told you about this set of hand-written recipes that Miri had gifted me long back...I was going thru it a couple of days back and decided to make a nice healthy soup from it. I don't make soups very often and I really don't know why because I think I really like them ! And I love these new soup bowls that my sister-in-law gifted me, so I'm sure I'll be making soup more often now :)
Teamed the carrot ginger soup with some tomato bruschetta from Kay's fabulous blog 'Kayotic Kitchen'- perfect dinner for this weather, light on the stomach and nice combination of flavours
The sharp taste of ginger with the almost sweetish carrots and the heat from the pepper made this soup really perfect and we loved the bruschetta...Thank you Kay and Miri for these great ideas !
What you need -
3-4 medium sized carrots
10-12 sprigs of coriander leaves
2 medium sized onions
1 big piece of ginger
1 tsp butter
juice of half a lemon
salt and pepper to taste
1 litre water
What you do with it -
Clean the carrots, peel and cut into big chunks
Chop the onions and crush the ginger slightly, but dont let it break. This way you get the flavour, but not the pieces of ginger
Heat butter in a pan and add onions and carrots
Clean the coriander sprigs and tie it up with a thread
Add the bunch of coriander and the ginger piece and a litre of water to the carrots
Pressure cook for 15 mins
Discard the coriander bunch and the ginger
Cool and run thru the blender
Add the remaining water, salt and pepper and allow to simmer
Turn off the heat and add a few drops of lemon juice
Garnish with fresh coriander leaves
Saturday, December 18, 2010
Tuesday, December 14, 2010
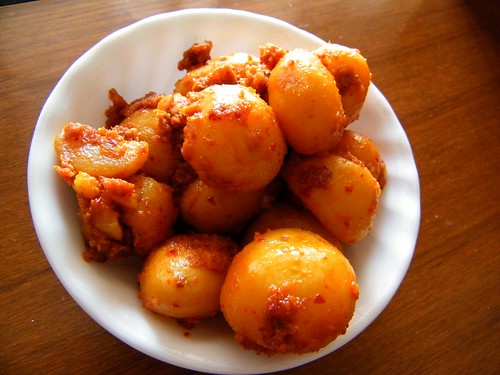
Lasun Batata / Spicy Garlicky Baby Potatoes
One more of my Ma's special dishes..Knowing my love for potatoes, its a surprise I haven't made this in a really long time...
I had some friends over for lunch and decided to make this...It was a real hit, they even packed the remaining for their dinner !! If you like it with a little more gravy to have with rotis, you can add curd to the masala..My aunt makes it like that and its called 'jumping potatoes' !!
Peeling garlic isn't really one of my favourite things to do..I used to buy peeled garlic from the stores earlier, but ever since one of the vegetable vendors here told me that they rub kerosene on the garlic to make it easier to peel, I have stopped buying them...Do check with your stores before you pick up peeled garlic...
And let me also mention here that the 12 cloves of garlic I used in this dish are the regular Indian sized garlic cloves. I had to mention this since the garlic I've seen in the US is about 3-4 times the size of the ones here !!
You can make these as spicy as you like. I have used my stock of Byadgi chillies from Bangalore, which give a lovely red colour, but aren't that spicy..
What you need -
15-20 baby potatoes
10-12 cloves of peeled garlic
15-20 red chillies (use as per your preferred spice level)
small ball of tamarind / 2 tsp tamarind paste
salt to taste
3-4 tbsp oil
What you do with it -
Boil the baby potatoes in a pot of hot salted water
Peel and set aside
Grind the peeled garlic, tamarind and red chillies into a smooth paste, without adding water
Add salt and grind once more
Apply this paste on the potatoes and keep aside for 10-15 mins
Heat half the oil in a heavy bottom pan and then put the potatoes in it
Stir occasionally and fry on a low heat, adding the remaining oil, as required, for about 20 mins or till the ground paste has blended well with the potatoes and there is no raw smell
Serve hot with rotis or dal and rice
Tuesday, December 7, 2010
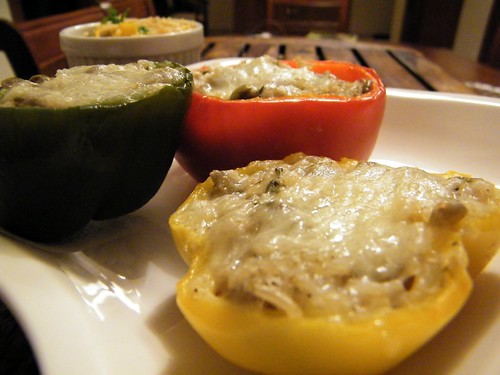
Baked Stuffed Peppers / Capsicums
Stuffed capsicums was one of the dishes that my dad always insisted on for the big dinners at home, when he had people over...My mom makes some wonderful stuffed capsicums, which for some reason, hasn't been made in the longest time now...
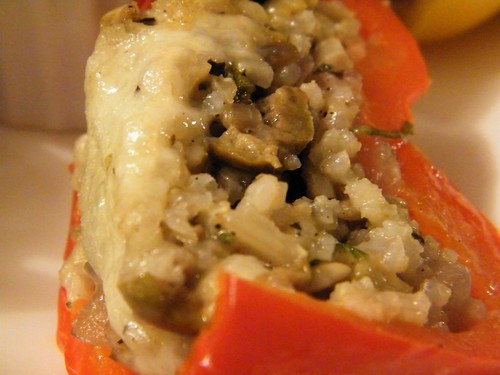
I had this packet of sunflower seeds lying around and wasn't sure what to use it in. Googled for a recipe using sunflower seeds and found these stuffed baked peppers, that included brown rice - another one of the ingredients in my kitchen, that was waiting to be used...
The sunflower seeds added a nice crunch and I quite liked the idea of the rice and cheese, which made this a complete meal in itself !
The stuffed peppers brought back a lot of memories of the ones that my mom made, though the ingredients here are very different. I hope to make her version soon and post that too..
What you need -
1/2 cup long-grain brown rice
6 large capsicums / peppers (2 red, 2 green, 2 yellow)
3 Tablespoons butter
1 medium onion, chopped fine
1/2 cup sunflower seeds
2 tsps chopped cilantro
10-12 olives, chopped in half
1/4 cup grated Parmesan cheese
1/4 tsp dried oregano
1/4 tsp dried basil
1/2 tsp salt
1/2 tsp ground black pepper
1/2 cup shredded cheese
What you do with it -
Cook brown rice in 1-1/2 cups boiling salted water until tender. Drain if necessary
Set it aside in a large mixing bowl
Preheat oven to 220 deg C. Line a baking pan with nonstick foil
Cut the bell peppers in half and deseed
Parboil bell peppers in boiling salted water for 5 minutes. Drain thoroughly and arrange cut-side up in the prepared pan
Saute onions and sunflower seeds in the butter over medium heat until onion is soft and translucent. Remove from heat and let cool 5 minutes. Add to the rice in the bowl, along with olives, cilantro, cheese, oregano, basil, salt and pepper
Mound rice mixture in the bell peppers. Sprinkle the shredded cheese over the stuffed peppers
Bake in the pre-heated oven at 220 deg C, for 15-20 mins
Monday, November 22, 2010
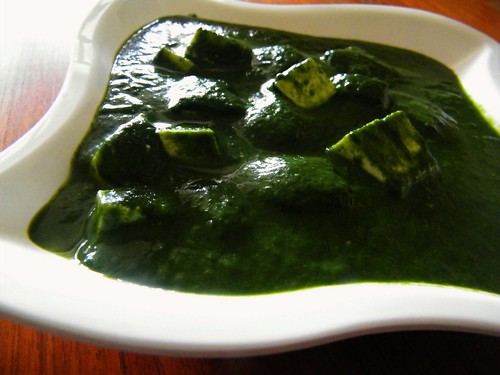
Palak Paneer / Cottage Cheese in Spinach
Back from my Diwali break...This time it didn't really feel like a relaxed holiday...with lots of rushing around between Bangalore and Chennai, visiting relatives, brother-in-law getting engaged and my little brat turning 5 !
Of course I managed the shopping and eating out at my favourite restaurants in the midst of all this...
We are back home finally and settling back into the routine...
Was waiting to get back to my kitchen and eating some simple food, after all the over-eating back there...
Simple palak paneer and rotis to startup the kitchen again...There are many many variations I have tried for palak paneer, but I like this one best...It really brings out the flavour of the spinach and feels so healthy...
What you need -
2 bunches spinach
2-3 green chillies
2-3 cloves of peeled garlic
1/2 tsp cumin seeds / jeera
2 tbsp milk
150 gm paneer / cottage cheese
2 tsp oil
salt to taste
What you do with it
Remove stems of the spinach. Clean and chop and keep aside
Heat oil in a pan and add the cumin seeds and garlic and chopped green chillies
When the garlic turns slightly brownish, add the spinach
Cook without adding any water, till the spinach turns colour
Drain the spinach and run it through some cold water
Once it cools, grind it to a smooth paste
Cut the paneer into little cubes
If the paneer is frozen, thaw it, cut into cubes and dip into hot water for 5 mins
Add the paneer cubes, milk and salt to the spinach and bring it to a boil
Serve hot with rotis
Saturday, October 23, 2010
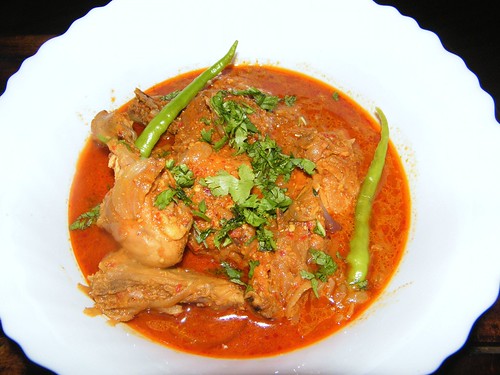
Hyderabadi Chicken Masala
I had some guests over for dinner and wanted to make a chicken curry, but wanted to try something different from the usual masala base I use...For me, its generally the coconut based masala or the onion-tomato based one...
I googled for a Hyderabadi style of making chicken curry and guess what...I found this recipe on a matrimonial site !!
It sounded very different from the usual masalas I use, so decided to go ahead with this one..I am not sure how authentic this recipe is, but it tasted really nice...
The taste was different, I really liked the taste of the ground coriander seeds in this and it tasted way better the next day...
Here's the source of this recipe. I didn't make too many changes, just skipped the ghee and modified the method slightly...
What you need
1 kg chicken
1 cup beaten curd
4 medium sized onions
1 tsp garam masala
10 red chillies
2 tsp cumin seeds
4 tsp coriander seeds
2 tsp ginger garlic paste
1/2 tsp turmeric powder
salt to taste
What you do with it
Chop three of the onions really fine. Heat a tsp of oil and fry these on a low flame till they turn brown
Grind together the red chillies, one onion, turmeric, cumin and coriander seeds into a thick paste
Best the curd well and add the fried onions, salt, ginger garlic paste to it
Clean the chicken and cut into large pieces
Marinate the chicken with the yoghurt paste for about 20 mins
Heat oil in large pan and add the ground masala. Fry till the raw smell goes away and the paste turns to a reddish brown colour
Add the chicken and fry for 3-4 mins
Add 1 cup water and the garam masala
Cover and cook till done
Garnish with coriander leaves and serve hot with steamed basmati rice
Sunday, October 17, 2010
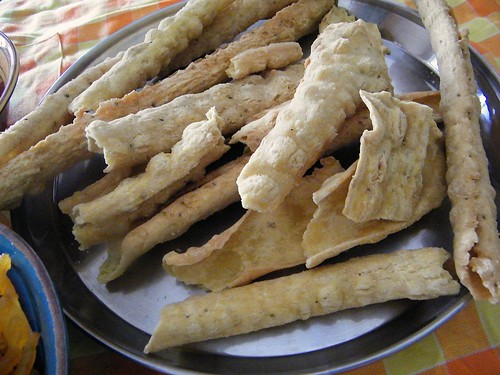
Fafda, jalebis and my 100th post !
The last nine days have been a big celebration in many states in India and in Gujarat, its been a really colourful one, with the nine nights of Garba for Navratri - the dancing starts around nine at night and goes on way beyond midnight. Every evening the enthusiastic dancers are out in their wonderfully colourful traditional costumes, with lots of accessories and chunky silver jewellery...
As with every other festival in India, food is of prime importance and there is special food associated with each religious occasion...In Gujarat, the Dussehra special is fafda and jalebis. On our way back home last night, we saw a lot of shops gearing up to handle the endless queues of customers for the famous fafda and jalebis...
My husband is not the sort who can ever wait for food. If we are asked to wait at any restaurant, we just drive away to the next one...But the temptation of the really hot and crisp jalebis made him go stand and wait for about 45 mins...It was so totally worth it !!
So here's what we had for our breakfast, thanks to the husband's patience with the store called Gwalia, down the road from our place...
crisp hot jalebis, fried in ghee and dipped in sugar syrup - tastes awesome, but you will need few more hours on the treadmill after this !
raw papaya salad / chutney - shredded raw papaya with a lot of green chillies
fafda - besan / chickpea flour and some spices made into a dough, spread out with base of the palm and then deep fried
This is my 100th post !! Though I began blogging with great enthusiasm, the posts havent really been frequent, of late, so I honestly didnt think I'd make it this far...
Thank you all for reading my posts, its a great inspiration to continue blogging...
Wish you and your familes a very Happy Dussehra
Wednesday, September 22, 2010
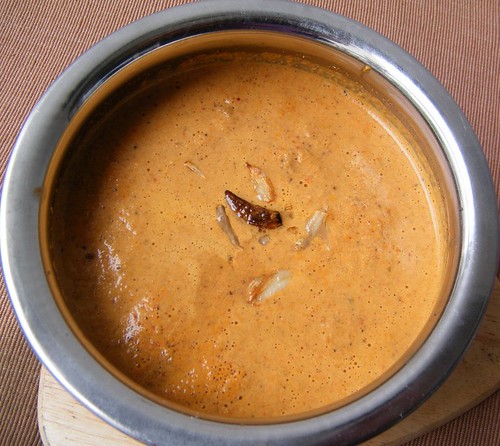
Jeer Meerya Kadi / Cumin-Pepper Coconut curry
Kadis and Tamblis are popular in Konkani cooking...Undoubtedly, coconuts are the base for this...Both use almost a similar set of ingredients, with some variations here and there...
The basic difference is that tamblis are served cold, they are not heated at all, just grind the ingredients and serve, Kadis on the other hand involve some roasting, grinding and boiling...
Jeera (cumin) and meerya (pepper) are considered very good at helping with gastric problems, Ma used to always make this when we had a stomach upset, or anyway make it about twice a month, to help with any gastric problems...She even uses the skin of a pomegranate in this, which added a bitterish but nice flavour...
This kadi/curry with rice is one of my total comfort foods...
What you need -
1 tsp cumin seeds
1 tsp pepper corns
3/4 cup grated fresh coconut
6-8 cloves garlic
skin of 1/2 pomegranate (optional)
4-5 red chillies
small ball of tamarind / 1/2 tsp tamarind paste
1 tsp ghee
salt to taste
What you do with it -
Dry out the skin of the pomegranate and then cut into pieces
Heat ghee in a small pan and add the cumin, pepper, 3-4 cloves of garlic and the pomegranate skin and roast for 2-3 mins
Grind together the coconut gratings, chillies, tamarind and salt
Add the roasted ingredients and grind to a smooth paste
Add 2-3 cups of water to this and bring to a boil
to season, heat some ghee/oil and fry the remaining garlic till it turns brown
add to the kadi and serve with hot rice and papads
Monday, September 13, 2010
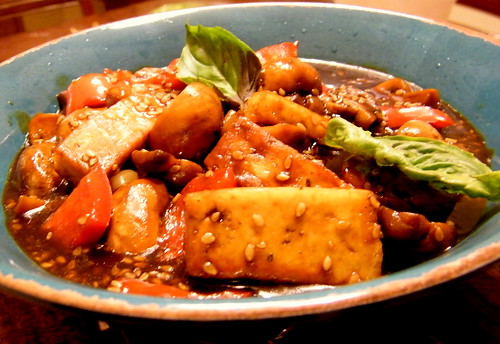
Orange Glazed Sesame Vegetables
Back in Bangalore, we had the super fast home delivery of Chinese food. There is this chain of restaurants called Chung Wah and their exclusive home delivery outlets are called Chung's kitchen...We had one of these just up the road from our place and we'd order out often. Once I make the call, I'd set out the plates and forks and the it really needed just that much time for the delivery boy to appear at our doorstep with the food !! It was really that fast...
Here, we need to do a bit of planning and reservations before we head out for a decent Chinese meal...This cuisine doesnt seem to be very popular here and a few places I tried serve noodles with a whole lot of tomato ketchup, passing it up as Chinese food...
On one of these dull rainy days last week, I was really craving for Chung Wah style chinese food - it would have been ideal to make some gobi manchurian and noodles - the quintessential Bangalorean Chinese, but since I didnt have most of what was required, I got down to making this from Nita Mehta's book...
I had never tried using orange juice in my cooking, so settled on this recipe - it turned out really nice and went very well with rice...
What you need -
100 gm paneer or enough to make about 6-7 strips
1 green / red capsicum
1 cup button mushrooms
broccoli / babycorn (didnt have these)
1 cup orange juice
2 tbsp soya sauce
1 tsp cornflour
2 tbsp sesame seeds
2 tbsp peanuts
oil
salt and pepper
pinch of sugar
What you do with it -
Roast sesame seeds ad peanuts on a tava or pan till golden
Heat 2 tbsp oil in a large pan and add the paneer stripsand stir fry till it turns brown. Remove the strips and keep aside
To the same pan, add the vegetables you are using. Stir fry for 2-3 mins
Mix soya sauce, orange juice and cornflour in a cup till its blended well
Stir this mixture in to the pan with the vegetables
Cook for 4-5 mins till the sauce thickens well
Add the sesame seeds, peanuts, salt, pepper, sugar and the paneer pieces
Cook for a minute more and serve hot with rice
Thursday, September 2, 2010
Curry leaf chutney powder / Karabevu chutneypodi
This one is from Ma's recipes...
She would make this for me ever so often and drop a jar of it at my place, when I was in Bangalore
Now since I've moved, I've got the packet just once over the last two years, and its always over in less than two weeks.. This time, I decided to make it myself and got the recipe from her
I had never attempted making any of these chutney podis earlier, but after I tried making the molagapodi from Usha's blog, its become a monthly ritual. We are so hooked on to the taste of this molagapodi, that the store bought ones just don't cut it for us, anymore.
I'm pretty sure the karabevu chutneypodi is also going to be added to my list of to-dos every month...
The flavour from the roasted curry leaves in this chutney powder really lingers in your mouth. Goes best with idlis and dosas.
I even had it with some toast and butter, thats something I first tasted at my aunt's place when I was little...tastes fabulous in this combinaton too !!
What you need
15-20 red chillies (depending on how spicy you want this)
2 cup packed curry leaves / kadipata / karabevu
1 cup pottu kadalai / roasted bengal gram / hurgadle bele
1/2 tsp amchur powder
1/2 tsp salt
1 tsp oil
pinch of asafoetida / hing
1 cup dessicated dry coconut / kopra / kobri
1/2 tsp sugar (optional)
What you do with it -
Wash the curry leaves, strain out the water and dry it in the sun or a covered cloth, till all the moisture is gone
In a large kadai / pan, heat the oil and add the asafoetida
Add the chillies and roast for 3-4 mins on a low flame
Add the dried curry leaves and the dessicated dry coconut
Roast for about 2-3 mins
Add the roasted gram and stir for a minute or two
Once this cools, grind it to a smooth powder, with the amchur powder and salt
If you are using the sugar, add it and run thru the blender one more time
Do not add any water while grinding
Tamarind can be used instead of amchur powder. Ma uses amchur powder, since it is a dry powder and so it can be stored easily. With tamarind, you will need to refrigerate it
Tuesday, August 24, 2010
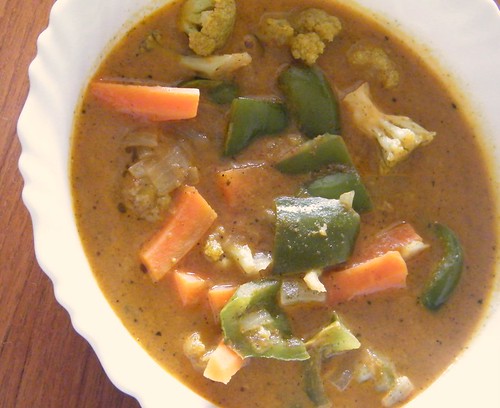
Melange of Vegetables in a flavoured curry sauce
This is one more of the Recipes from the Taj, this time by Chef C J Richard at Patio, Taj Coromandel, Chennai
Unfortunately the recipe in the book seems to have been written in a hurry. There is no mention of what vegetables he used and even the proportion of the tomato sauce and cream is not very clear
The gravy is an aromatic thick tomato creamy one with a curry powder (no, not that bottled one sold as an Indian spice) that has been made from scratch...the combination of flavours is very aromatic and after a few trials with the quantities of various ingredients, I have settled on this adaptation..
From the picture in the book, I figured he has used brocolli, asparagus, red capsicum and mushrooms - I didnt have any of these at home, so stuck to the regular cauliflower, carrots and capsicum...
The first time I made this, I used tomato ketchup like they mentioned in the recipe. I wasnt too happy with the result. The next time I pureed the tomatoes and it was much nicer.
This goes really well with steamed rice
Sending this to Divya's Show me your curry Event
What you need
1 onion, chopped
3 cloves garlic, minced
2 tbsp curry powder (recipe follows)
1/2 cup tomato puree (from about 3 medium sized toatoes)
1/2 cup fresh cream
2 tbsp olive oil
2 green capsicums
2 carrots
1 cup of cauliflower florets
For the curry powder
1/2 tbsp fenugreek seeds
1/2 tbsp mustard seeds
5 tbsp coriander seeds
1 tbsp turmeric powder
2 tbsp pepper corns
2 tbsp red chilli powder
2 tbsp cumin seeds
1/2 cup cleaned and dried curry leaves
What you do with it
For the curry powder
Roast fenugreek, mustard, coriander seeds, peppercorns and cumin seeds
Mix the turmeric powder, chilli powder and curry leaves and grind to a smooth powder
Do not add any water
You can store this powder in an airtight container in a cool dry place for about a month
Saute the onions and garlic in olive oil
Add 2 tbsps curry powder and saute for a few minutes
Add the cauliflower, carrot and capsicum and saute for 3-4 mins
Add the tomato puree and the cream and mix well and cook till the vegetables are done
Serve with hot steamed rice
Other Recipes from the Taj
Kombdicha Rassa
Lasooni Palak
Tuesday, August 10, 2010
Rainy weekend and some Bisi Bele Bhath
Ahmedabad has had some very unexpected showers over the last few weeks. Over the last two years here, the monsoon has ranged from 2 hours to 2 days, but this time, its been over 2 weeks !!
Sunday was one more of those downpour days...It has definately cooled down the place a lot, but the city is just not equipped to handle the rains, the roads are flooded and stepping out of the house for anything is a big mess...
This is the view from my balcony - an otherwise empty piece of land which has become a mini lake and had a buffalo enjoying a sunday swim !!
Rains again this Sunday meant our usual weekend meal out was out of the question..
I didnt want to go out to even buy the basic vegetables...Had to make do with what I had...TH was back after a few days of travelling out on work and he always prefers some simple home food...
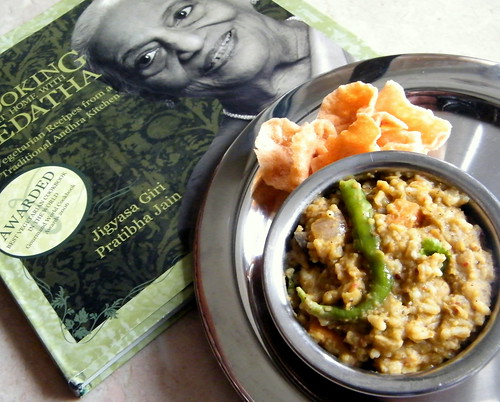
Miri had gifted me this book 'Cooking at home with Pedatha', when she was here in Feb and though I have been reading it up and admiring all those lovely pictures, I always planned, but somehow never landed making anything from this book.
The bisi bele hulianna / bisi bele bhath was definately on my list and it sounded perfect for a sunday lunch. Plus since its a one pot meal, you dont have to think up of too much to go with it... Cucumber raita and some garlic vadiyos/ vadams /crispies and we were all set...
I've always liked bisi bele and really like eating it hot with lots of boondi and raita...The flavours were so good and reminded me of this place in Bangalore from where we had packed this a few times...'Nammoora', a small place in South Bangalore, which only parcels food and expects you to bring the boxes along..Their bisi bele bhath is to die for..
This tasted almost as good...
Thank you Miri, this book is a real treasure...
What you need -
1 heaped cup uncooked rice
1 level cup split red gram (tur dal)
1/2 tsp turmeric powder
1 large onion
1 medium potato
1 medium carrot
7-8 french beans (I didnt have these)
1 green capsicum (my addition)
1 long brinjal (my addition)
3 tbsp tamarind pulp
2 slit green chillies
10-12 curry leaves
4-6 tbsps ghee (ok, i used 2-3 tsps)
2-3 tbsp oil
salt to taste
The 1st powder
1/2 cp bengal gram (chana dal)
1/4 cup split black gram (urad dal)
1/4 coriander seeds
6-7 red chillies
3 sticks cinnamon
4 cloves
The 2nd powder (this one rocks !!)
1/2 cup grated dry coconut (kopra / kobri)
1/4 cup coriander leaves
Tempering
1 tsp mustard seeds
1/2 tsp fenugreek seeds
1/2 tsp asafoetida (hing)
6-8 cashewnuts (my addition)
What you do with it -
Pressure cook the rice in 3 cups water till soft
Pressure cook the turdal in 3 cups water with a little turmeric. Churn and set aside
Chop the vegetables into bite-sized peces
For the 1st powder, dry roast the grams and coriander seeds separately, until deep brown. Heat 2 tsp oil and roast the red chillies. Grind these with the cinnamon and cloves to a fine powder
For the 2nd powder, wash the coriander leaves and pat dry. Roast the dry coconut until golden brown. Grind along with coriander leaves, without adding any water
In a large wok, heat the remaining oil for tempering,dd the ingredients under tempering and when the cashenuts turns brownish, add the vegetables
Cover and cook, adding a little water if necessary
Mix together the tamarind pulp, 1st powder and the cooked dal in 1 cup of water and make a smooth paste. Add this to the vegetables and cook for 2-3 mins. Here, Pedatha suggests adding some sugar. I added 1 tbsp grated jaggery
Add the cooked rice, green chillies, curry leaves and salt and stir for another 5 mins
Just before taking it off the heat, add the 2nd powder and ghee
Stir well and serve hot with vadams/ crispies and a raita

Tuesday, July 27, 2010
Butterless Chocolate Banana Cake
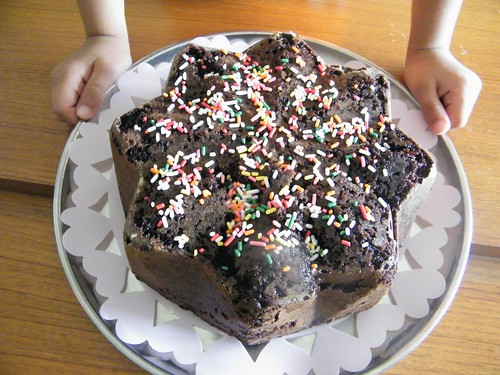
May i present to you, the new baker in our home - my almost-5-year-old son !!
I am so excited about this cake, since its the first time my son insisted on making it 'all by myself' !
I had picked up these colourful sprinkles a while back and he's been mega excited about using it. Last weekend, he insisted that we make a cake and use these sprinkles over them. I asked him if he can help me and he said he wants to make the cake himself...
Ok, I obviously read the recipe and took out all the ingredients, but he did the measuring and mixing and couldnt wait for the cake to get ready...He held the bottle with sprinkles for as long as the cake baked and then was in a hurry to put it all over, so we couldnt wait to even out the cake or layer it with a ganache, like I had planned to...
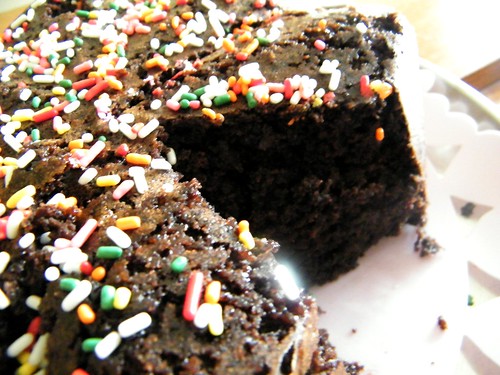
I got the recipe from JoyOfBaking, used slightly lesser sugar and water..It turned out to be wonderfully soft and moist, despite no butter being added...I am sure this can easily be made without eggs too. I just didnt want to tamper with the recipe for his first experiment...
If you want to give this a shot without eggs, just add another banana and 1/4 cup of oil..
This stores well. I just had the last piece with my tea now and its just as soft...
What you need -
Dry ingredients -
1 3/4 cup sugar
1 3/4 cup flour
3/4 cup cocoa powder
1 tsp baking powder
1 tsp baking soda
a pinch of salt
Wet ingredients -
2 eggs
2 ripe bananas
1/2 cup warm water
1/2 cup milk
1/2 cup oil
1/2 tsp vanilla essence
Topping
sprinkles (optional)
What you do with it -
Pre heat the oven to 180 deg C
Mix in all the dry ingredients in a large bowl and set aside
Mash the bananas and beat the eggs into it
Add all the other wet ingredients and mix well or beat lightly till its all combined well
Pour this into the dry ingredients. Stir together or beat for 2 mins
Grease the pan and dust lightly with some flour
Pour the batter a greased pan and bake in the pre-heated oven for about 45 mins
Top with sprinkles
Saturday, July 24, 2010
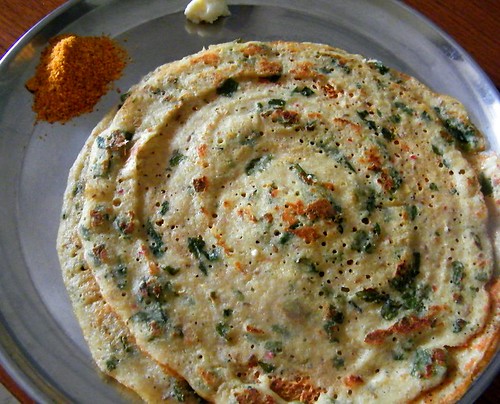
Keerai Adai
Adai for breakfast is one of my favourites...The best part is that there is no fermenting required, so you easily save up on a good 6-7 hours of time...Its a crispy thick dosa with a lot of lentils and rice and makes for a nice filling breakfast
I had a murungakeerai (drumstick leaves) adai once at a restaurant in Bangalore, served with jaggery, butter and avial and loved the combination.
The drumstick leaves are considered very healthy and tasted awesome in the adai. I had then gone looking for these leaves at the local markets in Bangalore and made a whole lot of adai with it
Since this is something I definately will not find here in Ahmedabad, I decided to substitute it with methi leaves. This worked as an equally nice combination. I guess coriander leaves should also work very well
My son loved the adai with homemade butter and jaggery and I had it with molagapodi and butter, giving in completely to the temptation of the soft white homemade butter...
What you need
1 cup rice
1/2 cup moong dal
1/2 cup chana dal
1/2 cup urad dal
1/2 cup tur dal
1 tsp cumin seeds
3 red chillies
a few curry leaves
a pinch of asafoetida (hing)
1 cup methi leaves
1/2 tsp salt
What you do with it
Soak the rice and the lentils for a minimum of 4 hours
Drain the water and grind along with the cumin seeds, red chillies and curry leaves to a coarse paste
Add as little water as required to make the batter
It need not be smooth like the regular dosa batter
Add hing and salt and chopped methi leaves
Mix well adding a little more water so you can spread it out well
On a hot tava, add a little oil, pour a ladleful of batter in the centre and spread into a nice round shape
Cover for about a minute or two and then flip over
Add a little more oil and remove from heat when done
Serve with butter, jaggery, molagapodi or avial
Tuesday, June 22, 2010
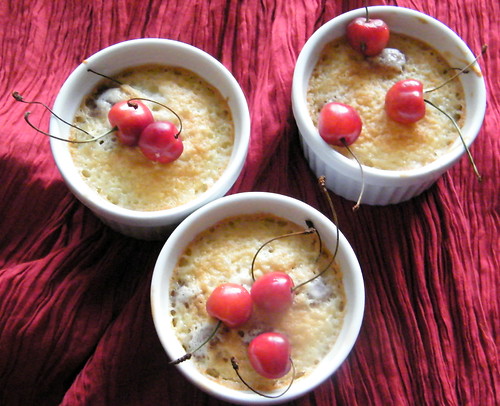
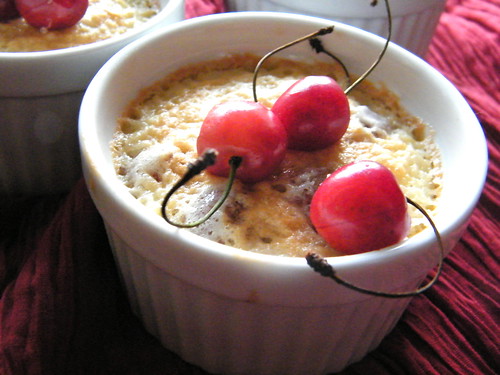
Cherry Clafoutis and Apple Flaugnarde
Till a few months back, I had no idea what 'Clafoutis' and 'Flaugnarde' meant, but thanks to all the blog hopping, I actually made these on Sunday !
I am still not sure I know how to pronounce these, though !!
Deeba, the baking diva, has some amazing creations on her blog...Her pictures are fantastic and I can spend hours drooling over all the exotic dishes she comes up with !
I've seen her use these pretty little ramekins and I recently picked up six of them, so had to try out something in them - thankfully, I didnt have to wait too long - with cherries in season and this really neat recipe on her blog, I knew exactly what I was going to make as a Father's day special !!
Deeba used plums in hers and I am sure the juice of that added a lot to the taste of the clafoutis, but after my overdose with plums last year, I decided to stay far away from them...
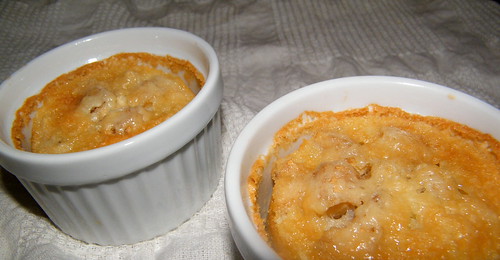
Filled three ramekins with the pitted cherries (learnt that here)that looked really nice and red and for the remaining three, I tried the flaugnarde. I learnt from Deeba's blog that flaugnarde was basically the same batter used with fruits other than cherries - this was a great idea - it meant I saved my time pitting the cherries and I could get 2 desserts with one meal !!
I used apples and raisins for the flaugnarde and actually liked it better than the clafoutis - I am guessing the cherries were not sweet enough or perhaps didnt seem to ooze out too much juice to make the clafoutis moist...Maybe, I will try with the plums someday...
For the original recipe, go straight here
To see my tweaked version, continue reading...
What you need -
25- 30 red cherries
3 eggs separated (this was another adventure !)
3/4 cup castor sugar
1/2 cup plain flour / maida
2-3 drops vanilla essence
3/4 cup fresh cream
What you do with it -
Preheat oven to 170C
Grease 6 small ramekins with oil / butter
Pit the cherries, and halve them
Arrange half the fruit at the bottom of the greased ramekins
For the flaugnarde, I chopped the apple and heated it in a pan with 2 tsp of brown sugar till the apple looked a little stewed. Arrange these in the ramekin. Drop in 5-6 raisins in each ramekin over the apples
To make the batter, whisk the egg yolks with half the sugar until thick and pale. With a rubber spatula, fold in the flour first, the vanilla essence and then the cream
Whisk the egg whites with the remaining sugar till they form firm peaks
Fold them into the batter gently
Pour the batter over the fruit to reach about 3/4 of the way up
Bake in the oven for 15-20 mins, take out and arrange 3 whole cherries on top and bake for a further 5-7 minutes
Serve warm with some cream or vanilla ice-cream
Sunday, June 13, 2010
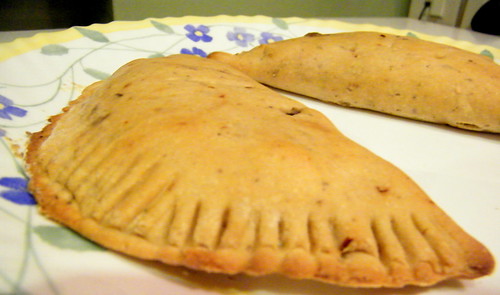
Am back with some Calzones...
I'm back from a rather long unplanned break from blogging. Was on a month-long vacation and after I got back, it was just too much lethargy to get back to blogging. I cooked a lot, but taking pictures and writing about it seemed like too much effort...
Met up with cousins after a long time, and had a wonderful time together. The kids got along fabulously which was the best part of it all...
We also travelled out to see places and on our visit to Niagara, my cousins from Canada came down to meet us..It was unusually cold out there with rains and crazy wind speeds.. We were cold, tired from the long walk around the falls and really hungry. We then drove down to a lovely Italian restaurant. As we waited to be seated I saw these awesome calzones being served at a few tables. They were huge, compared to the ones I've seen here in India..We ordered for those calzones, pizza, salad and pasta and some really good wine for dinner..
It was a wonderful meal before we headed back into the rains outside..That day turned out to be a little too adventurous, with the fire alarms at the place we stayed going off way past midnight and the hotel being evacuated..We stood holding our son, who was fast asleep, for over an hour in the cold outside..The next day was better, still cold and windy, but we enjoyed seeing the falls..It is really mindblowing seeing the force of all that water...
Now we are back home, and I was still thinking of those calzones and decided to make them last night for dinner..The ones we had there just had a whole lot of cheese as the filling..I looked around in the blogosphere and saw this one on Raaga's blog. She made it seem pretty simple and it was ! Thanks Raaga for a wonderful dinner idea !
I followed the recipe for the dough from Raaga's with a few changes, and for the filling I made some mushrooms in white sauce...
What you need -
For the dough
1.5 cup wheat flour
1/2 cup flour / maida
1.5 tbsp yeast
1/4 cup olive oil
1/2 tbsp sugar
1/2 tsp salt
1 tsp chilli flakes
1/2 tsp garlic salt
1 tbsp thyme (use any herb here)
1/2 tsp crushed pepper
1/2 cup warm water
1/2 cup warm milk
For the filling
1 cup cleaned and quartered mushrooms
1 tsp flour / maida
1/2 tsp butter
1/2 cup milk
2-3 tbsp grated cheese
1/4 tsp salt
1/4 tsp red chilli flakes
1/4 tsp pepper powder
1/2 tsp peri peri sauce (optional - i used it to make it spicy)
What you do with it -
For the dough
In a large bowl, add the water, milk, oil and sugar
Stir to make the sugar dissolve
Sprinkle the yeast (I used the active dry yeast) and keep in a warm place for about 10 mins till it gets frothy
Add the herbs, salt, pepper and chilli flakes
Knead in the flours and place in a greased bowl, keep for about an hour in a warm place
Cover with a damp cotton cloth
The dough should double in size, keep longer if required
For the filling
Saute the mushrooms with the salt and spices
In another pan, melt the butter and fry the flour in it for a minute or so
Add the milk and then stir in the cheese
Add the mushrooms to this. Keep stirring on a low flame till it thickens
Add more milk if required
Making the calzone
Punch the dough and keep aside for another 15 mins
Preheat the oven to about 200 deg C
Divide the dough into equal sized balls
Flour the surface and roll out the dough
Add the filling in one half and then cover with the other half
Punch the edges down with a fork and then make small slits on the top
Place in a greased oven pan and bake for about 20-25 mins at 200 deg C
Serve hot
Thursday, April 1, 2010
Goan breakfast - Pao Tonak
This is a favourite breakfast in Goa and the first time I had this was when I was visiting my Dad's friend's family there. The lady of the house is an excellent cook and this was a very interesting breakfast.
I am not a breakfast person - I cant have something really heavy for breakfast, but on a lazy weekend, this is a great breakfast and keeps you stuffed for a few hours !
The 'tonak' is basically made with dried peas and potatoes and a strong aromatic masala.
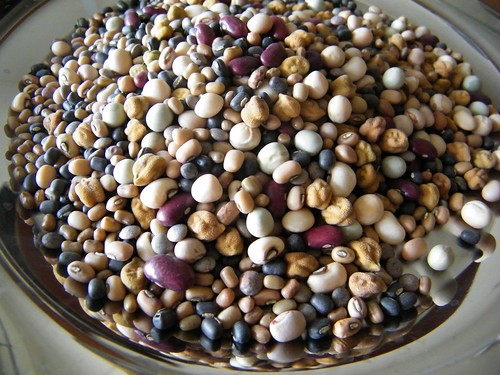
I found this pretty packet of assorted legumes and thought it would go well in this tonak masala, so used this in place of the dried peas.
The pao there in Goa is a crusty one, which I dont get here, so I used the softer, bready pav to go with the tonak...
The masala is quite strong and very aromatic, but if it doesnt suit your taste buds, you can use garam masala instead, though I'd suggest you give this fresh masala a try..
What you need -
1 cup peas / any other legumes
1 potato (I didnt use this)
2 onions
1 cup grated coconut
1 tsp tamarind
1/2 tsp sugar
1/4 tsp turmeric powder
salt to taste
For the masala
2 tsp coriander seeds
4 red chillies
1 tsp fennel seeds
2 cloves
1 inch strip cinnamon
4 pepper corns
What you do with it -
Soak the peas / legumes overnight
Roast and powder all the ingredients under 'Masala'
Peel potatoes and cut to bite-size pieces
Boil the potaoes with the legumes
Chop onions fine
Fry the onions, add grated coconut and tamarind
Grind this to a coarse paste
Add the dry masala, sugar, salt and turmeric powder
Add the potato and legumes and cook a little more
Adjust salt and add more water if required.
Serve hot with pao, bread or chapatis
Sunday, March 21, 2010
Sweet Appe / Paniyaram
Ever since I've moved to Ahmedabad, and met new people here, most of them ask me where I am from and I start with saying that I am a Mangalorean, who's been living in Bangalore, and their instant reaction is 'oh, you are a South Indian'...ok, i am very much that, but then the next classification is that being South Indian means eating only idli, dosa, sambar and rice...
We do eat that, but that is not the only thing we eat...
Each state down South has so much variety to offer in terms of food, language, customs, but its all tagged as one happy idli-eating community !
Ok, I do know people down South who think that everyone this side of the Vindhyas are 'North Indians' and eat rotis, cholay and paneer !!
Its wierd that after having most cities being so cosmopolitan, some ideas just dont get out of our heads !
I had some friends and their kids coming over yesterday for lunch and decided on a South Indian menu that did not have idli, dosa or sambar...
We had spicy and sweet appes, raw mango chitranna, green and red chutneys, potato fry, chana dal vadas and curd rice (a little boy requested that)
I had a little dough of the sweet appe and made that for breakfast today !
These sweet appes are really spongy, soft and tasty and you can gobble a few down, before you even realise it...Its not too sweet, so it works well for me !
What you need -
3 cups raw rice
1 1/2 cup poha / beaten rice or 2 cups puffed rice
2 cups grated jaggery
1/2 - 3/4 cup grated coconut
1/4 tsp turmeric powder
1 cup buttermilk
a pinch of salt
What you do with it -
Soak the rice in the buttermilk for about 3-4 hours. You can add water to make enough liquid to cover the rice
Grind the soaked rice with the coconut till its a smooth paste
Wash the poha and drain the excess water
Add turmeric powder, jaggery, salt and beaten rice and grind well
Do not add too much water
Ferment it overnight
Heat the appe kadai / Aebelskiver pan and add a drop of oil into each cavity
Pour a spoonful of the batter till its 3/4th of the level in the cavity
Cover and flip over each one after 2-3 mins
Let it cook for another minute
If you dont have a appe kadai / Aebelskiver pan, you can add a little buttermilk / water while grinding the batter
Pour out like a small thick dosa, on a tava
Cover with a lid till done. You dont need to flip this over
This is called 'surnoly' in Konkani
Tuesday, March 16, 2010
My Ugadi Menu
Happy Ugadi to all of you...
Ugadi translates to Beginning of a New Era and is celebrated as a 'New Year' in Andhra Pradesh, Maharashtra and Karnataka
Being a few states away, the fervour, holiday and celebrations of Ugadi were missing, but the food made up for most of it...
For lunch, I made a kele-chana ghasshi (raw banana- black chana spicy coconut based gravy), a Kannada style kosambari (salad with mung dal, raw mango and coconut), dali saar, tendle-bibbe upkari and Puranpoli
Here's what we had for lunch today...
Today's Menu
Kele-Chana Ghasshi
What you need -
2 raw bananas
1/2 cup black chana soaked in water overnight
4 tbsp grated coconut
2 tsp coriander seeds
4 red chillies (preferably byadgi)
1/4 tsp methi seeds
pinch of turmeric
salt to taste
mustard seeds and curry leaves to season
small piece of tamarind or 1/2 tsp tamarind paste
What you do with it -
Cut the skin off the bananas and then quater length-wise. Cut into small cubes
Heat with turmeric and a little salt in water till cooked
Pressure cook the soaked chana till cooked well
Roast the red chillies, coriander seeds and methi seeds
Grind with coconut and tamarind to a smooth paste
Add this coconut paste to the cooked chana and bananas and stir till it blends well
Add water and bring to a boil
Prepare a seasoning of mustard seeds and curry leaves in oil and pour over the ghasshi
Puran Poli (with tur dal)
This puran poli is something I learnt from a friend here - its made with tur dal instead of chana dal, tried that for the first time today
What you need -
1 cup tur dal (soaked for an hour or more)
2-3 cardamoms pounded
1 cup grated jaggery
1 1/2 cup maida / flour
1/2 tsp turmeric powder
What you do with it -
Wash the dal, add enough water to cover it and cook in a pressure cooker till its soft
Drain off the excess water
Add jaggery to the dal and cook on a low flame, stirring continuously, till all the water is absorbed
Allow it to cool and grind it to a paste - do not add water
Add the cardamom powder
Divide this mixture into small balls
Make a dough with the flour, turmeric powder and 1/2 cup water
Add oil and knead well
Apply a little oil to your palm, take a portion of the dough and flatten it on the palm
Place a ball of dal in the centre and cover from all sides
Dip in flour and roll it out flat
Roast on a hot tava on both sides till it has a few brown spots
Serve with ghee
Kosambari
What you need -
1 raw mango
3 tsp fresh grated coconut
1 green chilli
pinch of salt
1/2 cup yellow moong dal
few coriander leaves
What you do with it -
Soak the moong dal in water for about half an hour or more
Drain the water
Chop the chilli, raw mango and mix with the dal
Add grated coconut, salt and mix well
Sprinkle chopped coriander leaves
Sunday, February 7, 2010
Buttermilk Scones with Garlic Chives
The first time I had ever tasted scones were at Miri's place years ago...I remember they tasted really nice, but she doesnt remember ever making them !
Incidentally, Miri was in town for a training last week and managed to squeeze in few hours to meet up, almost everyday, which was so great for me, considering I barely have any friends here in Ahmedabad.
She was here when the scones were made and she liked them, so I am guessing I got it right !
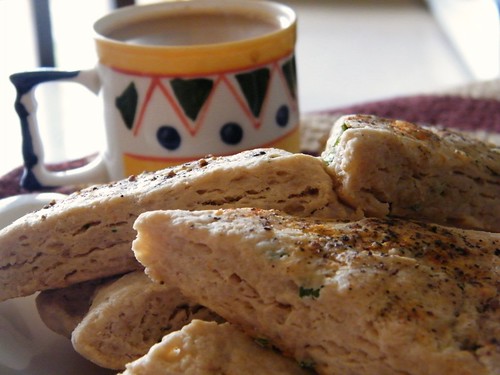
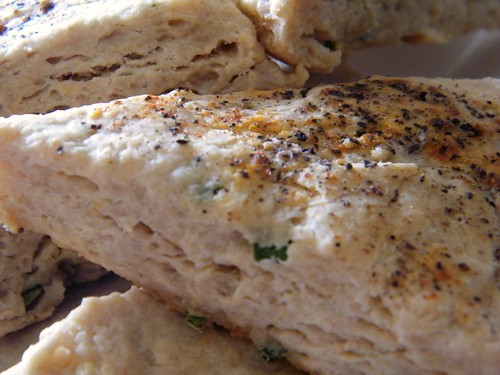
I couldn't remember if the ones I had tasted earlier were flaky, crisp, bread-like, biscuit-like, but I liked what I finally came up with...
Looked up a whole lot of recipes in the blogging world and in my books...
I have this book called 'Baking' by Martha Day, that had this recipe for scones, using buttermilk. The idea of using chives was from Parita's sping onion scones
I had a few garlic chives ('hara lasan'/greens from fresh garlic), and here again its the first time I've ever used them. Its available here in winter and is used in the famous Gujarati 'undhiyu'.
Most scone recipes used cheese for the savoury ones, but I intended keeping them as low fat as I could, so skipped the cheese.
The buttermilk (from the churned out home made butter) was buttery enough, so cut down on the additional butter and these turned out to be a nice, light snack.
I got some really helpful tips from JoyOfBaking one of which said that if you used buttermilk, it took slightly longer to bake, gave a more light bread-like scone, with a crisp crust and tender inside...
The chives gave it a mild garlic flavour, and the pepper and chilli powder added to the spice factor...The crust was crisp and inside, it was soft and tasted absolutely great when eaten hot !
I'm sure they would taste good with a nice hot soup too, but couldn't wait till dinner time, so had this with a cup of hot tea instead.
What you need -
2 cups wheat flour
2-3 stalks of garlic chives
1 tsp baking powder
1/2 tsp bicarbonate of soda / baking soda
1 tbsp cold butter
upto 1/2 cup buttermilk
1 tsp chilli powder
1 tsp fresh ground pepper
1 tsp salt
What you do with it -
Preheat the oven to 220 deg C. Grease a baking sheet / pan
Combine the flour, baking powder and baking soda
Rub in butter using your fingertips till it resembles breadcrumbs
Now add in the chopped garlic chives and salt to taste
Gradually, pour in the buttermilk as required and make a soft dough (softer than the one used to make rotis)
On a floured surface, roll out the dough to about 3/4 inch thick
Sprinkle chilli powder and crushed pepper powder on the rolled out dough
Using a sharp knife, cut the dough into 8 wedges, like a pizza or use cookie cutters to make little rounds
Bake this at 220 deg C, for about 30 mins
Tuesday, February 2, 2010
Pasta in a spinach almond pesto
I had always assumed that 'pesto' had to be made with pine nuts and basil, both of which were never easily available...
Thanks to a lot of posts on in the food blogging world, I realised that pesto was basically 'nuts and herbs pounded together'
I have tried a lot of different combinations and its made my life so much simpler to use whatever is on hand !
My son loves pasta and I get the organic whole wheat one from Fab india here, which is really good..
Have tried coriander-walnut pesto earlier, settled for a spinach-almond one this time...
Found this whole packet of almonds that was a gift from Diwali and decided this was a good way to get it into my son's diet...
Simple flavours, some veggies, whole wheat pasta and a healthy meal was on it way...
What you need -
2 cups pasta (I used whole wheat fusilli)
2 carrots
1/2 cup fresh corn kernels
1 capsicum
(You can use any vegetables, I had these for the day)
1 tsp chilli flakes (optional)
1 tsp crushed pepper (optional)
salt to taste
3-4 tsps olive oil
5 tsps milk (optional)
For the Pesto
10 almonds
2 cups chopped spinach
3 cloves garlic
3 tbsp grated cheese
1/2 tsp salt
4 tsp olive oil
What you do with it -
For the pesto
Soak the almonds in hot water for 15-20 mins and peel the skin off
Blend together with all the ingredients listed under pesto
Do not add water, add more olive oil if necessary
Bring water to boil in a large deep bottom pan, add salt and a drop of olive oil
Add pasta and reduce the heat and cook for 8-10 mins, or till done (Follow instructions on the pasta packet)
Drain the water out and spread the pasta, sprinkle a tsp or two of olive oil, so it doesn't stick together
In a pan, heat a tsp of olive oil, add chopped carrots, corn kernels and chopped capsicum
Stir frequently till the veggies are almost cooked and then add the pesto
Add crushed pepper, chilli flakes and salt
If its too dry, add olive oil or milk, depending on the flavour you like
Add the pasta and stir once or twice
Turn off the heat, add shredded cheese if desired
Serve hot !
Saturday, January 9, 2010
Stuffed Eggplant
I discovered Purple Foodie's blog a couple of months back..I love the way she comes up with one interesting dish after another...Though I never venture too much into the desserts area, which I think she does complete justice to, I did try out her crispy apple crumble and it turned out awesome...
The cake from my previous post is also from her blog..
The day I saw this Stuffed Eggplant Goodness on her blog, I had decided I must try it out..Bookmarked it and then completely forgot about it...
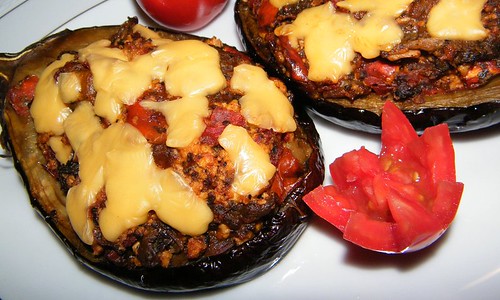
In the market, I saw this beautiful eggplant (bharte wala baingan) and picked it up with the bharta on my mind. Chopped the onions and tomatoes for it and then remembered Purple foodie's eggplant, went back to my bookmarks, saw that the ingredient list, at least most of it, was available in my kitchen and went ahead to vegetarianise her recipe. I did not have parmesan cheese, but had 2 cheese slices...
This halved, loaded eggplant looked like a complete meal to me, but I was sure TH would ask me 'This is dinner ?', so I quickly spiced up some leftover rice with olives, red chilli flakes, garlic and shallots. Served the eggplant on the bed of rice - was a pretty picture and tasted good too
Thank you Shaheen, for a brilliant dinner...
Here's the link to the original recipe and here's my tweaked vegetarian version...
What you need -
1 large eggplant
2-3 tbsp olive oil
1 onion
1 bayleaf
3-4 cloves garlic
1-2 tomatoes
1/2 cup crumbled paneer
1 tsp oregano
1/2 tsp mixed herbs
1/2 tsp chilli flakes
salt and crushed pepper
What you do with it -
Slit the eggplant lengthwise
Pre-heat oven to 200 C
Grease the baking dish with some olive oil and then place the eggplant, cut side up
Sprinkle oil over the eggplant with a chopped clove of garlic and some oregano
Bake for about 25 mins, or till tender
Scoop out the flesh from the eggplant and mash it up gently with a fork
In a pan, heat the 2 tablespoons olive oil over medium heat
Add the onions, chopped garlic, bayleaf, oregano and red chilli flakes
Then the tomatoes, salt, pepper and mixed herbs. Once its a little mushy, add the crumbled paneer and the eggplant flesh
Remove the bayleaf
Lower the oven temperature to 190 C
When the mixture cools a bit, fill it back into the eggplant shells (Shaheen uses egg here, which would give it a nice binding, but I didnt have any at home, so skipped that)
Return the shells to the baking dish. Sprinkle with olive oil
Bake the eggplant for 30-40 minutes or until the shells are tender when pierced with a skewer
During the last 10 minutes of baking, add bits of the cheese slices onto the eggplant and bake till done. You could use a lot more cheese here, I had run out of cheese !
Tuesday, January 5, 2010
Time to celebrate - 1 year up !
My foodie blog is one year old !!
To celebrate, I baked this yummy chocolate-walnut marble cake
Followed the recipe from Purple foodie's blog, except that I used walnuts instead of hazelnuts, and reduced the quantity a bit..
Turned out really nice, the aroma of the cake filled the house, the ground walnuts gave it a lovely twist and the marble / layered effect was something I was super thrilled about !
It was also an inauguration of the beautiful glass bundt pan I bought in Bangalore a few months back..
My cooking has become more innovative and experimental after I started blogging and visiting blogs..Baking was something I never tried too much and was never confident about, but after the fairly successful breads, cakes and muffins, it does feel great to bake now...
Thank you people, for visiting my blog...The comments from the blogging world, the mails I get from my cousins and friends telling me what they have tried out from my blog, truly makes my day ! Thank you !